Print Your Operating Account Checks
You must enter an operating account withdrawal before you can print a check.
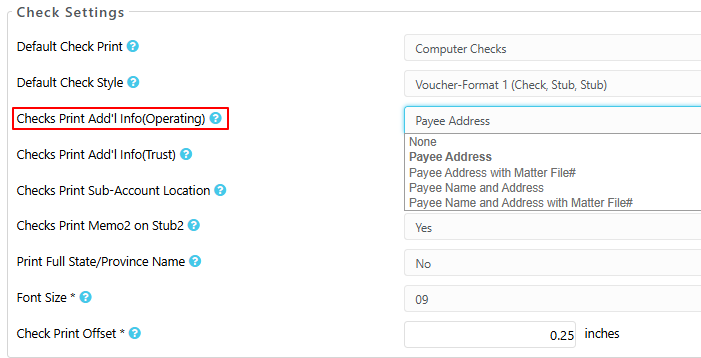
Display Payee Address on Checks
Print Your Operating Bank Checks
You must first enter an operating bank transaction with the ‘To be printed’ box checked. They are most often entered from the bank account area, but may also result from paying an Accounts Payable bill or issuing a credit memo to a client.
Navigation
Once your transaction is entered you can print checks:
From the Bank Ledger– Under Banking > You will find your list of bank accounts. When viewing the bank’s details, click on the transactions tab. In the toolbar, you will see Action. Click and choose Print Checks.

Printing Checks
- The Bank Account field will either be prepopulated with the bank account you are printing from, or include a list of banks associated with that matter you are within.
- In the Check Style field, confirm the appropriate check style displays or change your default under Setup > Firm Settings > Firm Preferences > Check Settings.
- In the First Check # field, confirm the number is the next available in your stock or change it as needed.
- In the Last Check # field, this number is automatically calculated based on your first check number and the number of transactions selected below. This number will change as you select/deselect transactions from the list.
- Check the box to Change Transaction Date to Today’s Date, if desired. This will change the date of the selected transaction to today’s date once printed.
- In the check transaction list, select the checks you want to print.
In the lower right corner, the Total field automatically updates to reflect your selections. - Click Download Checks.
The system generates a PDF file for printing on your check stock.

Reprint Checks
If ever reprinting a check, be mindful of the first/last check number as you may need to go out of sequence.
The following steps are for when you print the checks to PDF and notice a mistake before printing onto check stock.
- Locate the transaction from within Matter Details > Banking> Bank Details > Transactions. you will notice Ref# now displays a check number.
- Single-click the check to highlight it and click Edit.
- Toward the right of the Edit Trust Transaction screen, check the To be Printed box. To print displays in the check’s Ref # field.
- In the top right corner, click Save.
- Reprint the check using the steps above.


