In This Article…

Need Support?

Can't find the answer you're looking for?
Contact Support
In The Article...
Print

Add an Operating Bank Transaction

You can add an operating bank transaction within your application.

To add an operating bank transaction:

  1. From the left navigation panel, click Banking.
  2. On the Bank screen, double-click the bank to scroll down to its details.
  3. From the tabs atop the Bank’s details section, click Transaction.
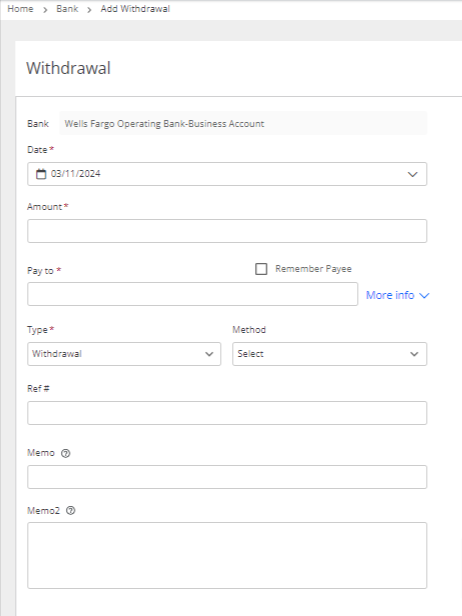
  4. From the toolbar atop the Transaction screen, click Add > Deposit or Add > Withdrawal as applicable.

Add Transaction Screen Fields
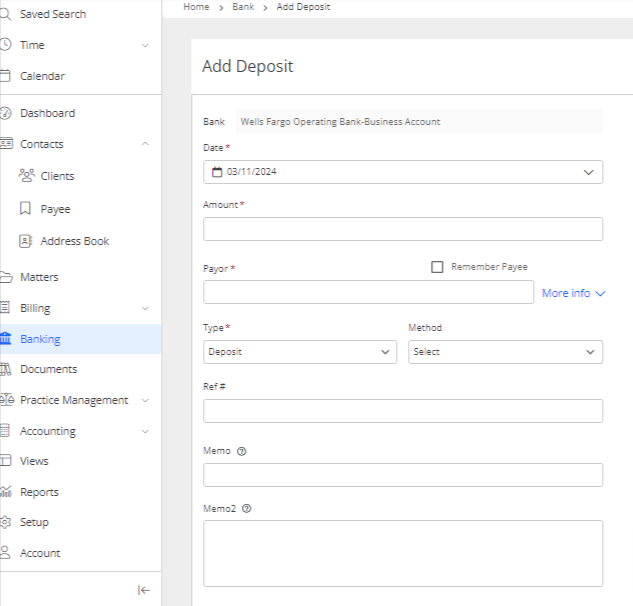
Bank
  • Populates with the bank name selected by you.
Date
  • Populates with today’s date.
  • Click the drop-down to specify a different date, if needed.
Amount
  • Enter the amount.
Calc box*  (*Only for states/provinces where tax is to be calculated.)
Take the appropriate action:

  • Calc Box Checked
    • In the Total field, enter the total amount.
      The system calculates the GSTHSTQST and PST, as applicable, and auto-populates their fields.
  • Calc Box Unchecked
    • In the GSTHSTQST and PST fields, as applicable, enter the taxes paid.
      The Total field auto-populates with the bill’s total.
Pay To
  • Enter the payee’s name.
Address
  • In the Address section, enter the payee’s mailing address.
    If you don’t see the address block, click on More Info to expand the section.
Type
  • Will default to Deposit or Withdrawal based on your selection.
  • Use the drop-down to select Adjustment In or Adjustment Out.
Method
  • Use the drop-down to click the payment method.
Check#* (*Will only display if you select Check as the payment method)
Take the appropriate action:

  • Check to be Printed
    1. Leave the To be Printed box checked.
  • Check Was Printed
    1. Uncheck the To be Printed box.
      The Check# field becomes editable.
    2. Enter the check number.
Memo
  • Enter a memo or click the drop-down to select one.
Memo2
  • Include further details for internal purposes. This will not print on client documents.
Include matter expense
  • Checking the box will take you to the Expense – Hard Cost screen. Here you can Add a Hard Cost

Accounts Section

In this section you can split the transaction between different accounts.

  • One line item with the total amount will be created, you can add the GL account to which you want to assign this transaction by clicking on the drop-down beside it.
  • To add more line items, from the toolbar above the section, click Add.
  • If you wish to remove a line item, you can select the item to remove and click Actions > Delete.
  • You can also add a description, and assign a class, or split the amount across multiple classes.
    Note: When splitting the transaction amount, ensure the remaining amount is $0.00.

Save Options

Cancel
  • Click Cancel to exit the screen without saving the transaction.
Save
  • Click Save to save the expense and return to the Transactions screen.
Save and New
  • Click Save and New to save the transaction and enter another.

In This Article…

Need Support?

Can't find the answer you're looking for?
Contact Support
Scroll to Top