Matter Settings
The Settings section provides the opportunity to specify a greater level of detail relative to the following:
| Matter Info | Workflow | Billing | Invoicing |
| Split Billing | Accounting | eBilling | Fee Allocation |
| Tax | Ethical Wall | Client Portal | Budget |
Note: The availability of some of these settings depends on your tier.
Watch a Video
Access Settings
To access a matter’s settings:
- From the left navigation panel, click Matters.
- From the Matters screen, double-click a matter and scroll down to the matter’s summary.
- From the tabs atop the summary, click Settings. This will open the Matter’s Settings area with tabs atop the screen.
- You can make changes to each section by clicking on the specific tab.
Matter Info

The Matter Info or Matter Definition section contains the general information that you entered when adding the matter. If you wish to make changes, you can do so here and then click Save. In addition to changing the general information, you can set the Statute of Limitations, add Custom Labels and make the matter active or inactive, and if you have enabled trust hold at firm level, you can configure Trust Hold Settings for the matter here. From the options, select the one that you wish to apply for this matter.
-
- Use firm level: This will use the firm level default for this matter.
- Turn off Trust Hold for this matter: If you have enabled Trust Hold at firm level, selecting this option will turn off trust hold only for this matter.
- Customize matter level settings:
- If you wish to place a hold on all trust transactions for this matter for a certain number of days, in the No. of days until hold release entry field, enter the number.
Note: You can place a hold on trust transactions for a maximum of 365 days. - If you wish to place a hold on a specific transaction method for this matter, check the box beside Set default hold days per transaction method.
Note: If you wish to place a hold on only one transaction method, make sure that you enter 0 in the No. of days until hold release. - Select the transaction method on which you wish to place a hold and enter the number of days you wish to hold the transaction.
- If you wish to place a hold on all trust transactions for this matter for a certain number of days, in the No. of days until hold release entry field, enter the number.
Workflow
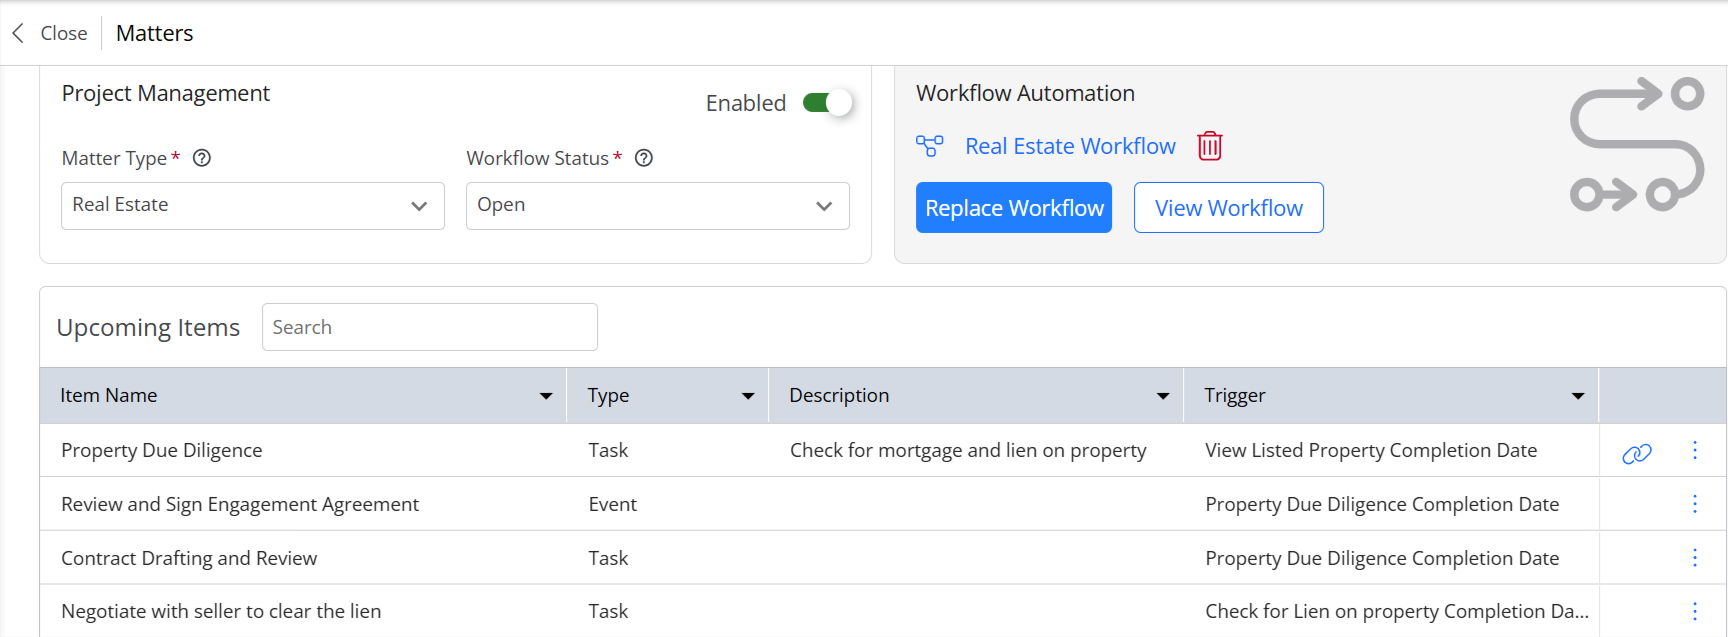
This section comprises two parts, Project Management and Workflow Automation.
Once you enable the matter for Project Management, add the following:
| Matter Type |
|
| Workflow Status |
|
- Under Workflow Automation, to add a workflow to automate your tasks and events, click Add Workflow.
- In the Add Workflow window, select a workflow name from the drop-down, select a workflow start date and add the workflow.
All the tasks and events you created for the specific workflow will be added to the matter.
Billing

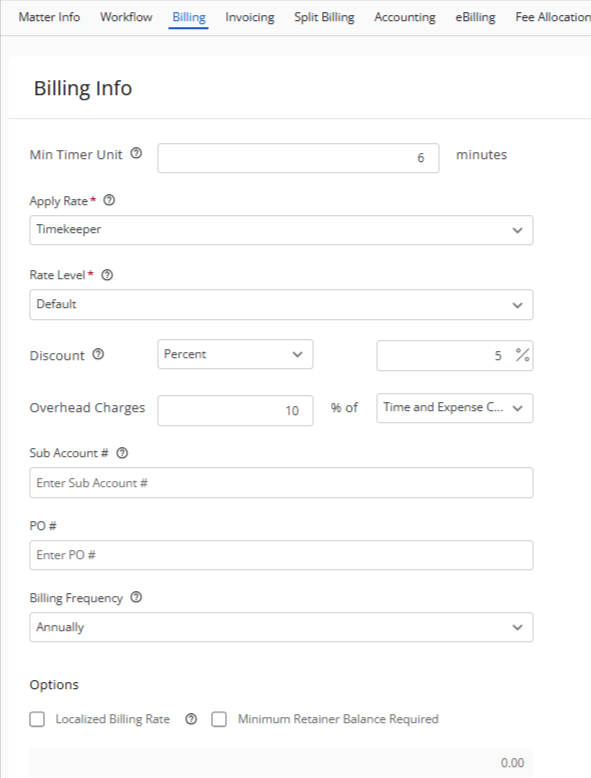
The Billing section offers these options:
| Min Timer Unit |
|
|---|---|
| Apply Rate |
|
| Rate Level |
|
| Discount |
|
| Overhead Charges |
|
| Sub-Account |
|
| PO # |
|
| Billing Frequency |
|
| Localized Billing Rate |
|
| Minimum Retainer Balance Required |
|
| Calculate & Apply Finance Charges |
|
| Pre-Bill Notes |
|
After completing the fields, click Save. If you do not save before leaving the page, you will get a message prompt You have unsaved changes. Are you sure you want to leave?
Invoicing

The Invoicing section allows you to customize the invoice for this matter and add mailing and email addresses. Click here to learn more about assigning a matter billing contact.
| Enable Automatic Payments |
|
|---|---|
| Customize invoice formats just for this matter |
|
| Customize Invoice subject line for this matter |
|
| Invoice Mailing Address |
|
| Select Email Recipients for Invoices |
|
| Select Primary Recipients for Text Invoices |
|
After completing the fields, click Save. If you do not save before leaving the page, you will get a message prompt You have unsaved changes. Are you sure you want to leave?
Split Billing

Sometimes multiple parties share the responsibility of making the payment for one matter. Split billing allows you to split the fees and expenses for a single matter among multiple matters.
On this page you can choose to add parties between which you would like to split the fees and expenses. You can choose to split both hours and amount or split hours and then calculate amount. For more information read Set Up Split Billing.
Accounting

Select default accounts to track income and trust transactions on your General Ledger reporting.
| Default Legal Fee Income Chart of Account |
|
|---|---|
| Default Trust Transaction Chart of Account |
|
| Class |
|
| Negative Balance Allowed |
|
After completing the fields, click Save. If you do not save before leaving the page, you will get a message prompt You have unsaved changes. Are you sure you want to leave?
eBilling

Clients such as large insurance companies require eBilling formats using UTBMS billing codes from their lawyers. If you did not enable eBilling while adding the matter, you can do so here.
The application supports LEDES1998B, LEDES 98BI, LEDES 2000, LEDES 2.0 and Litigation Advisor eBilling formats.
After completing the fields, click Save. If you do not save before leaving the page, you will get a message prompt You have unsaved changes. Are you sure you want to leave?
Fee Allocation

Use the Fee Allocation feature to record Timekeeper allocations, where a person receives a portion of their matter’s collected fees, and a Matter Parties allocation, where a person receives a portion of all of collected matter fees. After completing the fields, click Save. If you do not save before leaving the page, you will get a message prompt You have unsaved changes. Are you sure you want to leave?
Tax

Determine whether a matter’s fees and expenses are taxable. There is a firm-level setting under setup which designates the default. US firms will default as non-taxable and Canadian firms as taxable.
For taxable matters, you can specify a rate other than the firm default.
| Tax Status |
|
|---|---|
| Localized Tax Rate |
After completing the fields, click Save. If you do not save before leaving the page, you will get a message prompt You have unsaved changes. Are you sure you want to leave?
Ethical Wall

To protect your client from a conflict of interest, you can restrict one or more users within your organization from participating in any matter involving that client. By default, Set Ethical Wall for this Matter is set to Everyone.
- To restrict certain users from access to this matter, click the radio button beside Custom.
- From the list of Allowed users, click on the users you want to restrict.
- Click on the > arrow to move the user to the Restricted list.
- Once you have completed your selection, click Save. If you do not save before leaving the page, you will get a message prompt You have unsaved changes. Are you sure you want to leave?
Client Portal

To allow a firm user Client Portal access:
- To enable the Client Portal screen, slide the toggle button On.
- In the Client Email field, enter the client’s email id,then click Invite Contact.
- In the Client Portal Parties section under Allowed Users select the users from your firm who should be able to share items with the client via the client portal.
- Check or uncheck the permissions as desired.
Budget

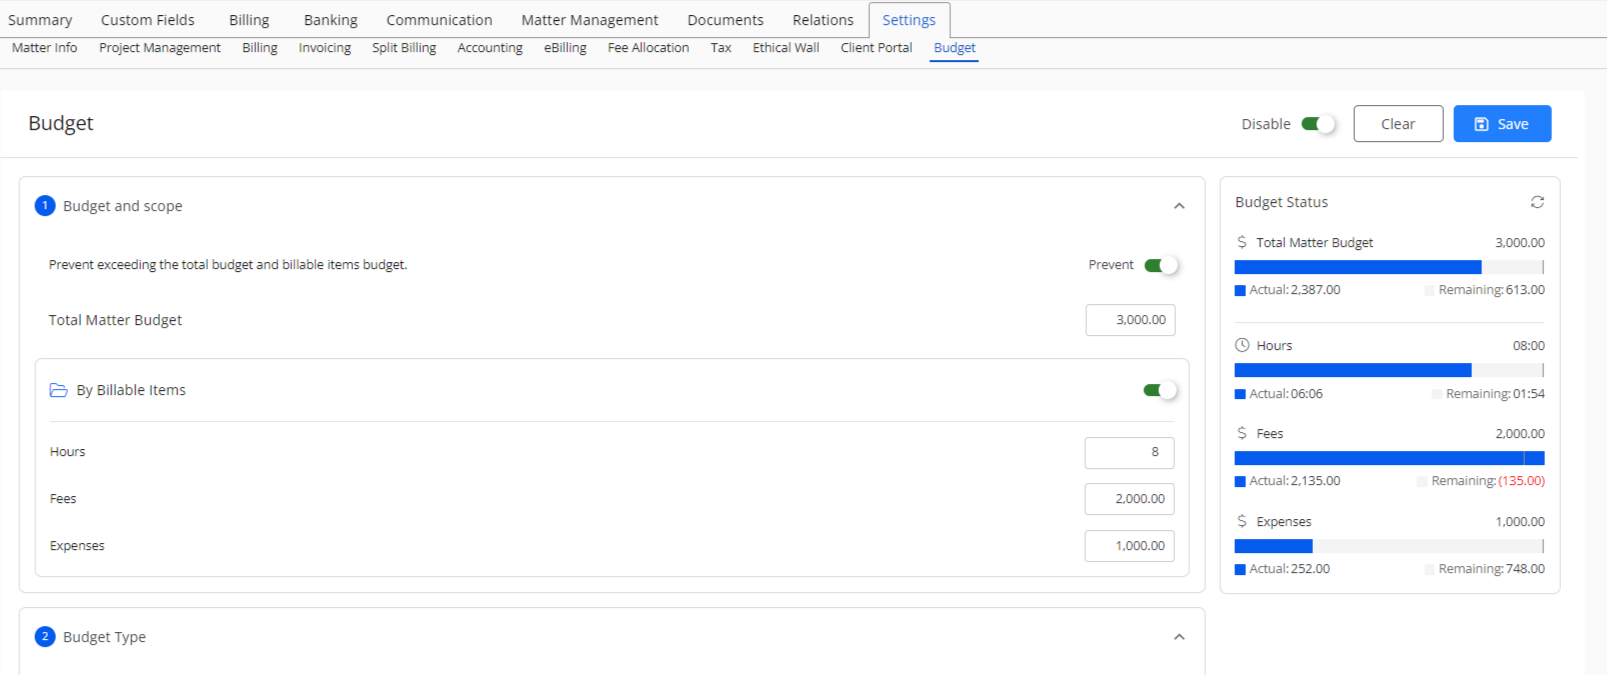
Determine the time, amount, and expenses for specific matters, ensuring that you do not spend more than the funds allocated for those matters.
Note: If you have split billing enabled for a matter, the system will not permit you to set a budget for it.
To set the budget parameters and scope, read Manage Matter Budget.

