
Manage Your Client and Address Book Contacts
The Contacts area allows you to manage your Client, Payee, and Address Book contacts.
Note: For information regarding managing payees, see Manage Your Payees.
Your options include:
- Adding
- Editing
- Deleting
- Associating other parties with clients with your Client and Address Book contacts
- Exporting
Watch a Video
Adding a Client
From Contacts
Note: If the contact is a client, the information you add displays in your invoice’s Bill To section.
To add a contact or client from Contacts:
- From the left navigation panel, click Contacts.
- From the Contacts menu, you can add a client within the Client or Address Book tabs.
- From atop either screen, click Add (Client or Contact).
- If adding from Contact, from the Type drop-down, select Client.
Note: By default, the toggle button beside Active will be switched on. You can switch it off, if desired.
Primary Contact Tab
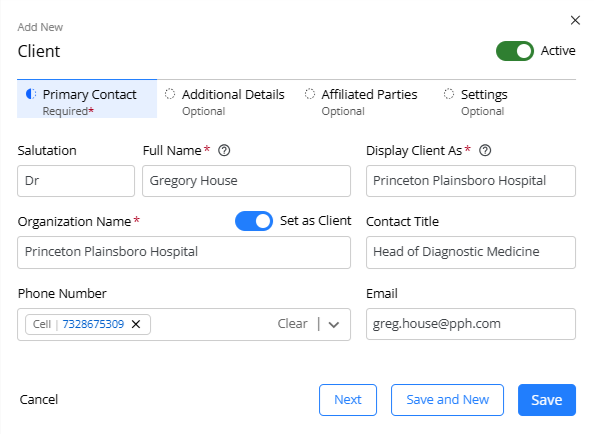
- In the Salutation field, enter a salutation, if desired.
- In the Name field, enter the contact’s name. If the contact is a business, enter the individual who will receive invoices and other transmissions from the software.
- The Display Client As field will auto-populate with Last, First name format or the settings you selected under Setup > Firm Preferences > Default Settings.
- In the Organization Name field, enter the company’s name.
- If the company is your client, switch the Set as Client toggle on. This will populate the Display Contact As field with the name of the Organization.
- If you have selected the Organization as your client, in the Contact Title field, enter the designation or role of the person whose name you entered.
- In the Phone Number field, enter the client’s cell number. You can enter additional numbers, if desired. If you are using CosmoLex’s text messaging service, make sure to add the contact’s cell number.
- In the Email field, enter the client’s email ID.
- Once you have completed the essential fields, marked with an asterisk, you can click:
-
- Next to complete the fields on the other tabs.
- Save and New to save this client and add more clients.
- Save to save the information on this tab and complete the others later.
-
Additional Details Tab
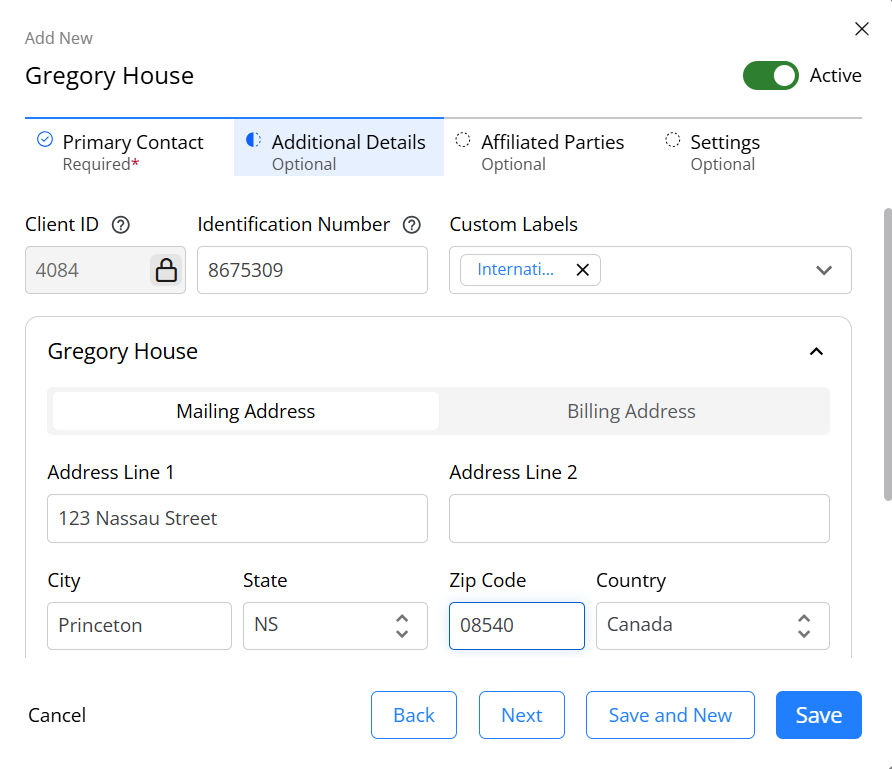
- In the Client ID field, enter a number only if you maintain an internal Client ID number.
- In the Identification Number field, enter an identification number such as a driver’s license #.
- In the Custom Labels field, from the drop-down select any custom labels you wish to associate with this client.
- In the Mailing Address tab, enter the address of the Client.
- If you wish to add any specific notes related to the client, you can enter them in the Notes field.
- Billing Address refers to the address used for integrated payments. If this is identical to the mailing address, you do not need to click the tab. If it is not, click and complete the fields.
- Once you have completed the fields, you can click:
-
- Back to return to the previous tab.
- Next to complete the fields on the other tabs.
- Save and New to save this client and add more clients.
- Save to save the information on this tab and complete the others later.
-
Affiliated Parties Tab

- To add any affiliated parties to the client’s contact card, switch the specific toggle on for Secondary Party, Work Party, Home Party, or Shipping Party, if desired and complete the details.
- Once you have completed the fields, you can click:
-
- Back to return to the previous tab.
- Next to complete the fields on the other tabs.
- Save and New to save this client and add more clients.
- Save to save the information on this tab and complete the others later.
-
Settings Tab
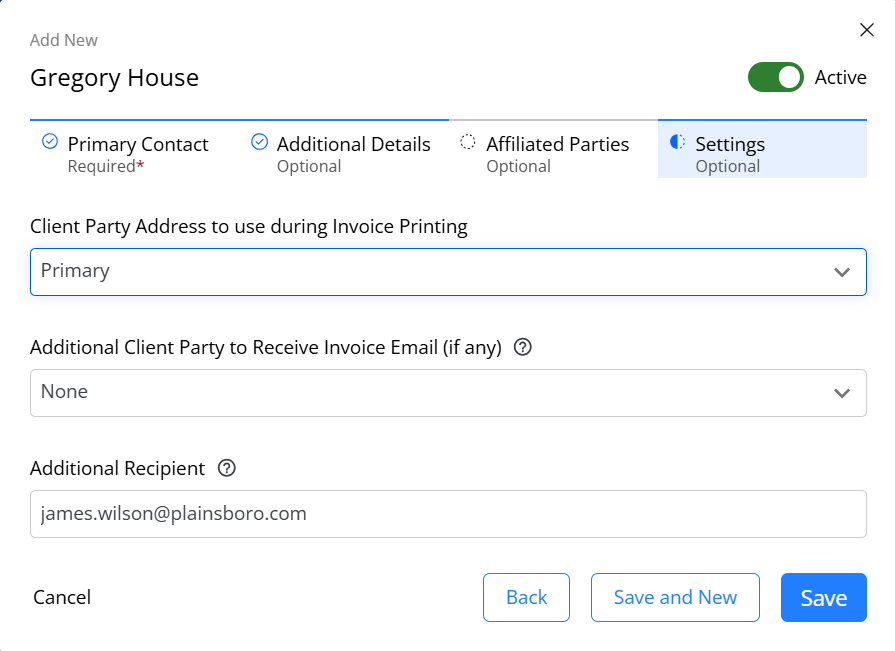
- If you have added affiliated parties, from the Client Party Address to use during Invoice Printing drop-down, select the address you want to be printed on the invoice.
- In the Additional Client Party to Receive Invoice Email (if any), select the email from the drop-down, if desired.
- In the Additional Recipient field, enter the email address to be copied when sending an invoice, if desired.
- Once you have completed the fields, you can click:
-
- Back to return to the previous tab.
- Save and New to save this client and add more clients.
- Save to save the information on the contact card.
-
When Adding a Matter
- From the left navigation panel, click Matters.
- From the toolbar, click Add Matter.
- Complete client information. Only client name and Client ID are required. You can always complete additional information later, by editing this contact in the Contacts area.
- When ready, in the upper right corner, click Save.
The system saves your contact.
Adding a Non-Client Contact
From Contacts
- From the left navigation panel, click Contacts.
- From the Contacts menu, click Address Book.
- From the Type drop-down menu, click the contact type.
- Complete the steps listed above for Adding a Contact.
Edit a Contact or Client
Note: Users that are restricted using the Ethical Wall feature will not be able to view certain Clients-Matters.
From Contacts
To edit a contact or client from Contacts:
- From the left navigation panel, click Contacts.
- From the Contacts menu, select Client, or Address Book as applicable.
- Double-click the contact, or click on the three dots and from the drop-down, click View/Edit.
- Edit the fields, as needed.
- In the lower right corner, click Save.
The system updates your contact.
From Matter Summary
To edit a client from Matter Summary:
- From the left navigation panel, click Matters.
- Either double-click the applicable matter, or click on the three dots and from the drop-down, click Edit.
- Scroll down to lower half of the screen and from the tabs, click Summary.
- Under the Client Info column, hover over the name of the client.
To the right of the field, an edit pencil icon displays. - Click the edit pencil icon.
- Make your changes and click Save.
The system updates your contact.
Bulk Action for Contacts
To bulk edit or delete client, or address book contacts:
- From the left navigation panel, click Contacts.
- From the Contacts menu, select Client, or Address Book.
- On the screen that opens, check the box beside the contacts you wish to edit or delete.
- From the toolbar atop the grid, select Edit or Delete as applicable.
- If you select Delete, validate the confirmation message by clicking Delete.
- If you select Edit, based on your selection, in the panel that opens:
- Clients: You can add custom labels and make clients active or inactive
- Address Book: You can select contact type, add custom labels, and make contact active or inactive
- Check the box to confirm your selection and click Save.

Add Additional Parties to a Client or Address Book Contact
You can add other parties’ contact information to any contact card. These parties are only for reference or to be chosen as a billing contact for a matter. If you are looking to add matter relations instead, click here.
To add other parties’ contact information to a client contact:
- From the left navigation panel, click Contacts.
- From the the Contacts menu, select Client or Address Book as applicable.
- On the Client or Contacts screen, take the appropriate action:
- Add Parties to new Contact
- From the left navigation panel, click Contacts.
- From the Contacts left navigation, click either Client to add a client or Address Book to add a non-client contact.
The Add Client or Add Contact screen opens, as applicable, displaying the Values tab.
- Add Parties to Existing Contact
- Double-click the contact, or click on the three dots and from the drop-down, click View/Edit.
The Edit Client or Edit Contact screen opens, if applicable.
- Double-click the contact, or click on the three dots and from the drop-down, click View/Edit.
- Add Parties to new Contact
- From the tabs atop the window, click Affiliated Parties.
The New Party Info section displays. - Complete the desired fields.
- Repeat steps 4 – 5 to add more parties as needed.
- In the lower right corner, click Save.
The system saves your additional parties to your contact.