
Using the Trust Administration Fee (TAF) Feature (BC)
Our automated Trust Administration Fee (TAF) feature:
- Is available for firms with British Columbia as their region.
- Provides quick access reporting
- Record bulk TAF payment
- Prior TAF Setup required.
Note: If you are located in a different province and have different TAF requirements, you will need to use Accounts Payable (AP) to manage your TAFs.
Add a TAF
To add a trust admin fee transaction:
- From the left navigation panel, click Matters.
- Single-click the matter to highlight it.
- From the toolbar atop the screen, click Action > Trust Admin Fee.

- From the toolbar atop the Manage Trust Admin Fee screen, click Add.
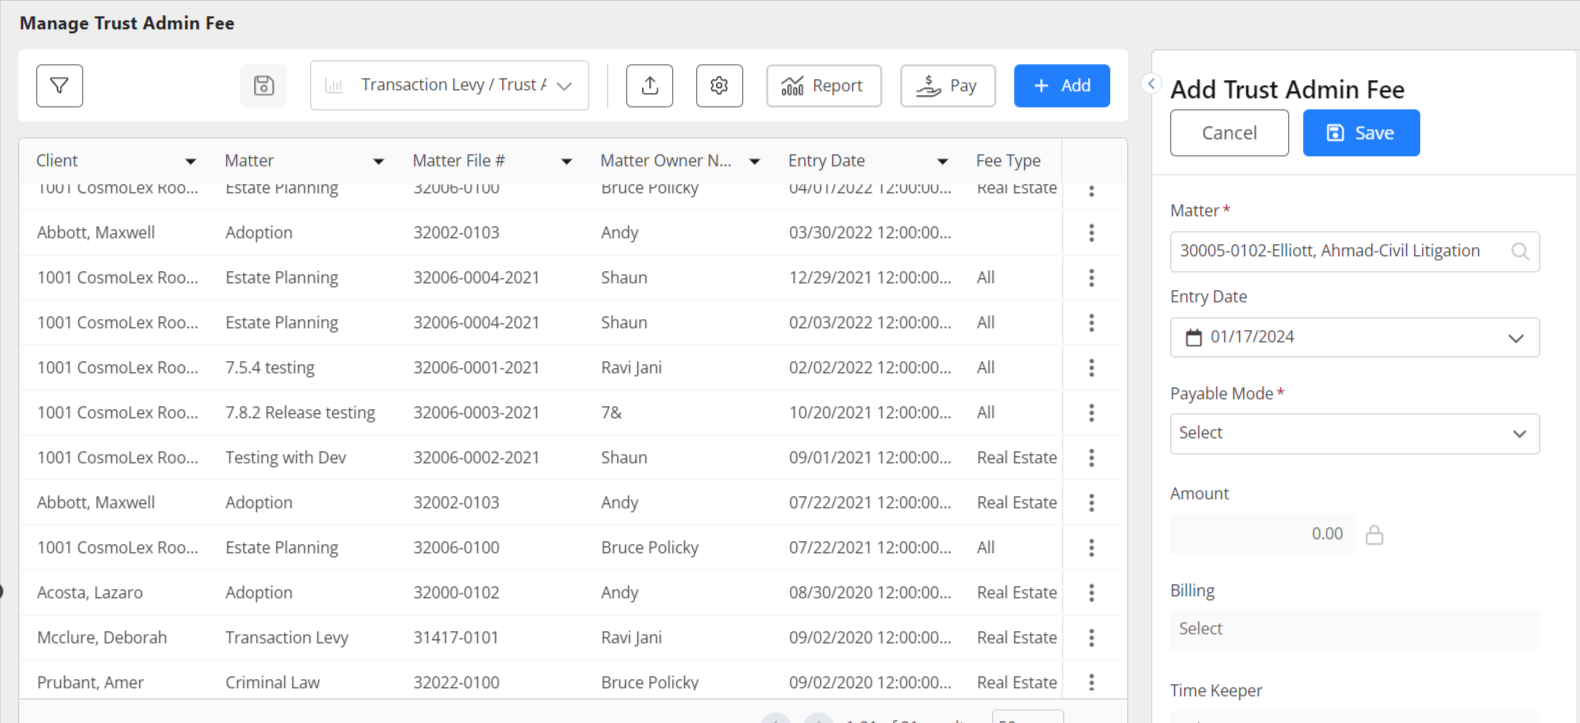
- Fill out the details on the Trust Admin Fees form.
- From the Entry Date field’s drop-down, click the entry date.
- From the Payable Mode field’s drop-down, click the mode.
Ignore - Your firm has paid the fee and does not want to include it in your payables at quarter’s end.
- Useful for historical entries
Exempt - Matter is exempt from fee
Payable - Fee must be paid
- The Amount field displays your entry under Setup > Firm Settings > Regional Settings. If you set Payable Mode = Payable in the previous step, you can click the lock icon and click Yes to continue with editing this field.
- From the Billing field’s drop-down, your designation under Setup > Firm Settings > Regional Settings indicates either Firm Expense or Bill to Client.
Use the drop-down to edit this field. - The Timekeeper field displays for Bill to Client matters only. From the drop-down, click the timekeeper.
- The Taxable field displays your entry under Setup > Firm Settings > Regional Settings. Click the drop-down to edit.
- Once complete, click Save.
The Success message box reads: Trust Admin Fees created successfully!
Edit a TAF
Note: If the TAF disbursement has already been billed, you must first remove it from the invoice to edit it. Any paid TAF cannot be edited.
To edit a trust admin fee transaction:
- From the left navigation panel, click Matters.
- From the toolbar atop the screen, click Action > Trust Admin Fee.
- The Trust Admin Fees screen lists the Matters with fees. Select the fees to which you would like to make changes by highlighting it.
- Scroll to the end of the row, click on the three dots and from the drop-down, click Edit.
- The system unlocks your fields in a panel to the right. Make the appropriate changes.
Note: You can use the drawer arrow to the top left of the panel to extend it to the full screen. - Once you have made your changes, click Save. The Success message box reads: Trust Admin Fees updated successfully!
Remove a TAF
Note: Once you have billed a client for a trust admin fee, you must remove it from the invoice to edit it.
To remove a trust admin fee transaction:
- From the left navigation panel, click Matters.
- From the toolbar atop the screen, click Action > Trust Admin Fee.
- The Trust Admin Fees screen lists the Matters and the fees. Select the fees which you would like to remove by highlighting it.
- Scroll to the end of the row, click on the three dots and from the drop-down, click Delete. The Delete Transaction Levy message box reads: Are you sure you want to delete this transaction levy?
- Click Delete.
The message box reads: The Trust Admin Fee associated with this matter has been successfully removed.
Pay TAFs
To pay trust admin fees:
- From the left navigation panel, click Matters.
- From the toolbar, click Action > Trust Admin Fee.
- From the toolbar atop the Manage Trust Admin Fee screen, click Pay.
The Pay Trust Admin Fee screen opens, listing all TAFs dated this quarter.
Note: To change this date range or apply other criteria, on the Pay Trust Admin Fee screen, click the filter icon to open the Filters panel and apply your desired filters. - Select the TAFs to which you want to apply payment.
- In the upper right corner, click Next.
The Payment Details screen opens. - Confirm the Amount field equals the total fees you intend to pay.
- Confirm the GST % field displays the appropriate GST payment percentage.
- The Date field defaults to today’s date. From the drop-down, click the payment date.
- From the Bank field’s drop-down, click the bank from which these fees must be paid.
- The Transaction Type field’s drop-down will display:
- Paying from your General Account
- Defaults to Withdrawal.
- Paying with a Credit Account
- The field defaults to Charge.
- Paying from your General Account
- From the Transaction Method field’s drop down, click the appropriate method.
The fields that display after this one will vary depending on your Bank, Transaction Type and Transaction Method selections. - Take the appropriate action:
- Cheque Payment
- In the Payee field, enter the payee’s name.
- In the Check# field, either uncheck the To be Printed box to enter a cheque number, or leave the box checked to use your cheque stock’s number.
- From the Memo field’s drop down, click a Memo or enter one freehand.
- Credit Card or Wire/ACH-Out Payment
- In the Payee field, enter the payee’s name.
- Complete the Ref # as desired.
- From the Memo field’s drop down, click a Memo or enter one freehand.
- Cheque Payment
- In the upper right corner, click Next.
- On the Summary screen, review the transaction.
- In the upper right corner, click Pay.
The message box reads: Paid Successfully! The system marks the TAF as paid and adds the transaction to your designated bank account. If this was a cheque transaction, you can print your cheque.
Use Filters to Search for TAFs
You can use the Filters panel to search your trust admin fee entries on specific criteria.
To use the Filters panel to search your trust admin fees:
- From the left navigation panel, click Matters.
- Atop the the Matters screen, click the funnel icon.
- On the Filters panel, scroll down the panel for the trust admin fee filters.

- As you apply your criteria, the Matters screen updates with the results.
- To export the filtered list, from the toolbar, click Export.
- Set your preferred export options.
- In the lower right corner, click Export.
Your system generates the report and downloads it in your designated format to your designated location.
Run a TAF Report
To run a trust admin fees report:
- From the left navigation panel, click Matters.
- From the toolbar atop the Matters screen, click Action > Trust Admin Fee.
- From the tabs atop the Manage Trust Admin Fee screen, click Report.
The Report Options – BC screen opens. - From the Entry Date From and To fields’ drop-downs, click your desired date range.
- From the Print format drop-down, click you desired format.
- In the lower right corner, click Download.
The system generates the report and downloads it to your designated location for review or printing.