
Using the Transaction Levy Feature
CosmoLex’s automated transaction levy feature:
- Is available for Ontario, Newfoundland & Labrador, and Alberta provinces.
- Provides quick access reporting
- Streamlines bulk levy payment
- Prior Transaction Levy Setup required
Note: If you are located in a different province and have different Transaction Levy requirements, you will need to use Accounts Payable (AP) to manage your Transaction Levies.
Add a Levy
![]()
To add a transaction levy:
- From the left navigation panel, click Matters.
- Single-click the matter to highlight it.
- From the toolbar atop the screen, click Action > Transaction Levy.
- From the toolbar at the top of the Transaction Levy screen, click +Add Levy.
- On the Add Transaction Levy panel, fill in the details. You can use the drawer arrow in the top left of the panel to extend it to full screen mode.
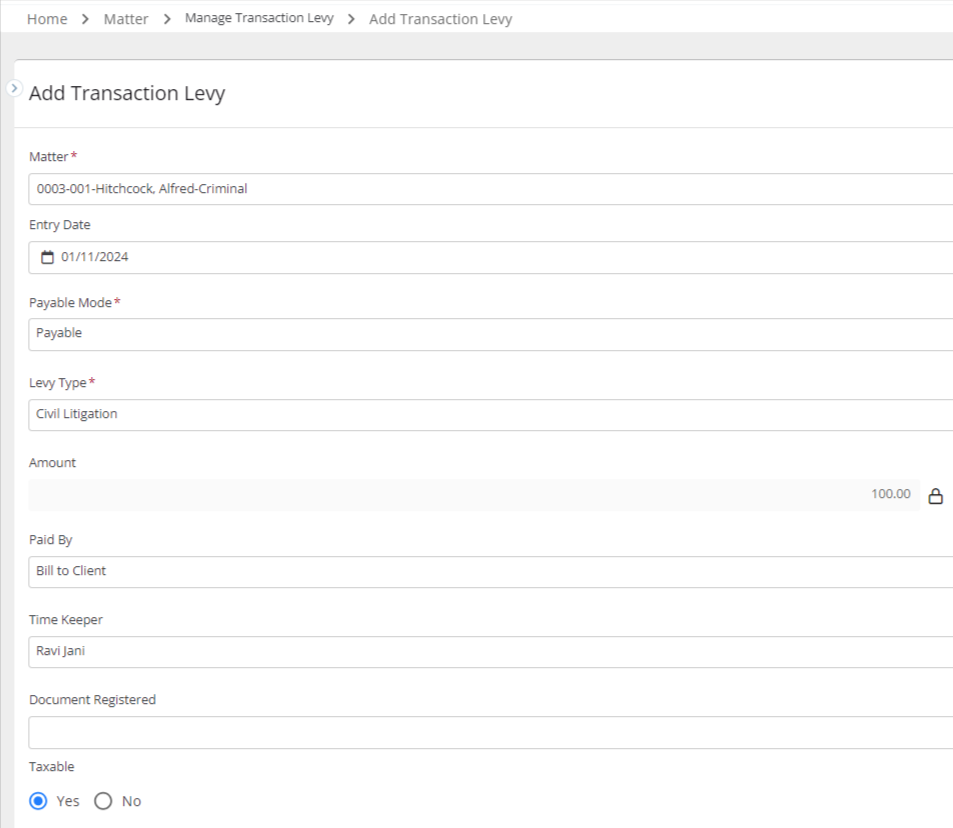
| Matter |
|
|---|---|
| Entry Date |
|
| Payable Mode |
|
| Levy Type |
|
| Amount |
|
| Paid By |
|
| Timekeeper |
|
| Document Registered |
|
| Taxable |
|
In the top right corner, click Save.
If you chose to Bill to Client, a disbursement is automatically added to the matter which you can include on your next invoice.
Edit a Levy
Note: If the transaction levy disbursement has already been billed, you must first remove it from the invoice to edit it. Any paid levy cannot be edited.
To edit a transaction levy:
- From the left navigation panel, click Matters.
- Single-click the matter to highlight it.
- From the toolbar atop the screen, click Action > Transaction Levy.
- The Manage Transaction Levy screen lists the levies for the Matter. Select the levy to which you would like to make changes by highlighting it.
- Scroll to the three dots at the end of the row and click Edit.
- The system unlocks your fields. Make the appropriate changes.
- In the top right corner, click Save.

Remove a Levy
To remove a levy and its associated disbursement:
![]()
- From the left navigation panel, click Matters.
- From the Matters screen, single-click the matter to highlight it.
- From the toolbar atop the screen, click Action > Transaction Levy.
- The Manage Transaction Levy screen lists the levies for the Matter. Select the levy which you would like to remove by highlighting it.
- Scroll to the three dots at the end of the row and click Edit.
The Delete Transaction Levy message box reads: Are you sure you want to delete this transaction levy? - Click Delete.
The Transaction Levy message box reads: The levy associated with this matter has been successfully removed.