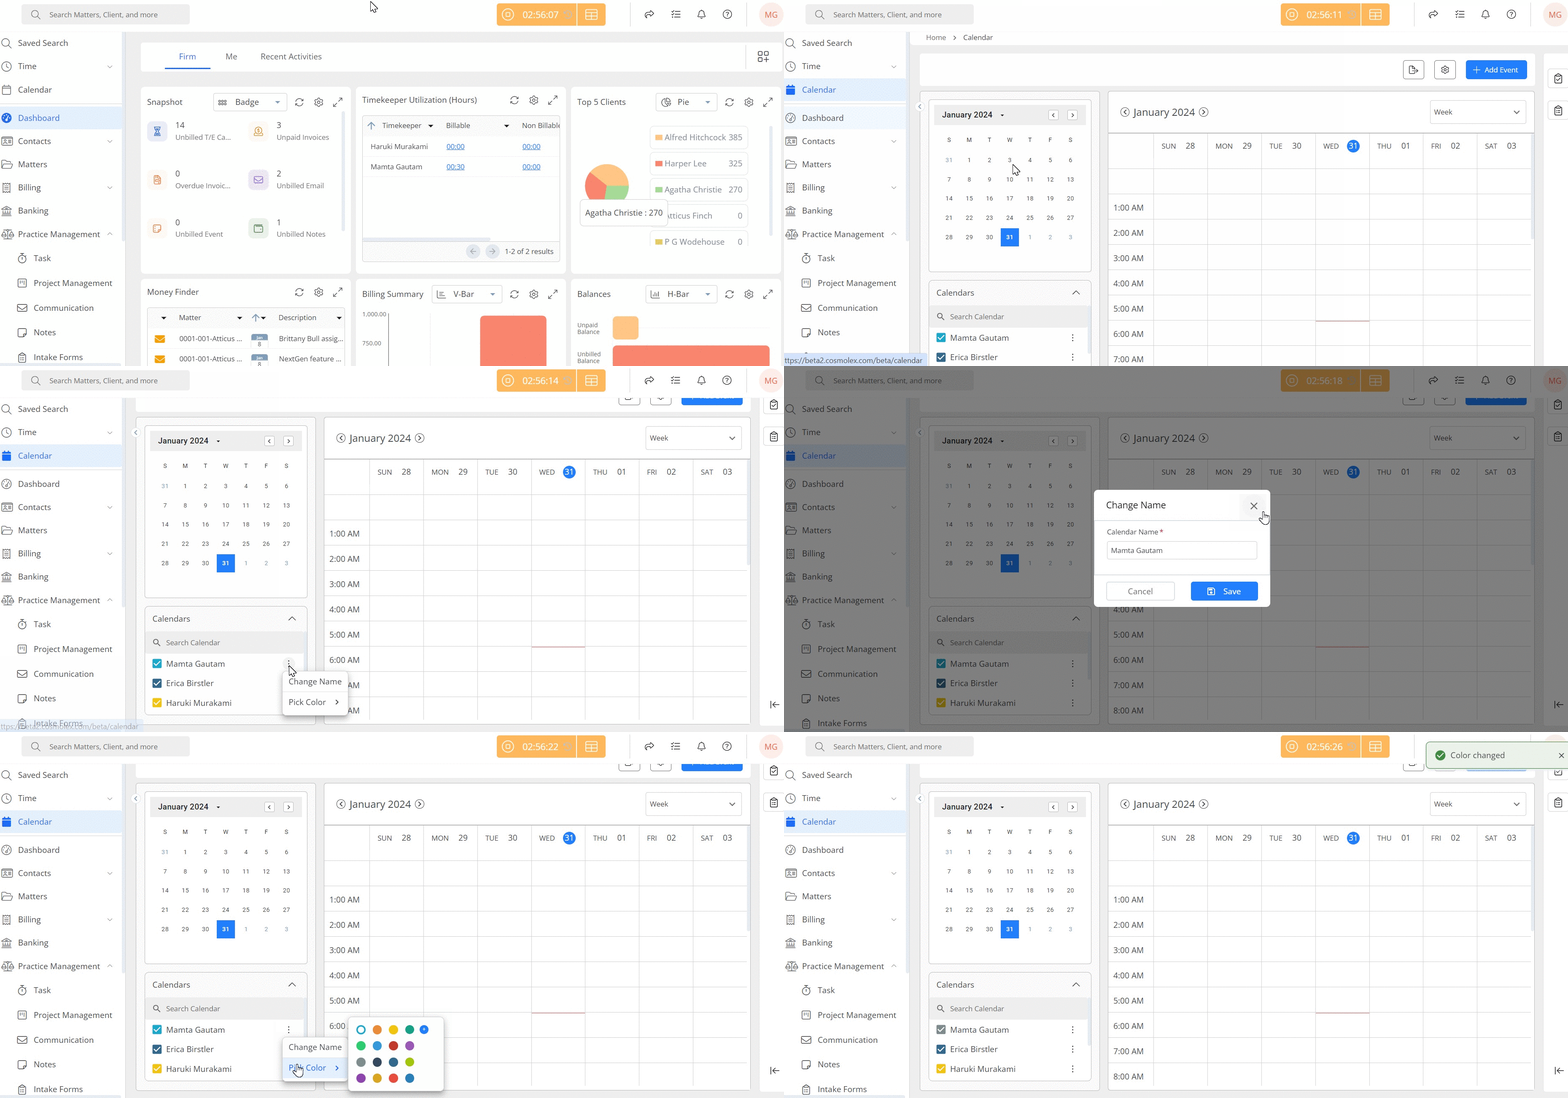
Set Up a Team Calendar
Each user has a calendar, but your firm can share a calendar, also known as a team calendar.
Create the Calendar
Note: Creating a team calendar involves selecting a “host” user whose calendar is visible to all and making their calendar the firm’s default.
To create the team calendar:
- Decide which user will host the team calendar. Though the host is typically an admin user, any user whose calendar is visible to all users can be the host.
- From the left navigation panel, the host user must click Setup.
- From the Setup left navigation, click My Settings.
- From the tabs atop the My Settings screen, click My Preferences.
- Toward the bottom of the My Preferences screen, locate the Default Calendar field.
- From the Default Calendar drop-down, click the host’s name.
- In the upper right corner, click Save.
The host’s calendar is the firm’s default calendar.
Rename the Calendar
To rename the calendar:
- From the left navigation panel, click Calendar.
- Beneath the monthly calendar grid, locate the Calendar field.
- Hover over the host’s name field.
- Click the three dots to the right of the field.
The calendar settings box displays, giving options to change the calendar name and the calendar icon’s color.

- Click Change Name.
- On the Edit Calendar Label message box, overwrite the calendar name with the team calendar’s name, replacing any spaces with dashes or underscores.
- Click Save.
The system renames the calendar.
Confirm User Access
To confirm user access to the calendar:
- From the left navigation panel, click Account.
- From the Account left navigation, click User Management.
- From the tabs on the User Management screen, click User.
- On the User screen, either double-click the User Name, or single-click it to highlight it, then from the toolbar, click Edit.
- On the Edit User screen, under the Settings (Roles and Restrictions) section, scroll down to the Restrict Calendar visibility field.
- Check the box beside the field name.
The field expands to display columns listing Restricted and Allowed user calendars. - Single-click the host’s name to highlight it.
- Click the right arrow.
The host’s name moves to the Allowed column, making their calendar visible to the user.

- In the lower right corner, click Save.
The Verification Required message box displays, prompting you for a password. - Enter your password.
- Either press enter or click Verify.
The user can access the team calendar. - Repeat the process for remaining users, or have users repeat the process for themselves, if applicable.

