Set a Payee’s Default Chart of Account
If you frequently or regularly submit payments to vendors or payees, you can set up a default chart of account for them. This will save you time and ensure reporting accuracy.
Warning: This article does not apply to trust (escrow) accounting.
Set a Payee’s Default Chart of Account
To set the default account:
- From the left navigation panel, click Contacts.
- From the Contacts menu, click Payee.
- On the Payee screen, take the appropriate action:
- Set Chart of Account for New Payee
- From the toolbar, click + Add Payee.
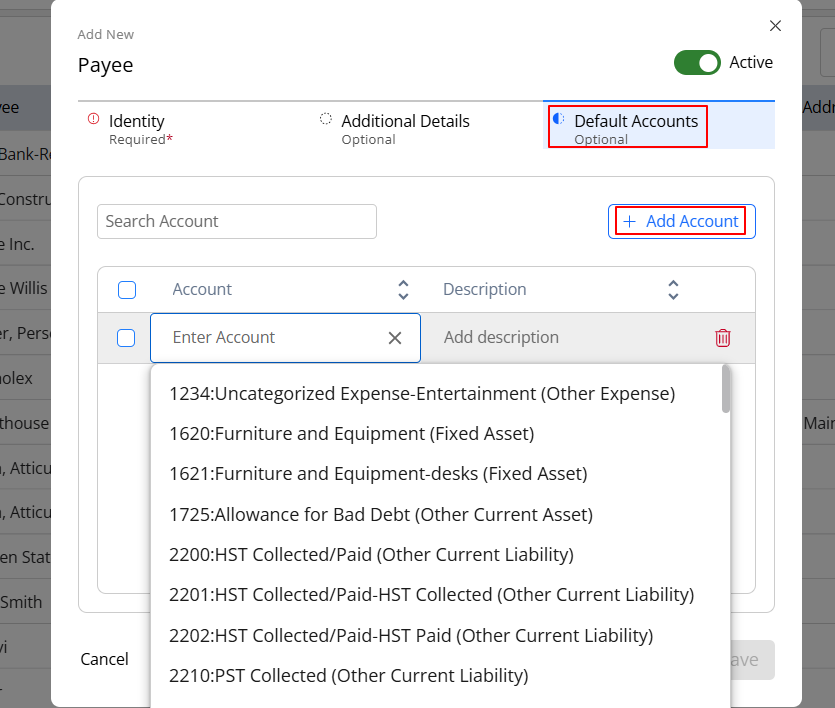
On the Add Payee window, complete the Name and Print As fields. - In the Default Accounts section, click + Add Account.

- From the Account fields drop-down, click the default chart of account to which you want to assign payments to this payee.
- Complete the remaining fields, if needed or desired.
- Click Save.
The system saves your payee and default chart of account.
- From the toolbar, click + Add Payee.
- Set Chart of Account for Existing Payee
- Select the payee, click the three dots at the end of the row, and then from the drop-down, click Edit.
The Edit Payee screen opens. - In the Default Account section, click + Add Account.
- From the Account fields drop-down, click the default chart of account to which you want to assign payments to this payee.
- Click Save.
The system saves your payee’s default chart of account. When you enter a payment transaction in your business or operating account, selecting the payee will automatically populate the account field.
- Select the payee, click the three dots at the end of the row, and then from the drop-down, click Edit.
- Set Chart of Account for New Payee

