
Manage Your Application’s Inbox
Your application integrates with your current email provider to organize your firm’s emails on the matter level and incorporate them into your billing workflow.
Integrating does not replace your everyday email tool. You continue to send/receive regular communication as you normally do, but the integration allows you to seamlessly archive this communication under a particular matter along with other matter-related information.
This integration allows email attachments up to 100MB.
Tag Emails to Matters
Auto-tagging
When you set up your email integration, there are two auto-tagging options from which you can choose.
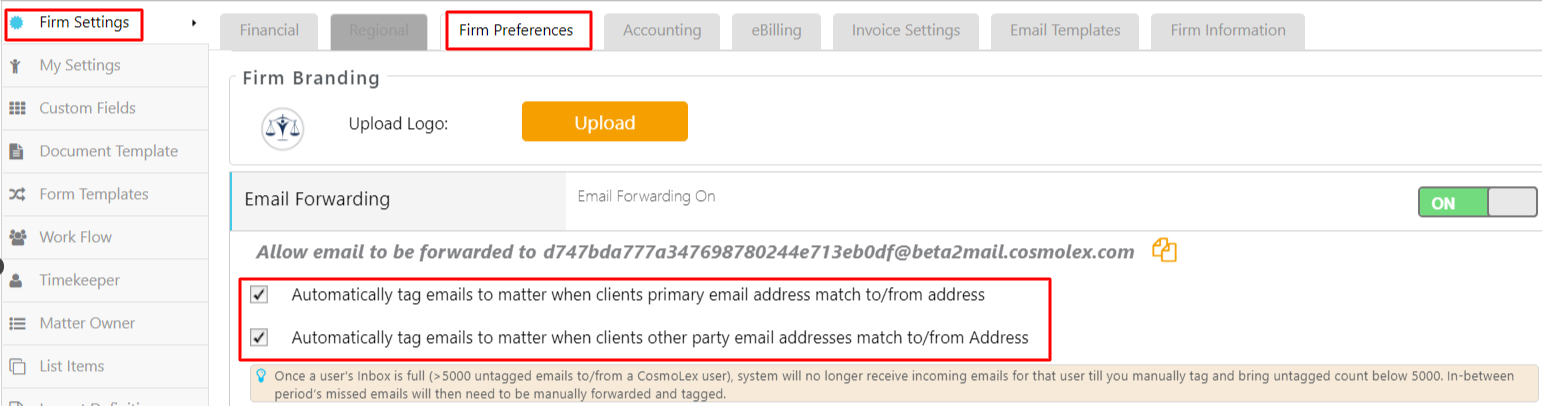
Automatically tag emails to matter when client’s primary email address match to/from address
With this option, the system only looks for matches with the client’s primary email address you enter in their contact information.
Automatically tag emails to matter when client’s other party email addresses match to/from address
With this option, the system looks for matches with the email addresses of additional parties you enter within the client’s contact information.
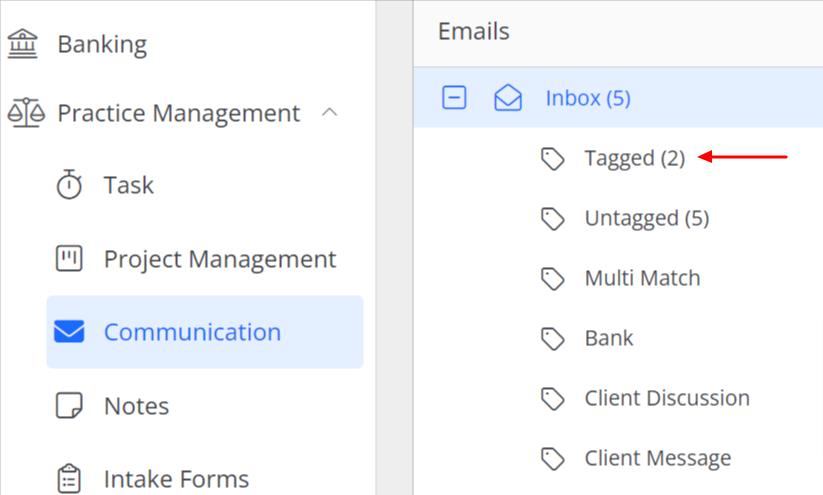
When either one of these options is active, auto-tagged emails are automatically filed under the the Tagged subfolder of your CosmoLex email inbox.
Untagged Emails
You will inevitably end up with untagged items for which the system could not find a match and did not automatically tag to a matter.
To locate the untagged items.
- Navigate to Practice > Communication > Email to open your inbox.
- From the folder structure, click Untagged.
The untagged emails display.

- To tag an item to a matter, select the email and click on the three dots at the end of the row.
- From the drop-down, click Tag emails.
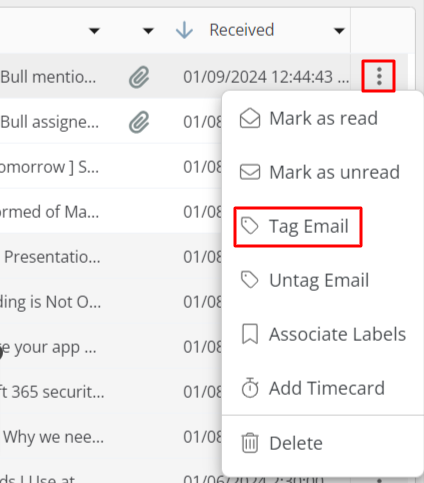
- Select or enter the matter to which you want to link the email.
- Click Save.

The system moves the email to the Tagged folder and displays it within the matter’s details.
Multi-Match
Under the Practice > Communication section, the Email screen’s Multi Match filter includes emails marked with an M. These untagged emails matched multiple matters and therefore remained tagged.
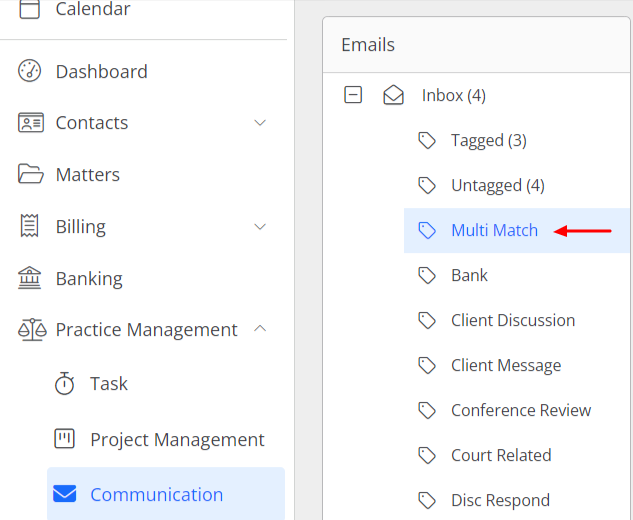
To view the matches associated with those emails, click on the M label.
Untag Emails
If you tag an email to the wrong matter, you can untag it or change it to the correct matter.
To untag an email:
- From the left navigation panel, click Practice.
- From the Practice menu, click Communication > Email.
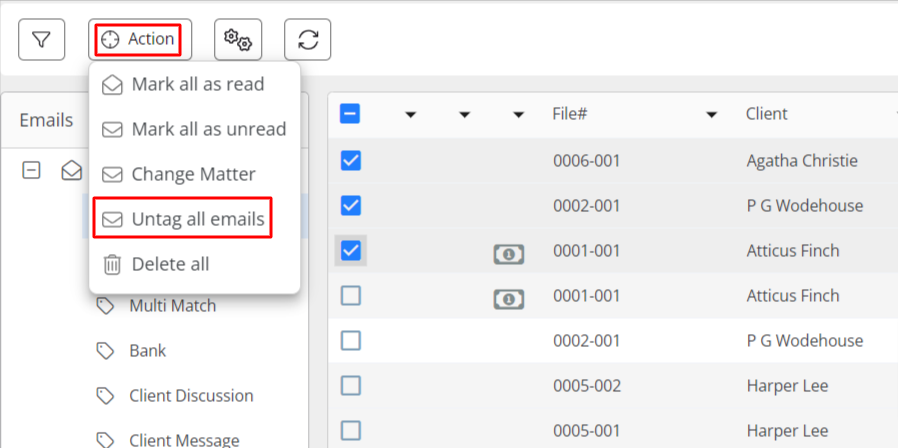
- On the Emails screen, select the tagged emails and check the boxes beside the emails you want to untag.
- From the toolbar, click Action > Untag all emails.
The system untags the emails.
Change Matter Tag
To change a matter’s tag:
- From the left navigation panel, click Practice.
- From the Practice menu, click Communication > Email.
- On the Emails screen, select the tagged emails and check the boxes beside the emails for which you want to change the matter tag.
- On the Emails screen, check the boxes beside the emails you want to untag.
- From the toolbar, click Action > Change Matter.
- On the Tag Emails screen, enter the name of the correct matter.
- Click Save.
The system updates the matter tag.
Important: You cannot untag an email from a matter if you recorded and/or billed time for it.
Delete Emails
There may be an email unrelated to a client and unnecessary to have in CosmoLex. Since this integration is not a sync, these emails are copies independent from your email tool and deleting items from CosmoLex will not delete this item from your normal email inbox.
To delete emails:
- From the left navigation panel, click Practice.
- From the Practice menu, click Communication > Email.
- On the Emails screen, check the boxes beside the emails you want to delete.
- From the toolbar, click Action >Delete all.
The system deletes the emails.
Note: The system automatically empties the trash folder every 30 days.
Billing for Your Time
To bill time from an email:
- From the left navigation panel, click Practice.
- From the Practice menu, click Communication > Email.
- On the Emails screen, select the email for which you want to bill and click on the three dots at the end of the row.
- From the drop-down, select Add Time Card.
The Add Timecard screen opens.

- Complete the timecard. For additional information, see Timecard Field Descriptions.
- Click Save.