
Manage Recurring Payments
Using Recurring Payments allows a firm to offer more flexible payment options to their clients. You can give your clients a payment plan that lets them pay your firm in instalments on a mutually agreed upon amount and frequency. Since the system will automatically collect the amount on the specified date, it frees you from tracking payments.
Note: You can use this feature only if you are using our internal payment processing app CosmoLexPay.
Add a Recurring Payment
To add a recurring payment:
- From the left navigation panel, click Billing.
- From the Billing menu, click Recurring Payments.
- From the tabs atop the Recurring Payments screen, click Add Recurring Payment.
- In Add Recurring Payment drawer that opens, enter the first few letters and from the drop-down select the Client-Matter. You can expand the drawer by clicking on the < arrow in the top left corner.
- In the Amount field, enter the mutually agreed upon dollar amount for each payment.
- In the Start Payment On field, use the calendar to enter a start date.
- In the Run Every field, enter the frequency of the transaction, You have the option to set transaction frequency by days, weeks, months, or year.
- The Ends After field gives you the option to stop payments based on:
- Paid Amount: Enter the total amount after which the system should stop fund transfer.
- Transaction Count: Enter the number of transactions after which system should stop fund transfer.
- Date: Enter the date after which from which payment will stop.
- Enter a description, if desired.
- Click the radio button beside the account, Operating or Trust, where you want the funds Deposited To.
Note: Operating option will only be available if you have opted for it under Setup > Firm Settings > Firm Preferences. - From the drop-down, select the relevant bank.
- Under the Payment Details, specify your payment method.
- Enter the Card information or Bank Account details, as applicable.

- Enter the firm users who should receive notifications of the success or failure of the transaction(s).
- Once you have completed all the fields, on the top right, click Review Plan.

- On the Recurring Payment Details screen, review the plan. If you wish to make any changes to the dates, you can click the arrow beside the field.
- Once satisfied, click Start Plan.
The success message reads Payment plan started successfully.
Note: If the payment is associated to an invoice, user will have to manually apply the payment to the invoice using an operating retainer.
Copy Payment Plan
If you made some errors in the payment plan, you can use the copy feature to clone the plan and change the configuration:
- From the left navigation panel, click Billing.
- From the Billing menu, click Recurring Payments.
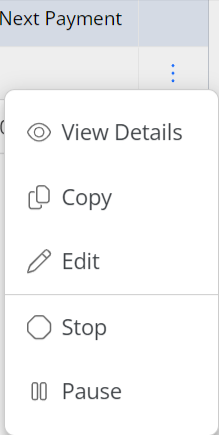
- From the list of payments, select the one you want to copy and click on the three dots at the end of the row.
- From the drop-down, click Copy.
- The Client Matter field will be pre-filled, but you can configure all the other fields.
- Once you have completed all the fields, click Review Plan.
- On the Recurring Payment Details screen, review the plan. If you wish to make any changes to the dates, you can click the arrow beside the field.
- Once satisfied, click Start Plan.
The success message reads Payment plan started successfully.
Edit Payment Plan
To edit a recurring payment plan:
- From the left navigation panel, click Billing.
- From the Billing menu, click Recurring Payments.
- From the list of payments, select the one you want to edit and click on the three dots at the end of the row.
- From the drop-down, click Edit.
- After you make your changes on the Edit Recurring Payment screen, click Update.
Note: You can only make changes to Bank details and email recipients.
Pause Payment Plan
If you want to pause a recurring payment schedule, to be resumed at a later date:
- From the left navigation panel, click Billing.
- From the Billing menu, click Recurring Payments.
- From the list of payments, select the one you want to pause and click on the three dots at the end of the row.
- From the drop-down, click Pause.
The success message reads Recurring payment paused successfully.

Resume Payment Plan
If you want to resume a previously paused recurring payment schedule:
- From the left navigation panel, click Billing.
- From the Billing menu, click Recurring Payments.
- From the list of payments, select the one you had paused earlier and click on the three dots at the end of the row.
- From the drop-down, click Resume.
The success message reads Recurring payment resumed successfully.
Stop Payment Plan
- From the left navigation panel, click Billing.
- From the Billing menu, click Recurring Payments.
- From the list of payments, select the one you want to stop and click on the three dots at the end of the row.
- From the drop-down, click Stop.

- To confirm that you would like to permanently stop the recurring payment, click Yes.
The status of the plan will display as Stopped.