
Manage Email Restriction Rules
If you use the automatic email forwarding option, you may want to block certain emails from coming into your application’s inbox. You can add exclusion rules to prevent the system from accepting those emails for tagging.
Add an Email Restriction Rule
To add a restriction rule:
- From the left navigation panel, click Practice Management.
- From the Practice Management menu, click Communication.
- From the Communication screen, click Emails.
- From the toolbar atop the Emails screen, click the gear icon (Rules).
- On the Email Restrictions screen, from the toolbar, click Add.
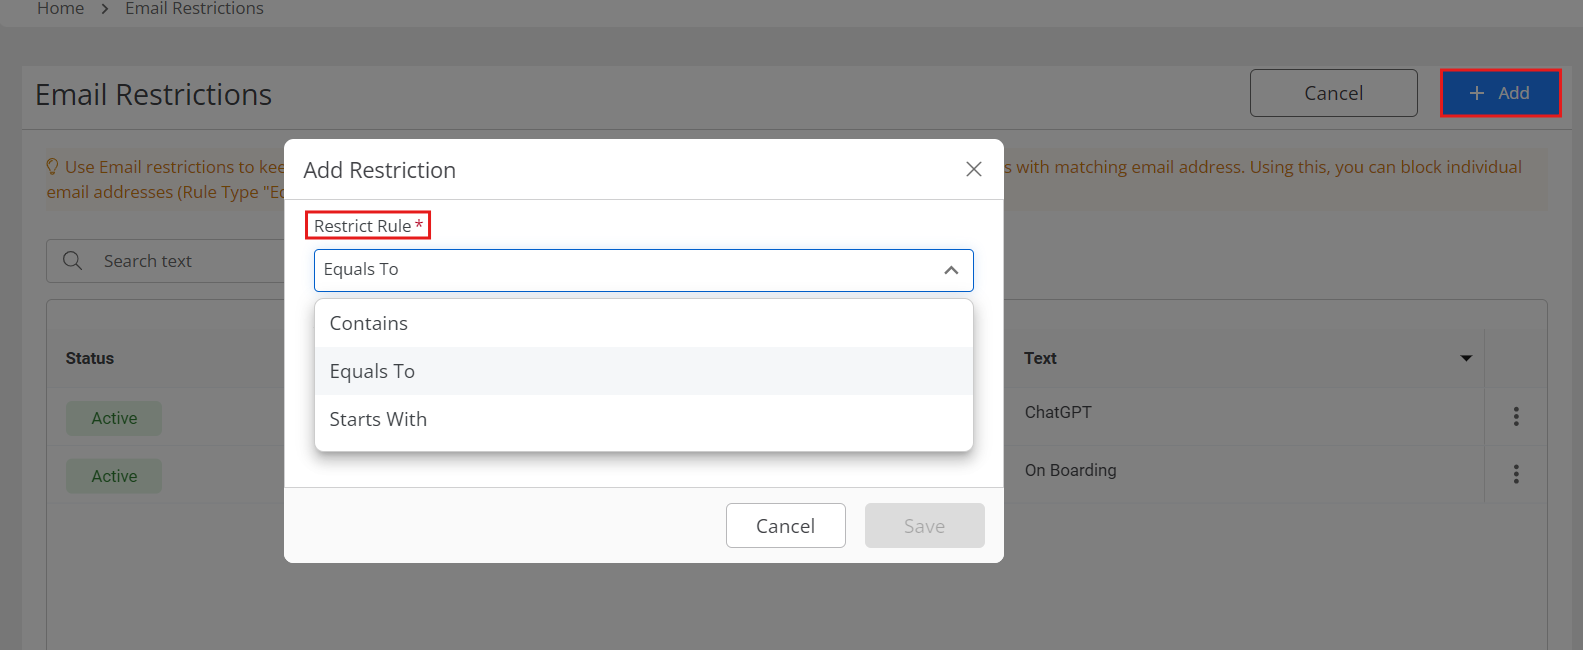
- In the Add Restriction window, from the Restriction Rule field’s drop-down, click the desired restriction.
Contains - Restrict emails originating from email address containing the text.
- For example, LinkedIn, Disney, etc.
Equals To - Restrict emails from exact email addresses.
- For example, [email protected], [email protected], etc.
Starts With - Restrict emails originating from email addresses that start with the text.
- For example, noreply email addresses.
- In the Text field, enter the text match upon which the restriction will be based.
- Click Save.
The system adds the restriction rule.
Edit a Restriction Rule
To edit a restriction rule:
- From the left navigation panel, click Practice Management.
- From the Practice Management menu, click Communication.
- From the Communication screen, click Emails.
- From the toolbar atop the Emails screen, click the gear icon (Rules).
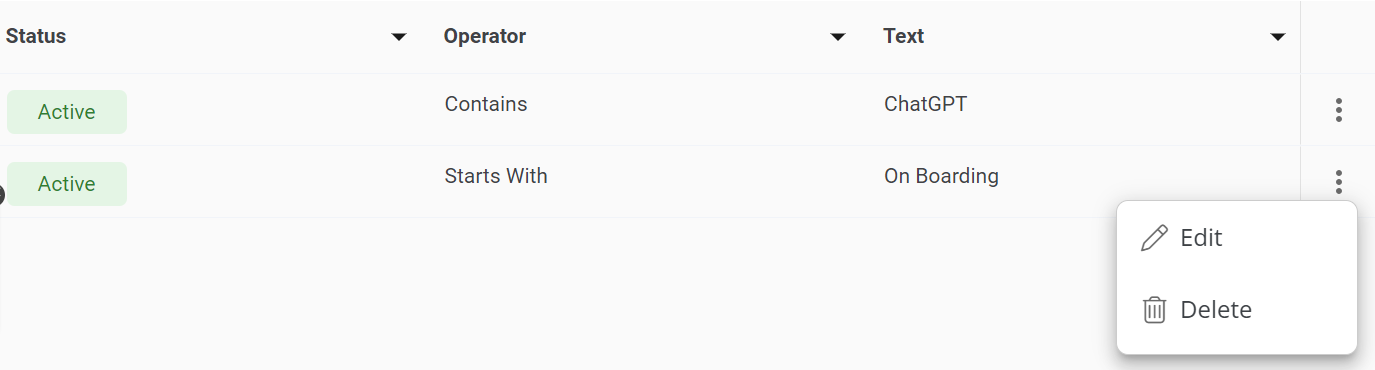
- On the Email Restrictions screen, select the email rule, click on the three dots at the end of the row and from the drop-down, click Edit.
- In the Edit Restriction window, make your edits.
- Click Save.
The system saves you rule changes.
Delete a Restriction Rule
To delete a restriction rule:
-
- From the left navigation panel, click Practice Management.
- From the Practice Management menu, click Communication.
- From the Communication screen, click Emails.
- From the toolbar atop the Emails screen, click the gear icon (Rules).
- On the Email Restrictions screen, select the email rule, click on the three dots at the end of the row and from the drop-down, click Delete.
- The Delete Restriction message box reads: Are you sure you want to delete this restriction item? Click Yes.
The system deletes the restriction rule.
Deactivate an Email Restriction
To deactivate a restriction rule:
- From the left navigation panel, click Practice Management.
- From the Practice Management menu, click Communication.
- From the Communication screen, click Emails.
- From the toolbar atop the Emails screen, click the gear icon (Rules).
- On the Email Restrictions screen, select the email rule, click on the three dots at the end of the row and from the drop-down, click Edit.
- On the Edit Restriction window, uncheck the Active field’s check box.
- Click Save.
The system deactivates the restriction rule.