E-File a 1099-MISC Form
You can use our Excel template to e-file your 1099-MISC Form.
Important: This service is independent from your CosmoLex account. New users must create an account to use the site.
For assistance with the site or to submit a ticket, visit ComplyRight’s help page.
E-File a 1099-MISC Form
To e-file a 1099-MISC form:
- Confirm your payees are set up properly for filing. For additional information, see Manage Your 1099-Eligible Payees.
- In the Reporting area, navigate to the 1099 Payee Ledger and download it in Excel format.
- Review the file to confirm the data is correct.
- If you find incorrect data, make the necessary changes in CosmoLex to ensure consistent record-keeping, and then re-export the file.
- Log into https://cosmolex.efile1.com/.
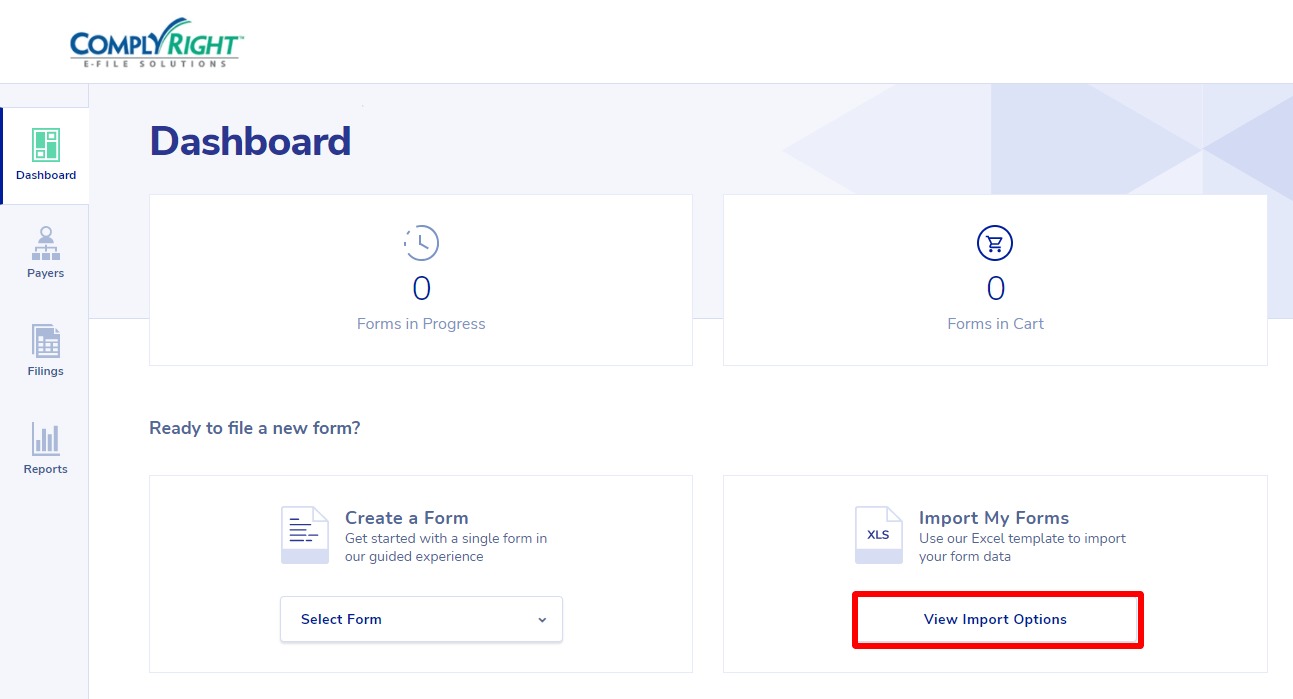
The Dashboard displays.
- In the center of the screen under the Import My Forms section, click View Import Options.
- On the Form Import Options screen, atop the Import via Excel section, click Select File to Import.
- On the browser window, locate your 1099 Payee Report and either double-click it, or single-click it to highlight it, and then click Open.
The file uploads. - To the far right of your import file’s row, click Import Data.
The Review Your Imported Forms screen opens, displaying your imported data and each form’s import results.
Error-free form 
Form contains errors - If an imported form’s fields contain errors, use the slider at the bottom of the screen to view the errors. Take the appropriate actions:
- To correct errors in import rows, make the corrections in CosmoLex and repeat this process.
- To delete a row, click the blue trash can icon and then click Delete to confirm the deletion.
- In the lower right corner, click Save All Forms.
- On the Forms in Progress screen, check the boxes beside the forms you want to print and take the preferred action:
- Click Print Preview.
A PDF file downloads for your review. - Click Bulk Edit.
The Edit Forms in Progress screen opens, displaying your forms’ fields. You can edit the fields in columns preceded with numbers such as 1. Rents. To edit a field, single-click it.
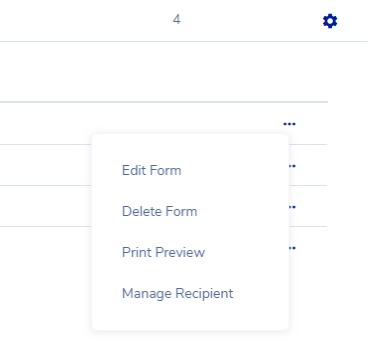
Note: To the far right of any form’s row, click the three dots to display a drop-down with individual form options.

- Click Print Preview.
- In the lower right corner under Select your filing option, click the radio button beside your preference.
- Check the Unmask TIN on delivered forms box, if desired.
- Click Add to Cart.
The My Cart opens, listing your forms and summarizing your order. - Click Proceed to Checkout.
- The Checkout screen opens.
- Enter your billing contact, billing address and payment method information.
- In the lower left corner, click Save & Continue.
- Confirm you order and submit payment.

