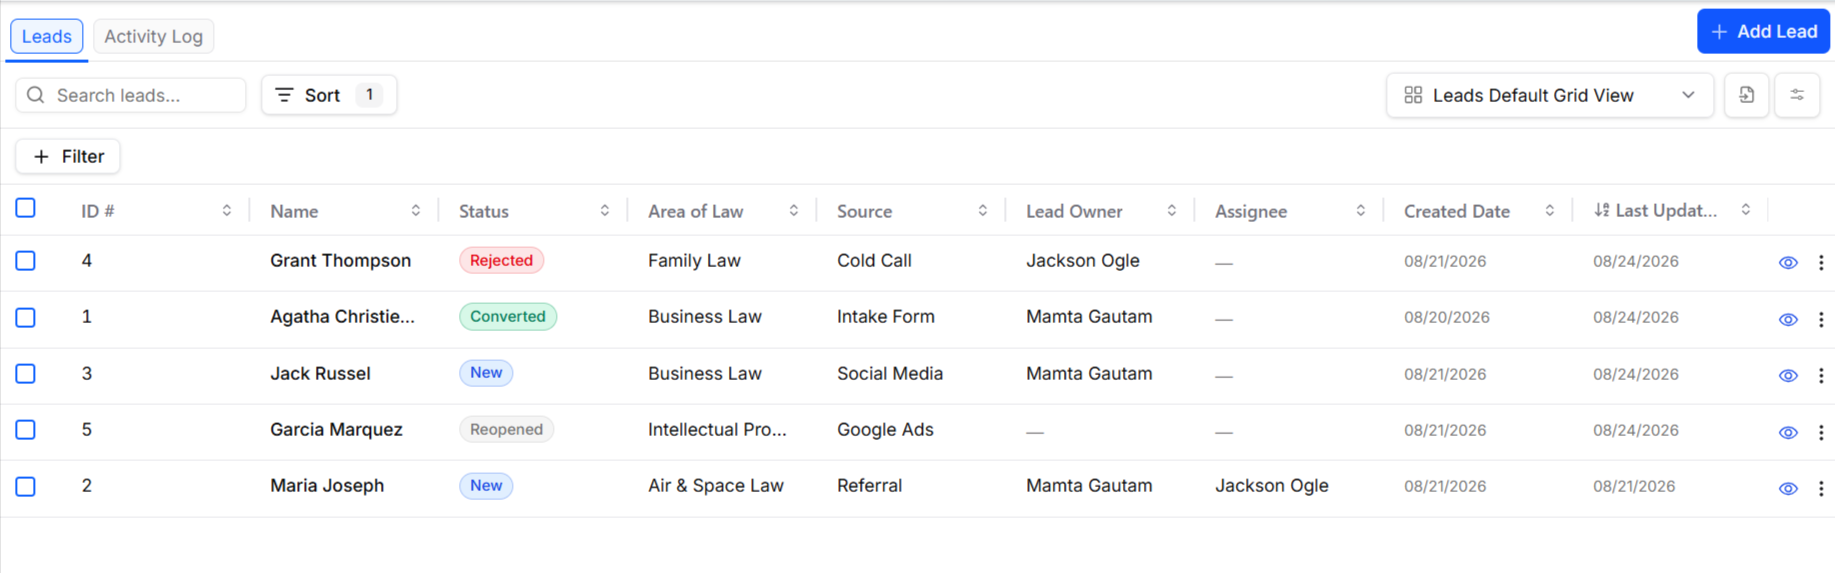
You can act on any lead captured in your system by clicking the eye icon. The lead's detail consolidates everything associated with that prospect — contact info, pipeline stage, documents, events, tasks, notes, related people, and a complete activity history in one space.
Open a Lead
-
From the left navigation panel , click Intake > Leads to open your Leads list.
-
To open the lead's record, click the eye icon on any row.
Manage a Lead's Record
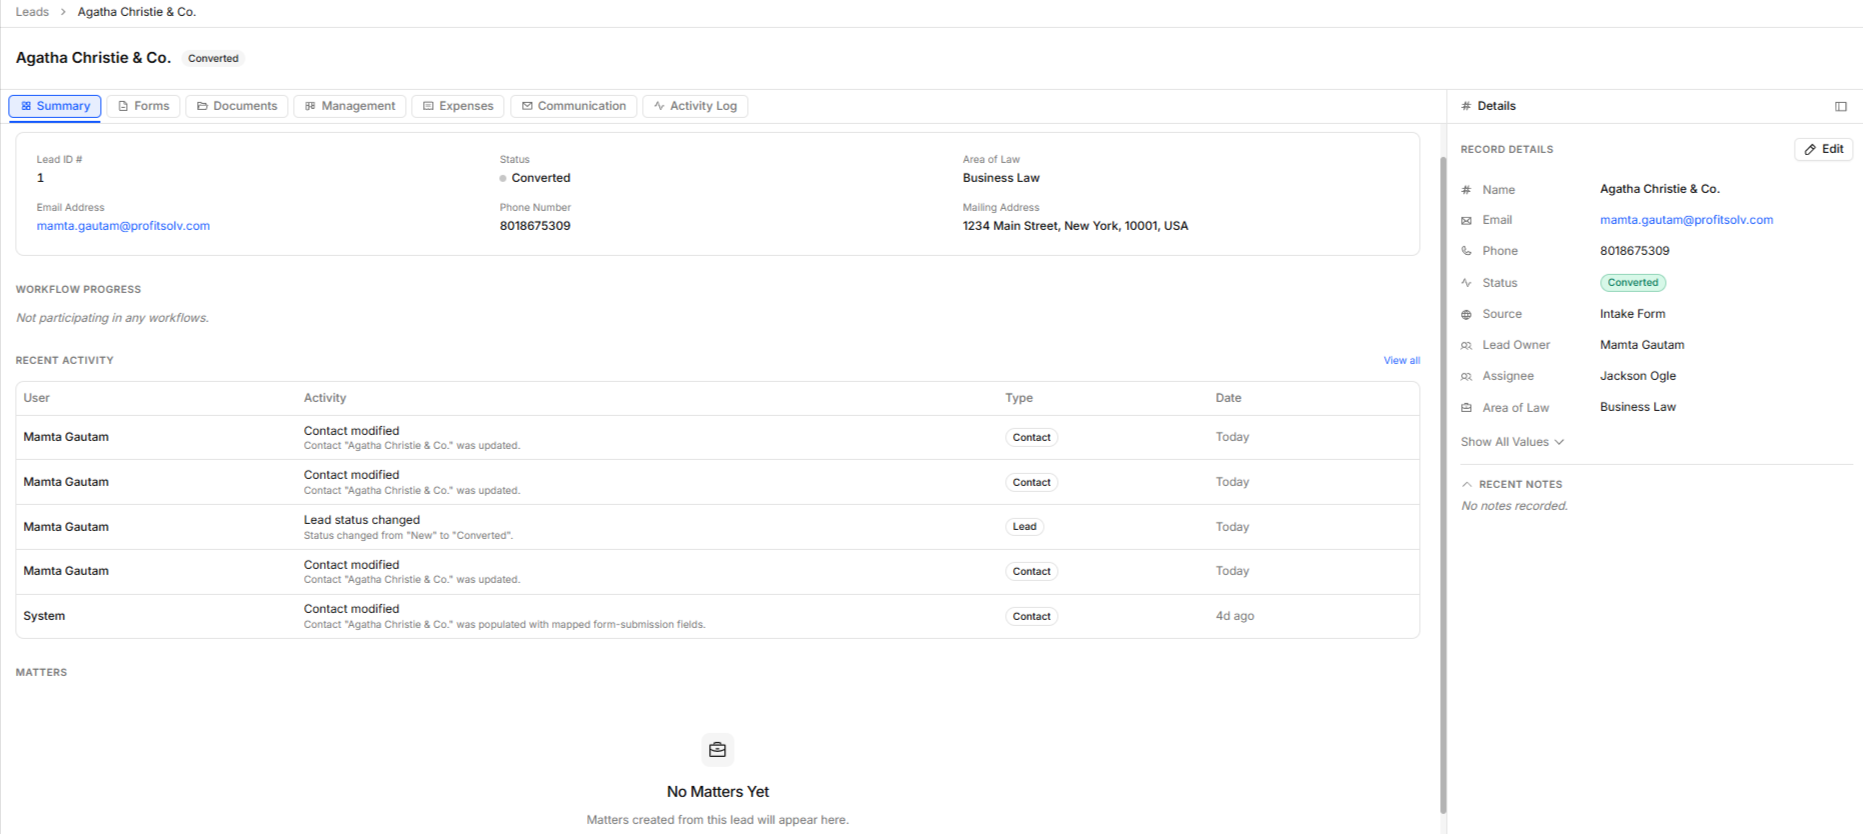
The lead record is organized into tabs that include:
Summary
Highlights — a card with the lead's details (id, status, area of law, email, phone, mailing address) at a glance
Workflow Progress — if the lead is linked to an intake workflow, this section shows the workflow's name, start date, last completed step, current step, and next step.
Recent Activity — the 5 most recent Activity Log entries, shown as a compact timeline. Click View all to jump to the full Activity Log tab.
Matters — if the lead has been converted to (or is otherwise linked to) a matter, it appears here with name, area of law, status, and estimated value; clicking it opens the Matter Overview. Hidden if no matters exist.
Right sidebar — a collapsible panel with two sub-tabs: Details (key record fields, with a “Show all values” expander) and Notes (the pinned note, if any, plus the 5 most recent notes). Use the edit tab to to edit the primary contact's identity, phone numbers, and mailing address etc. inline.
- Forms — Will show any forms you've shared with the lead.
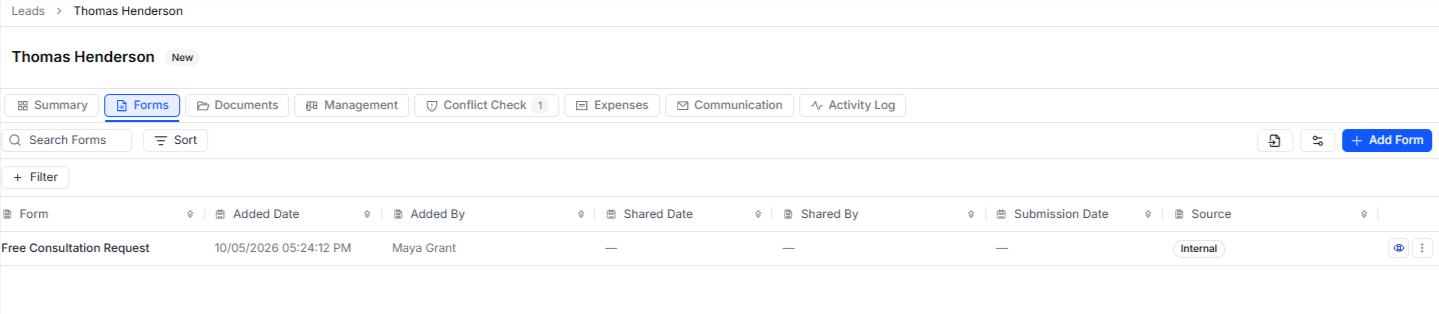
The Forms tab on a lead is a working surface. If an answer needs correcting or completing, just click the eye icon and select the field and update it in place.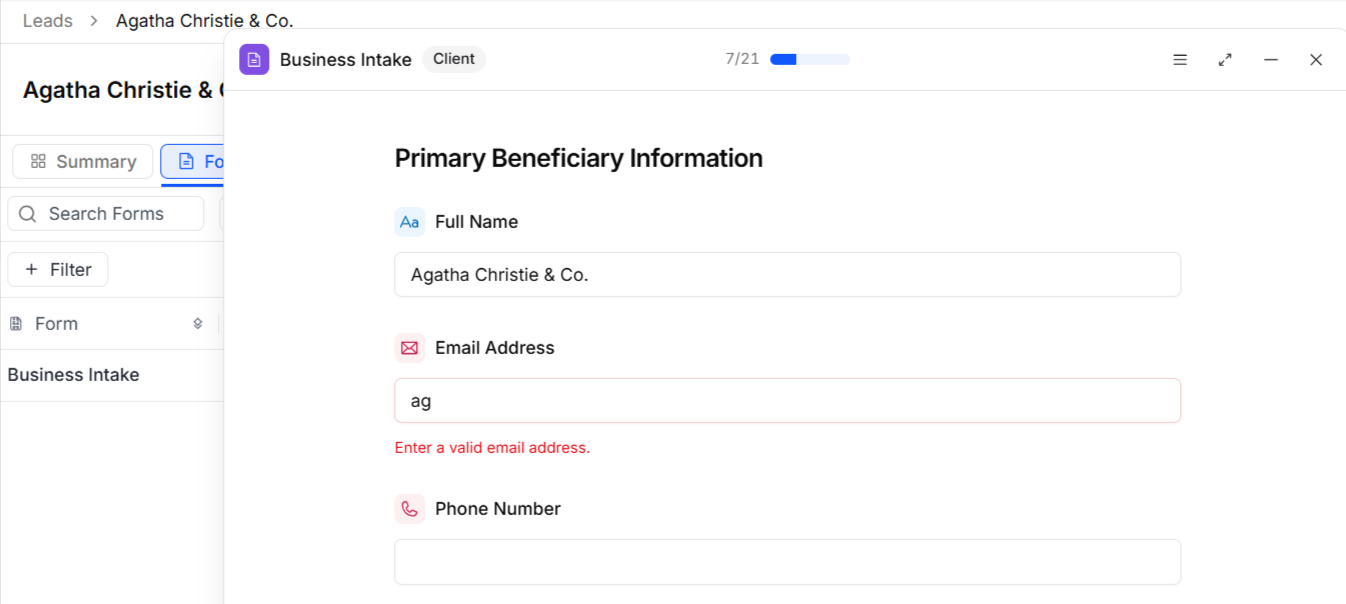
The system keeps a record of who made the change and what the answer said before, so the prospect's original response is never lost. - Documents — Upload and manage files related to the lead.
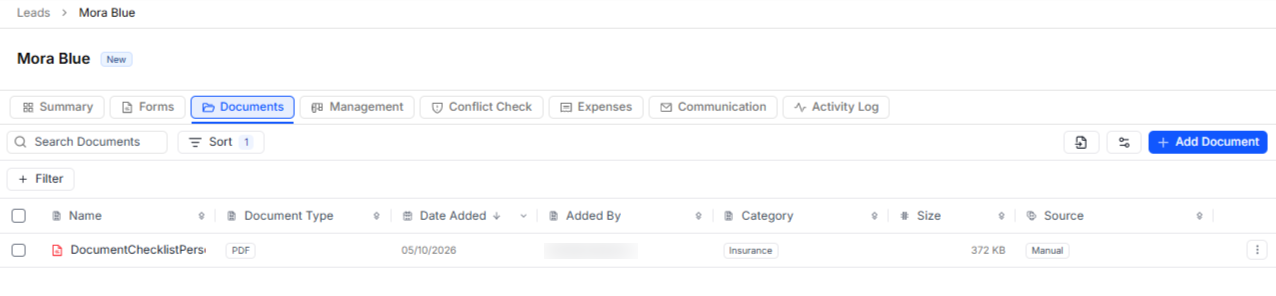
Click Add Document from the toolbar or drag and drop a file onto the upload area to attach a document to the lead (PDF, Word, images, and spreadsheets, up to 25 MB per file).
A grid lists every document manually added to the lead, with its name, type, date added, who added it, and file size. - Management — Track your follow-up work in three sub-tabs:
- Events — Log or view scheduled meetings booked through the lead's own Calendly scheduling link and calls tied to the lead. Use Add Event to open a form to enter a name, type, dates, location, a privacy toggle, owner, status, description, and reminders manually.
- Tasks — Assign and track to-dos related to following up. Click Add Task to open the task modal to enter task details.
- Notes — Record call notes and other updates, categorized (for example, as a Call), so your team has a history of every touchpoint.
Manage existing notes from the grid's row actions — open the eye icon to read and edit a note in a dialog, pin or unpin it, or delete it.
- Conflict Check — Firm users can run a conflict check directly from the lead, or have one run automatically as part of an intake workflow.
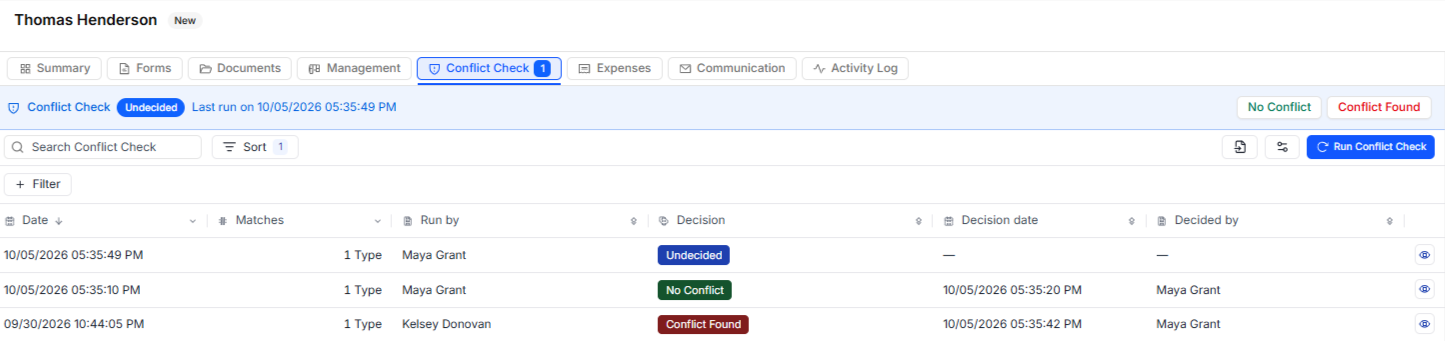
The check searches the firm's records for the lead's primary contact name across Contacts, Clients, Contact Fields, Matter Name, Relations and Matter Fields, saves the results to the lead, and waits for a person to review them and record a decision. Above the results grid, the reviewer sets the outcome for the current run. There are three possible values:Outcome
Meaning
Who sets it
Undecided
Results are ready but no one has recorded a decision
The system, automatically after every run
No Conflict
Results were reviewed and no conflict of interest was found
A user
Conflict Found
Results were reviewed and a conflict of interest was found
A user
- Expenses — Track any payments or timekeeper time recorded against the lead during the intake process (consultation fees, filing fees, and similar).

These stay separate from the firm's billing and A/R reporting. - Communication — Track any emails recorded against the lead.
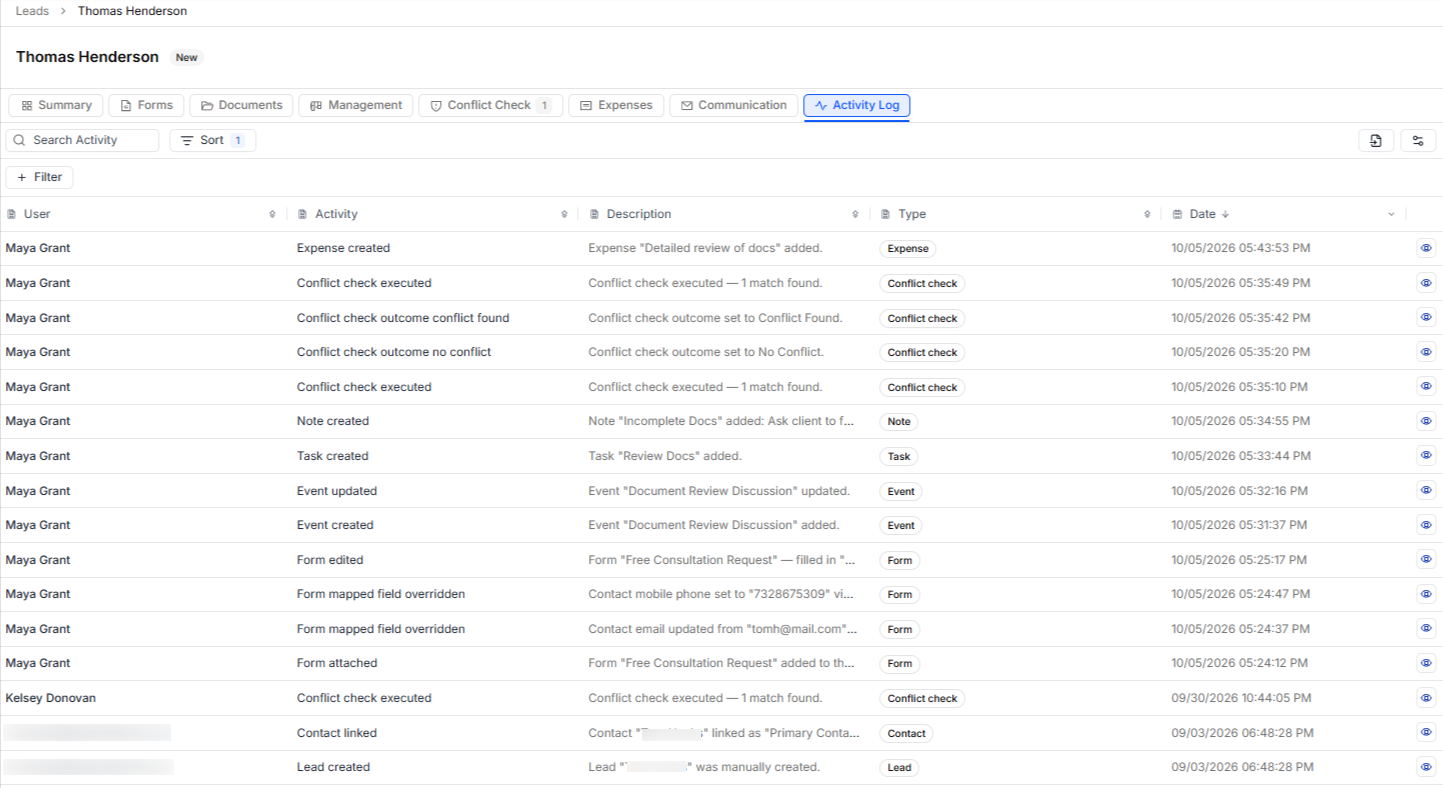
- Activity Log — A full audit trail of everything that's happened on the lead, including contact linking, document uploads, and note updates filterable by category (contact, meeting, document, notification, note, task), by user (a specific user, or “System” for automated actions), by date range, and by keyword search.
Convert a Lead to a Client and Matter
The system keeps three related but distinct records as a lead moves through your pipeline:
- Lead — The inquiry itself: a prospective client who hasn't yet been engaged.
- Contact — The lead is automatically added to the Address Book with 'lead' as the contact type. One contact can sit behind multiple leads and matters.
- Matter — The signed engagement you're actively working, created once a lead converts to a client. It holds time, expenses, billing, trust, documents, and tasks, and links back to the same contact record.
To convert a lead to a matter:
From the left navigation panel, click Contacts > Address Book.
From the list of contacts, select the lead you wish to convert and click the pencil icon.
In the Edit Contact window that opens, use the Type drop-down to change lead to Client.
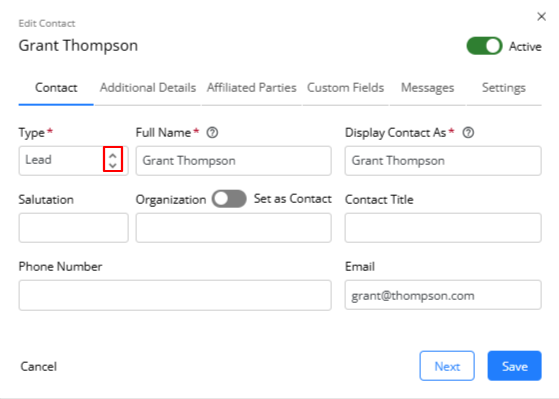
If you wish to make any other changes to the contact card, you can do so here and click Save.
Once you have converted your lead to a client, you can add a matter for the client.
In short, a lead is captured, qualified, and converted — and once it becomes a matter, the contact's details carry across automatically, so no one has to re-enter them.
Close a Lead
Every lead eventually reaches one of two outcomes:
- Converts — The lead becomes a matter, and the intake data captured on the lead carries over with it.
- Doesn't convert — The lead is closed as lost, with a reason recorded. That reason is kept on file for source and conversion reporting, so you can see which channels and follow-up approaches are actually turning inquiries into clients.
Because closed and lost leads stay in your records with their source and reason intact, your Leads list doubles as a report on where your best opportunities come from — not just a to-do list for open inquiries.
Also read, Manage Your Leads