The system keeps every captured lead, along with its notes, tasks, documents, and activity, in one place, so nothing you're working on gets lost between that first inquiry and a signed engagement.
Find Your Leads
-
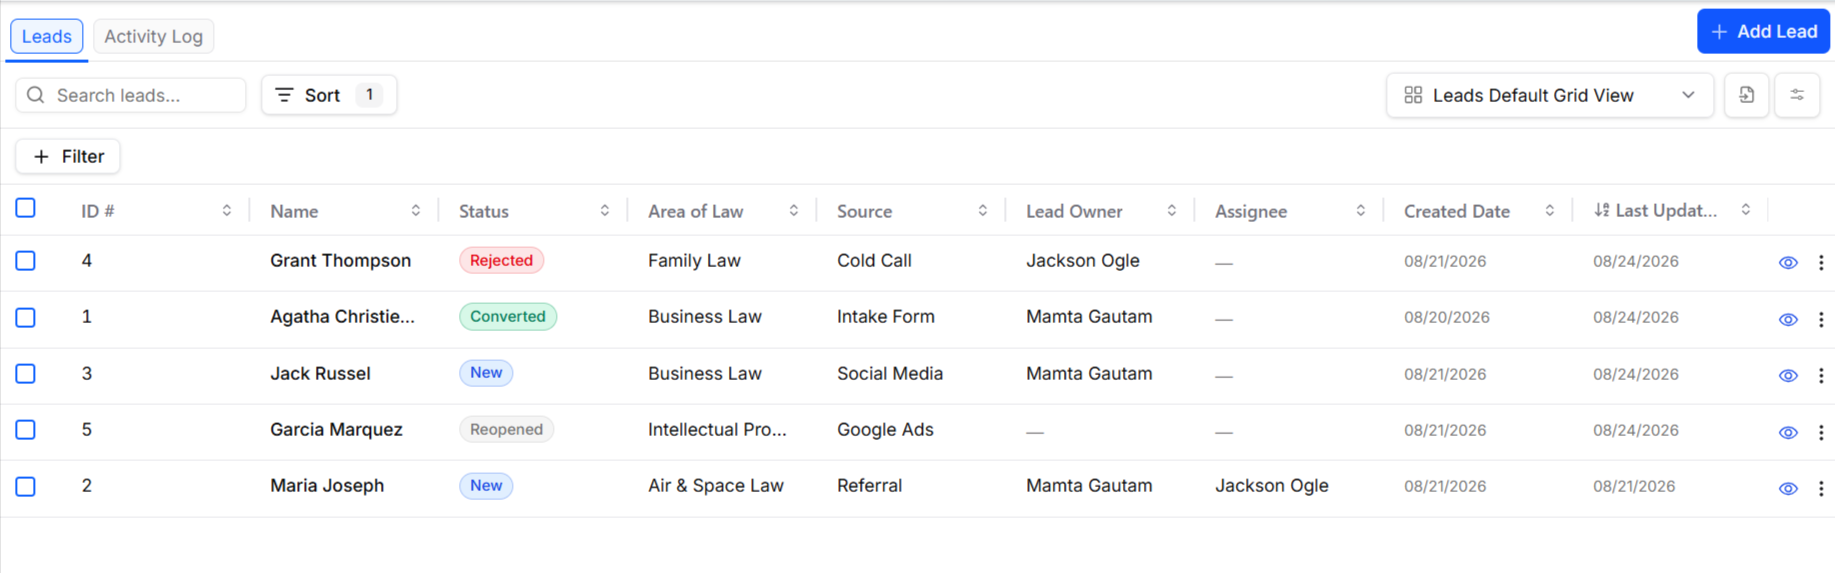
From the left navigation panel , click Intake > Leads to open your Leads list.
-
Type a name or keyword into the search bar. The grid filters in real time to leads where any displayed column contains your search text, starting from your very first keystroke. Search is case-insensitive and matches partial text — for example, typing “gar” matches “Garcia.”
-
To narrow further, click + Filter and choose from the 9 available fields: First Name, Last Name, Status, Area of Law, Source, Lead Owner, Assignee, Created Date, and Last Updated Date.
Active filters appear as removable tabs above the grid. click the x on a tab to remove that filter, or Clear all to remove every filter at once. Search and filters combine (both must match for a lead to appear). -
If no leads match your search and filters, the grid shows “No leads match your filters” with a Clear filters option.
- Search for a specific lead by name using the search box above the list.
- Filter the list — for example, by status, area of law, or lead owner — using the Filter button.
- Sort the list by any column using the Sort button.
- Customize the columns shown in the grid. Click the grid settings icon in the top right to choose which fields display — such as ID #, Name, Status, Area of Law, Source, Lead Owner, Assignee, Created Date, and Last Updated Date.
Each lead's Status — for example, New, Contacted, or In Progress — gives you an at-a-glance read on where it stands, right from the list. Update a lead's status as you work it so your whole team can see its progress without opening the record.
Take Quick Action From a Row
-
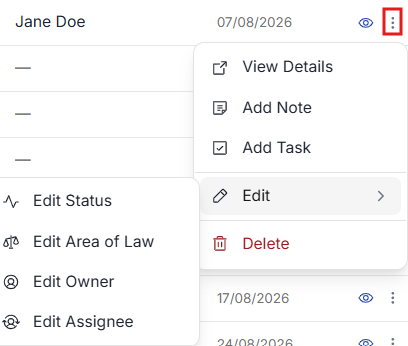
Click the three dot menu on any row to:
-
View details: Opens the lead's full Lead Overview. To learn more, read Manage an Individual Lead
-
Add Note: You can select from the category or add a general note, include a subject, enter the note itself, add labels, and create more.
-
Add Task: Add a task that needs to be done directly from the lead grid, include dates, status, priority, assignee and description.
-
Edit: Select the items you wish to change from the menu:
-
Edit Status: You can use Edit Status to select a lead's status that includes Converted, Retained, Disqualified, Referred, Rejected and more. If you want to move it back to any other active status from there, choose Reopened in the status field.
-
Edit Area of Law: From the drop-down, select the area of law.
-
Edit Owner: Use this to add more owners or remove an owner from the lead.
-
Edit Assignee: Use this to add more assignees or remove an assignee from the lead.
-
-
Delete
-
Activity Log
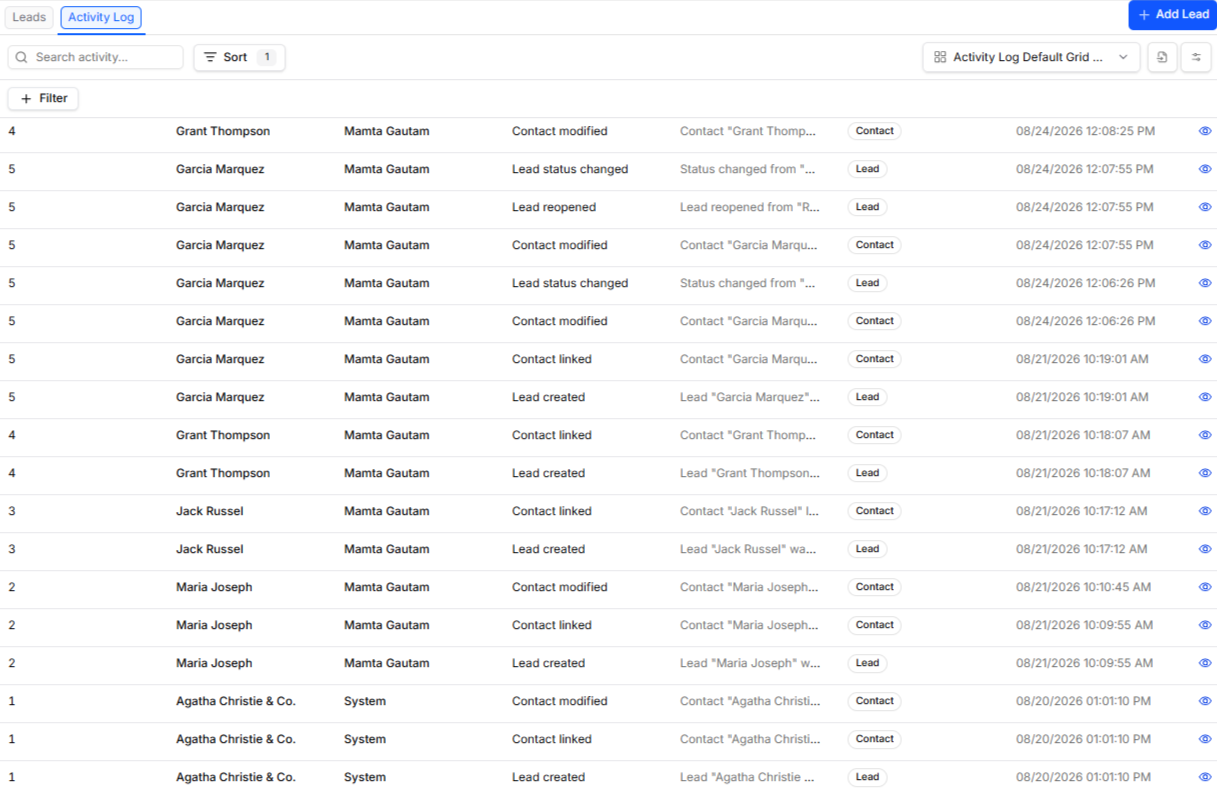
The Activity Log is a complete, chronological record of everything that has ever happened on the lead grid.You can view and filter recent activity in the leads area by lead, user, activity, description, type, and date.
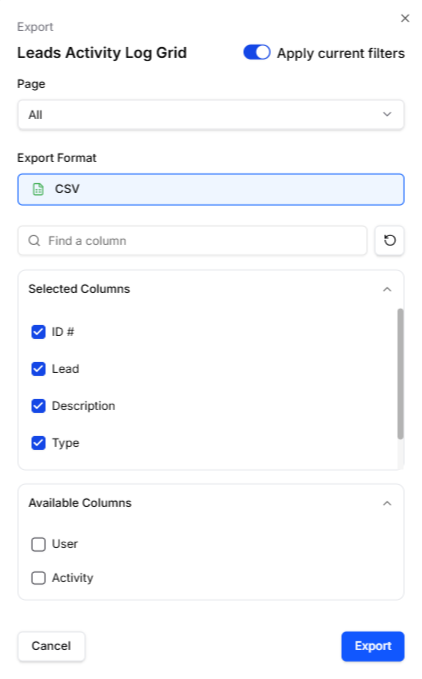
You can use the export icon in the toolbar to export in CSV format the entire activity log, all or select pages, and all or select columns.
Also read, Manage an Individual Lead
Lead Settings
Firm administrators have a single place to see the lead statuses and lead sources their intake pipeline runs on.
To access lead settings:
-
From the left navigation panel , click Intake > Leads to open your Leads list.
-
From the toolbar atop the leads grid, click Settings.
-
From the tabs on the page that opens, click either Lead Statuses or Lead Sources.
Lead Statuses shows you the statuses a lead moves through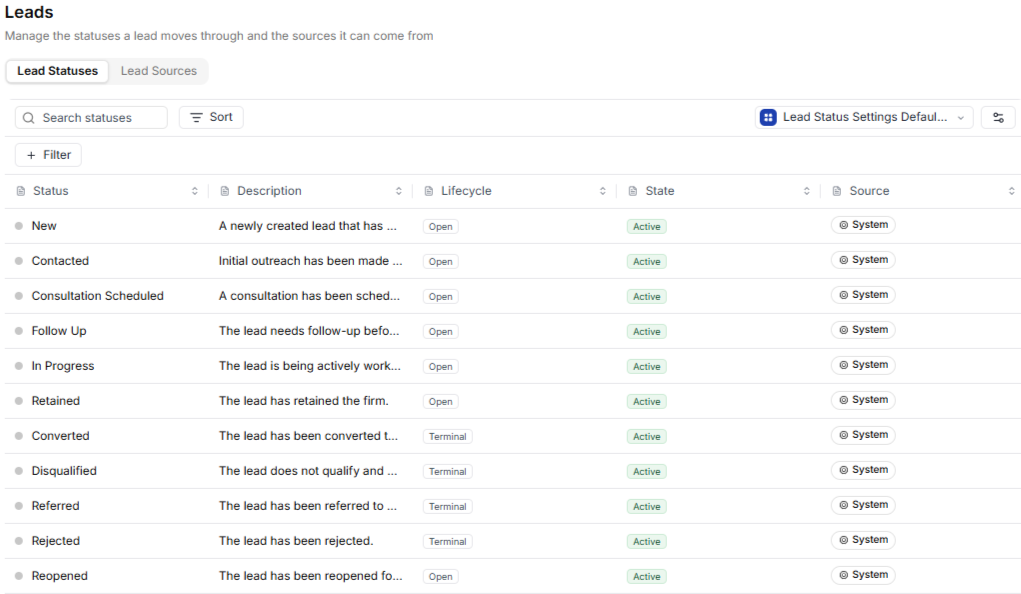 |
Lead Sources shows you the sources a lead can come from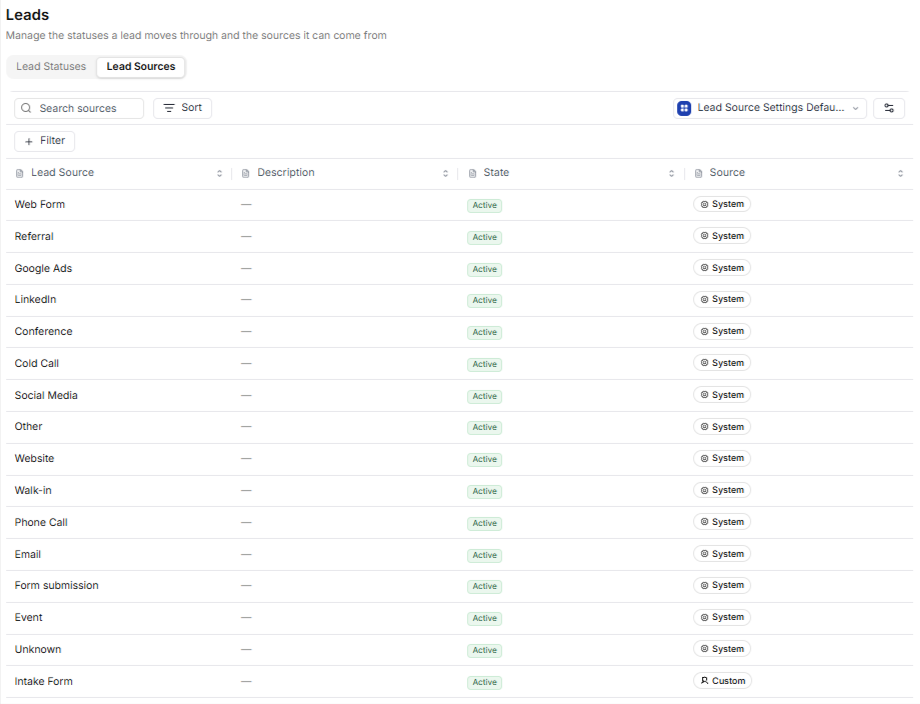 |