Create a Deposit Slip
You can use the deposit slip feature for reconciliation and record-keeping purposes.
Law firms use this feature:
- When creating a deposit slip to take to the bank.
- When batching payment transactions or trust deposit transactions to ensure the total deposit amount displayed on the reconciliation screen matches the deposit amount displayed on the bank statement.
Create a Deposit Slip
To create a deposit slip:
- From the left navigation panel, click Banking.
- On the Bank screen, double-click the bank and scroll down to its details.
- From the tabs atop the section, click Deposit Slips.
- From the toolbar atop the Deposit Slips screen, click Add Deposit Slip.
- On the Add Deposit Slips screen, from the Deposit Date field’s drop-down, click the deposit date.
- In the Ref # field, enter a reference number if desired.
- Under the Payment Type Options section, click the radio button to combine the applicable payment types: Combined Check/Wire/ACH Payments, Combined Check Payments Only, or Combined Integrated Payments (Batch).
- Select the deposits you want to combine.
Beneath and to the far right of the details window, the Total Amount field updates with each payment you select. - In the upper right corner, click Save.
The system saves your deposit slip. When you reconcile your account, your deposit amount will match your deposit slip total.
Edit Deposit Slip
- From the left navigation panel, click Banking.
- On the Bank screen, double-click the bank and scroll down to its details.
- From the tabs atop the section, click Deposit Slips.
- Select the deposit slip you wish to edit and either:
- Double click the deposit slip to edit it, or
- Single-click your deposit slip, click on the three dots at the end of the row and from the drop-down, click Edit.
- On the Edit Deposit Slip screen, make your changes and click Save.
Delete a Deposit Slip
- From the left navigation panel, click Banking.
- On the Bank screen, double-click the bank and scroll down to its details.
- From the tabs atop the section, click Deposit Slips.
- Single-click your deposit slip and click on the three dots at the end of the row.
- From the drop-down, click Delete.
- To confirm the message, Are you sure you want to delete this Deposit Slip? click Delete.
Download Deposit Slip
- From the left navigation panel, click Banking.
- On the Bank screen, double-click the bank and scroll down to its details.
- From the tabs atop the section, click Deposit Slips.
- Single-click your deposit slip and click on the three dots at the end of the row.
- From the drop-down, click Download Deposit Slip.
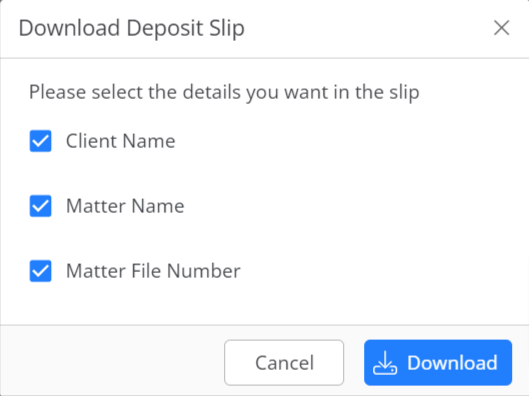
- In the Download Deposit Slip window, uncheck the boxes beside the information you do not want to include in your deposit slip.
Note: The included items are driven by the selection made under Setup > Firm Preferences > Bank Settings, or Setup > My Settings > My Preferences > Include Items in Deposit Slip Reports.

- In the lower right corner, click Download.
The system downloads the deposit slip in PDF format to your designated location.

Important to Know
- For credit card batching, only those transactions processed through our payment processing integrations will display.
- Credit card transactions do not have to have the same date, as in some situations a charge entered today may not be processed until the next business day.
- The deposit slip will not correct trust retainers received via LawPay or CosmoLexPay with differing dates.
- Voids display in this list as sometimes they occur days after the original transaction.

