Once an intake form is published, you can share forms with outside parties to collect and populate needed information.
Watch a Video
Send A Form
To send an intake form:
-
From the left navigation panel, click Intake > Forms.
-
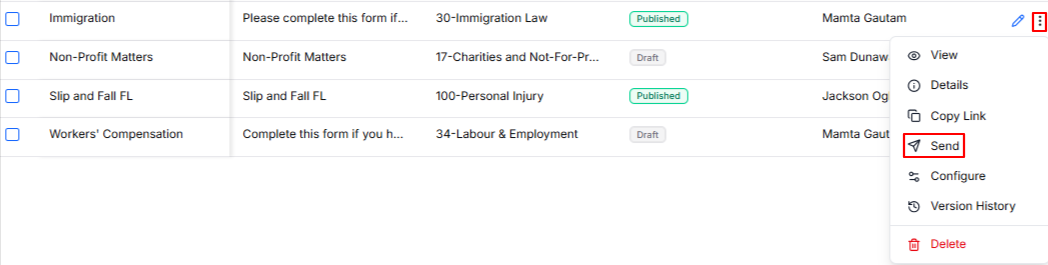
From the list of forms, select the published form you want to send and click the more actions (⋮) menu.
-
From the drop-down, select Send. The Send Form pop-up offers three ways to share:
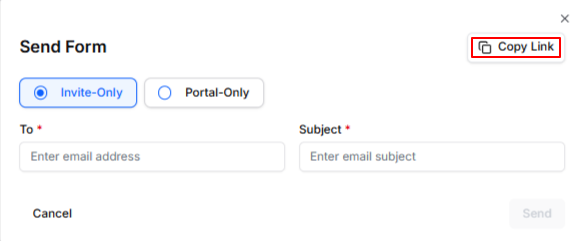
- Copy Link (public link): copy a public form link to post or send anywhere.
- Invite-Only (email invite): send the form via email to a specific recipient.
- Portal-Only (matter client portal): send the form to an existing matter via the client portal.
Copy a Public Link
A public link is the fastest way to share an intake form: good for your website, a broad email, or a text message.
- From the list of Forms (Intake > Forms), find the form you want to share, click its more actions menu, and select Copy Link.
- Alternatively, select Send from the more actions menu and in the top-right corner of the Send Form pop-up, click Copy Link.
- The form's public link is now automatically copied to your clipboard and can be pasted in the communication of your choosing.
System Email
You may wish to send the Intake Form as an email to any recipient directly from your system.
- Open the form's more actions menu and select Send.
- Choose Invite-Only.
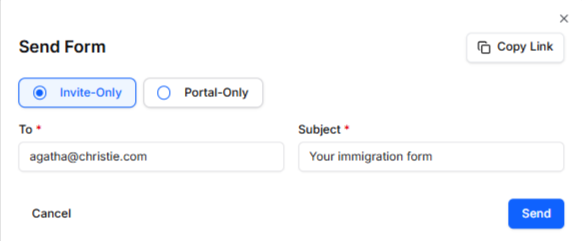
- Enter the recipient's email address in the To field. A valid email is required.
- In the Subject field, enter a subject line for the email invitation (required).
- Click Send. A confirmation message appears in the top-right corner of the screen.
Share Via Client Portal
Use this option to share a form with an existing matter that has the client portal enabled.
- Open the form's more actions menu and select Send.
- Choose Portal-Only.
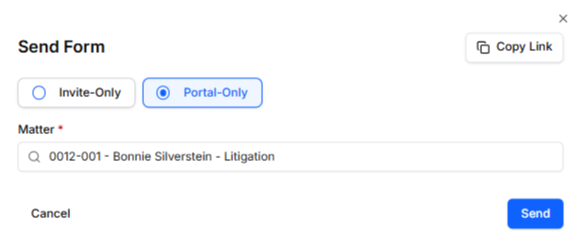
- Select a Matter with client portal access from the searchable list (required).
- Click Send. The form becomes available inside that matter's client portal.
-
- Choose Share via Client Portal.
- Select Share. The client will then be able to access the form from their portal by navigating to the top right of their client portal page.

Once they select the form from the drop-down, they can begin filling it out and submit.
By using any of these share options, the form will now be listed with a status of

What Your Recipient Sees
However you share it, your recipient opens a clean, branded form:
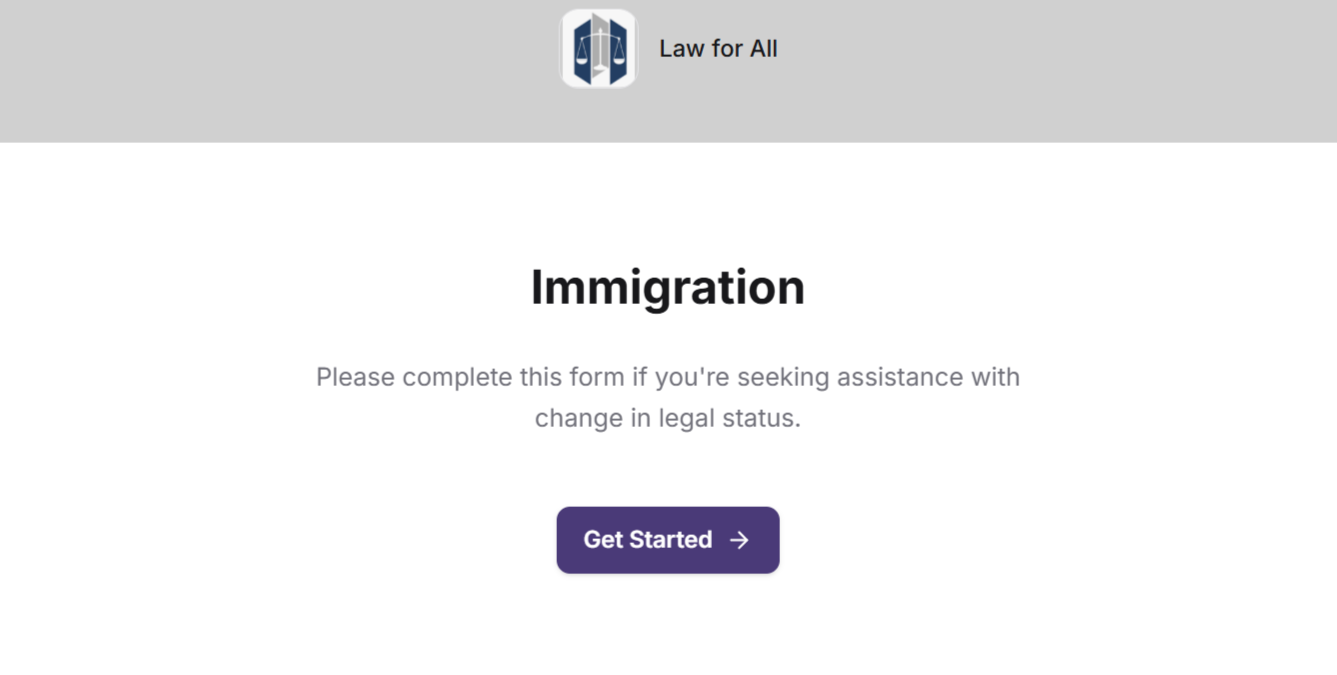
- A welcome page with your firm's branding, along with the Form Name and Description.
- One section per page, with a progress bar and Next/Back buttons.
- Validation that keeps them from skipping required answers.
- A final confirmation step after the last page, where they verify their name and email before submitting.
- A thank-you page once they submit.
- After submission, a confirmation email with a PDF copy of the completed form.
The form works on both desktop and mobile. Public or email links open directly, recipients don't need to log in first.
Notifications
Firm Users
Any notifications to the firm will be sent to the users that were configured in the settings section of the form. To configure firm notifications:
-
After navigating to Intake > Forms, click the 3-dot menu next to a form and select Configure.
-
In the Form Settings pop-up that opens, click the Publish tab.
-
From the Notifications drop-down, select which firm user(s) should get notified when the form is submitted.
-
Once configured, click Update.
Form Recipient Notifications
The form recipients will be notified when a form is available in the following way:
-
Invite-Only (email invite), the address entered in the "To" field will receive a message with a link to access the form.
-
Portal-Only (client portal), the form becomes automatically available when the client logs into their portal account.
-
Copy Link (public link), there is no recipient to notify since the share occurs outside the platform.
Regardless of share method, once the form is completed, the lead/recipient gets a confirmation email with a PDF copy of their submitted answers.
What Happens After a Form is Submitted
Once a recipient has submitted a form, the system automatically:- Saves the submission and all answers.
- Notifies the user(s) selected in the form's publish settings, if applicable.
- Records the submission in the Forms Activity Log, so you can track it and review the recipient's answers at any time.