The application's Intake Form Builder has a Create with AI tool which helps you build a complete first draft of your intake form in seconds, so you never have to start from a blank canvas.
Watch a Video
Create an AI Form Template
To create an intake form using AI:
- From the left navigation panel, click Intake > Forms.
You will see a list of forms displayed on the screen. - From the tabs atop the screen, click Add Form.
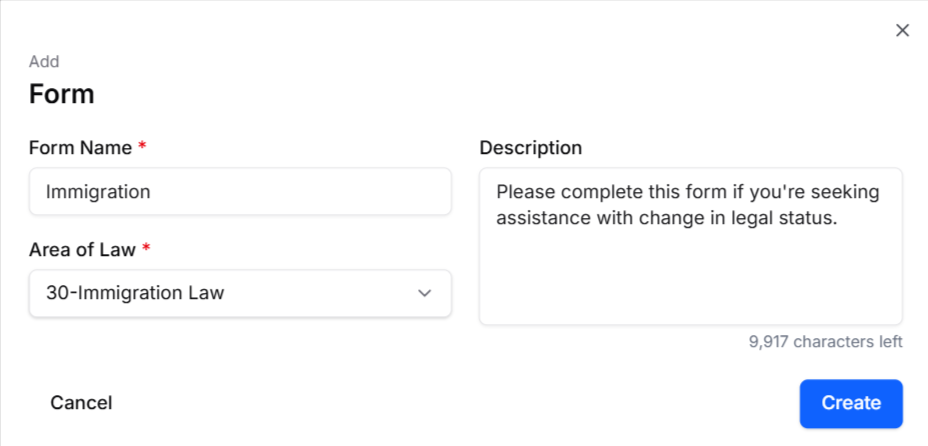
- In the Form window that opens:
- In the Form Name field, enter the name of the form. The title will appear at the top of the form and will be visible to the form recipients
- In the Description field, enter the description for the form. The description will appear at the top of the form under the title and will be visible to the form recipients.
- In the Area of Law drop-down, select the area of law you would like to associate with this form template. This can help you to organize your library of form templates.
- Once done, click Create.
The new form opens in the builder with the Form Name and Description at the top of the form. - In the top right of the form builder, click Create with AI. You can also click on Use AI to generate form for you.
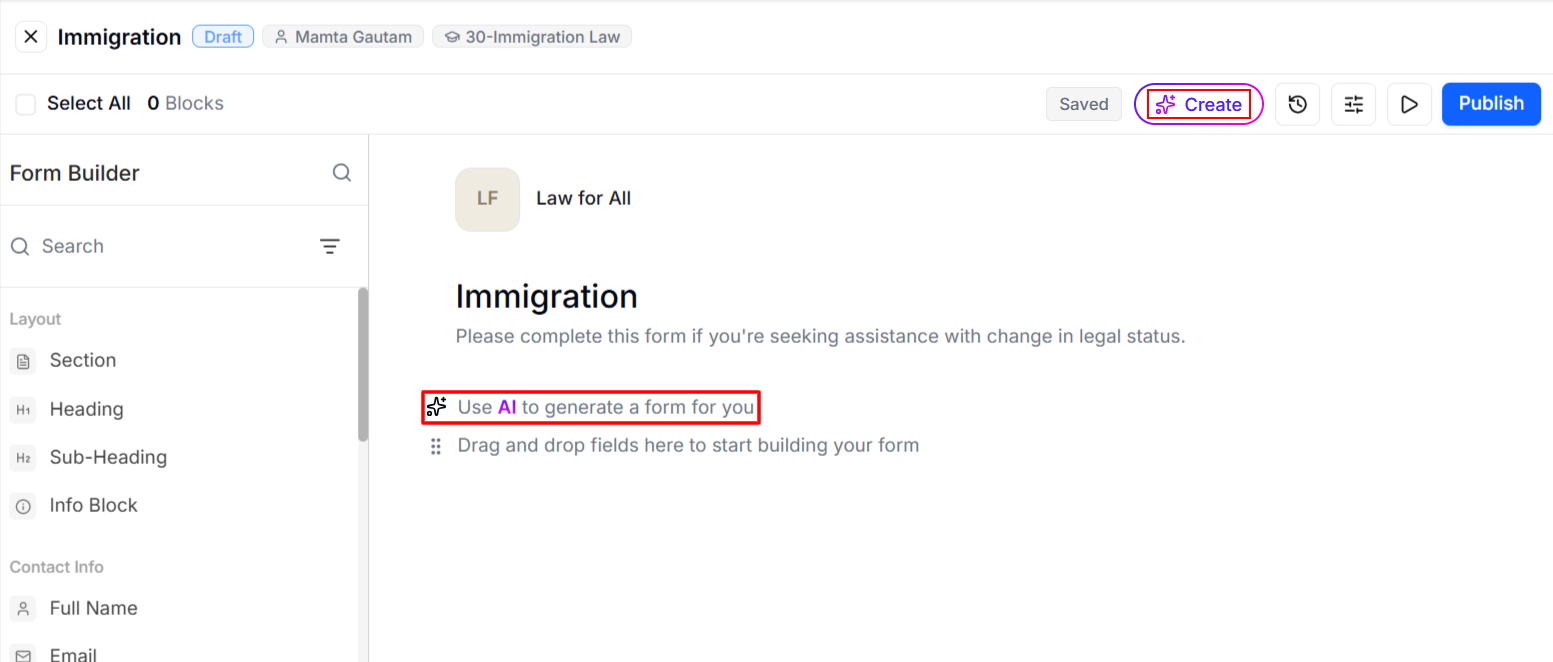
- In the screen that opens, describe the form you want.
For example: “Create an intake form for lawful permanent resident applying for naturalization.”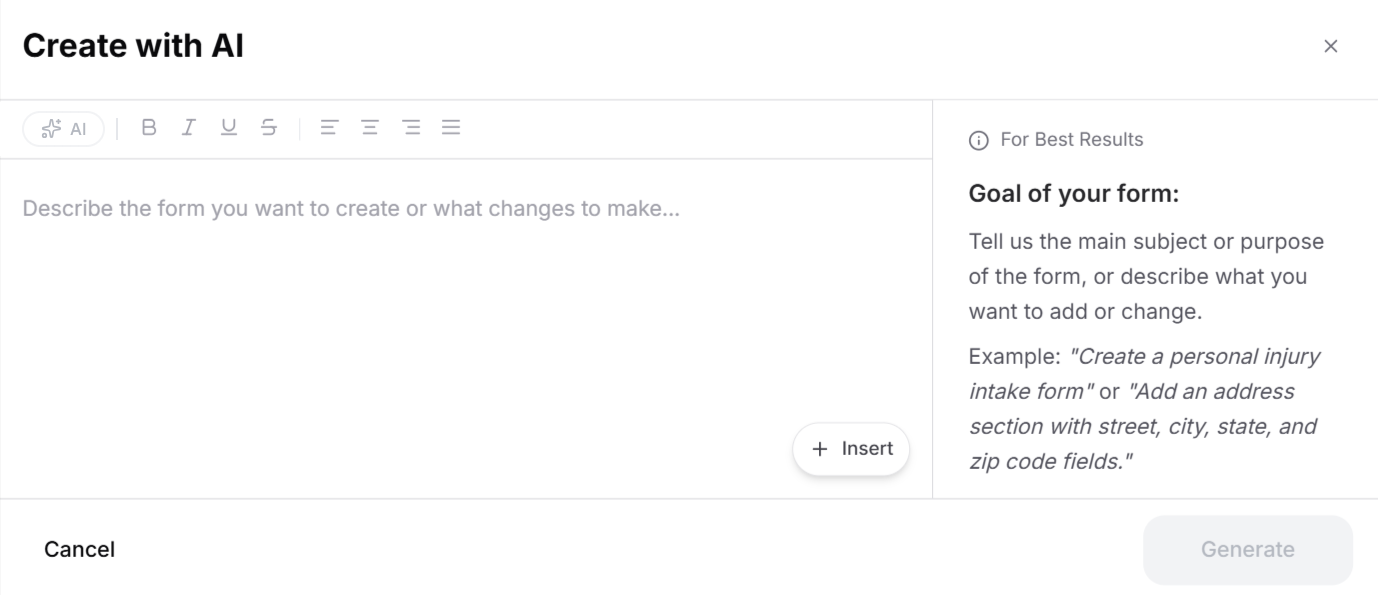
- Click Generate.
AI builds a structured draft form with sections and relevant questions. - The builder has three main areas plus a toolbar:
- Field library (left) — lists every available field type, grouped by category.
- Canvas (center) — the form itself, where you add and arrange fields.
- Section navigator (right) — a jump-list of the form’s sections; click any section to jump there on the builder.
- Toolbar (above) — includes a live completion-time estimator plus buttons for: Create/Add with AI, History, Settings, Preview, and Publish.
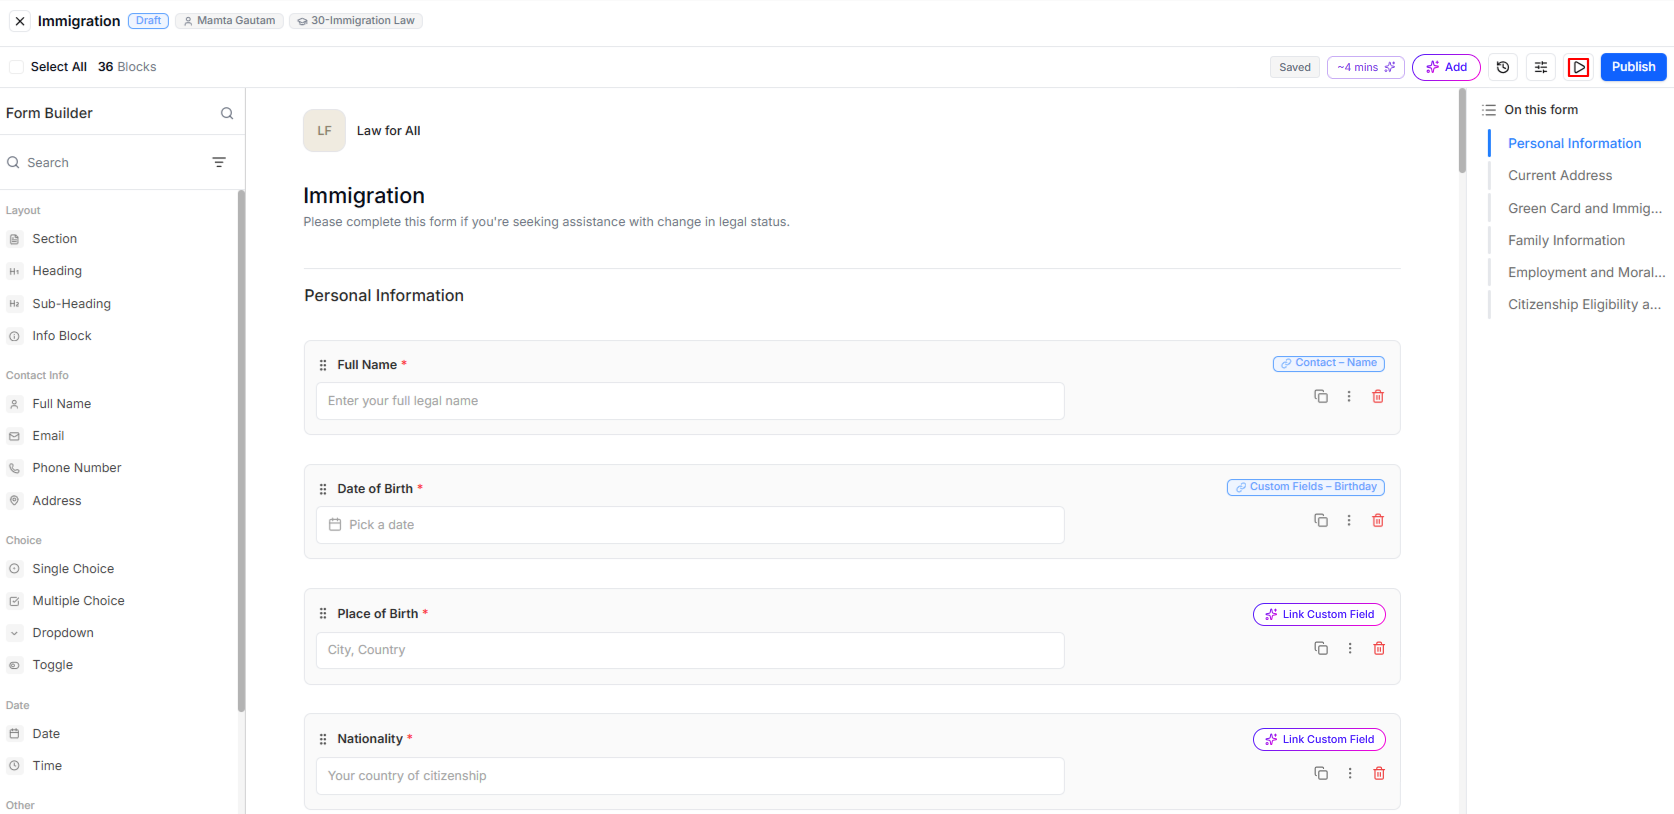
- Review the generated form and adjust it using the form builder.
Convert an Existing Form Using AI
To convert an existing form in your system to an editable intake form using AI:
- From the left navigation panel, click Intake > Forms.
- From the tabs atop the screen, click Add Form.
- In the Form window that opens:
- In the Title field, enter the name of the form. The title will appear at the top of the form and will be visible to the form recipients
- In the Description field, enter the description for the form. The description will appear at the top of the form under the title and will be visible to the form recipients.
- In the Area of Law drop-down, select the area of law you would like to associate with this form template. This can help you to organize your library of form templates.
- Once done, click Create.
- In the form builder, click Create with AI in the top-right toolbar.
- Click + Insert to open Attach Document, then drag in a file or click to upload.
You can upload PDF, DOC, and DOCX files, up to 5 files of a total of 100 MB.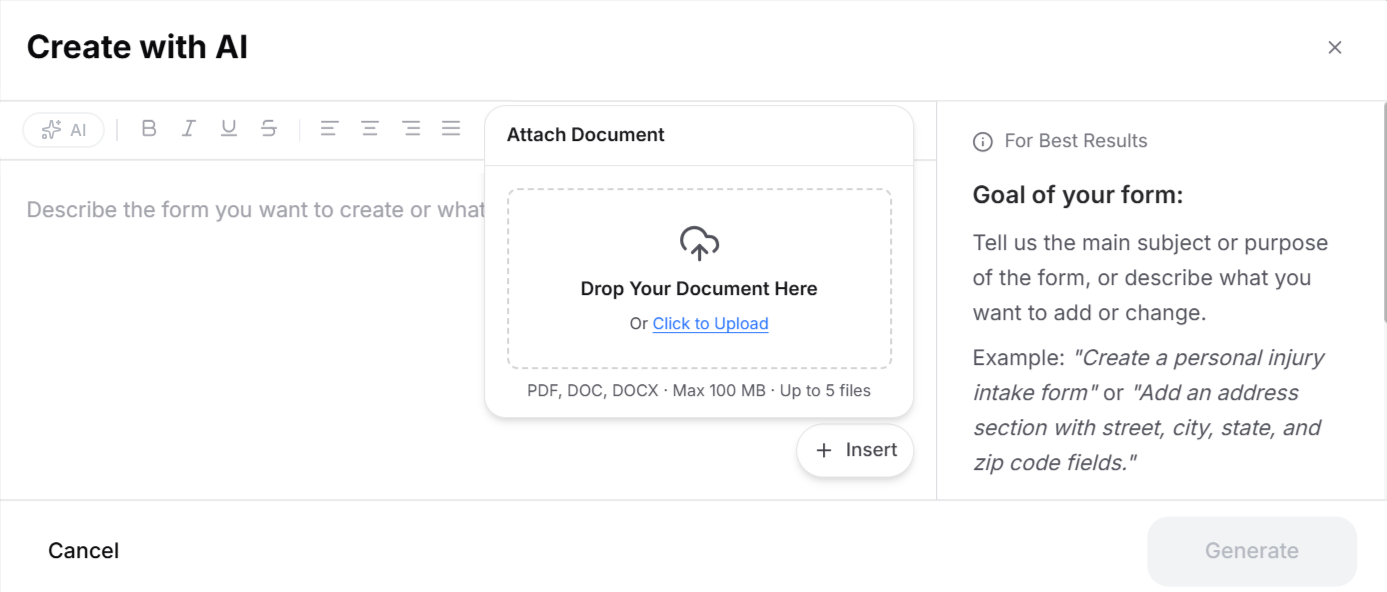
- Enter a prompt describing your form. AI uses your description as context, scans the document to identify its labels and input fields, and rebuilds them as editable fields in the builder.
- Click Generate.
Note: If AI can't complete a request, you'll see a clear message and can re-run your prompt.
Review and Refine the Generated Form
Once AI has drafted your form, review it in the builder just as you would a form you built yourself. You can add, edit, arrange, and configure fields; organize the form into sections; and map form fields to system contact and custom fields. For a full walkthrough of the builder, see Create an Intake Form Manually.
Two AI-powered tools help you refine the form as you review:
- AI Completion Estimator — the completion-time estimator in the top-right toolbar (next to Add with AI) predicts how long it will take a recipient to fill out and submit the form. It updates live as you add and remove fields, so you can gauge the effort you're asking of recipients and keep the form a reasonable length.
- AI Language Polisher — while editing field labels and placeholder text, click the purple wand icon to open the AI polisher. Type your own prompt or choose from options such as Improve writing, Fix grammar, Make shorter, Make longer, Simplify language, Continue writing, and Translate. AI displays suggestions based on your selected text, and you can accept, edit, retry, or dismiss each one.
- To configure any field on the form click the field to select and edit it right on the canvas.
- Label — click the field’s label text and type to rename it.
- Placeholder — click into the selected field’s input area (if applicable) to type an example answer hint for recipients to see. You can also set a placeholder from Advanced Edit in the field’s three-dot menu (⋮).
- AI Link to Custom Field — click the purple Link Custom Field label in the top-right corner of the field to have AI auto-map it to a system contact or custom field.
- Field actions — on the right, each field shows Duplicate (double-square icon), a three-dot menu (⋮), and Delete (red trash bin).
- The three-dot menu (⋮) contains:
- Required — makes the field mandatory. A red asterisk (*) is added to the field label, and recipients can’t submit the form without completing it.
- Link to Custom/Default Field — manually map the field to a system contact or custom field (see section 9).
- Advanced Edit — open additional field settings, such as placeholder text.
Configure Form Branding and Publishing Settings
Form branding and publishing settings both live in the Form Settings pop-up.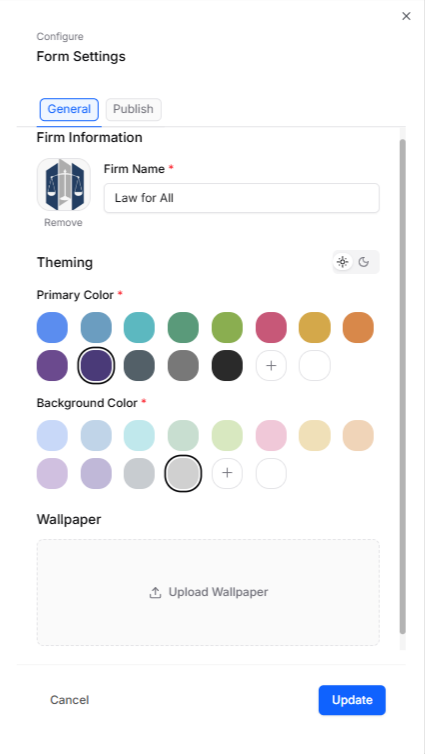
To configure the form's settings:
- Click the Settings button (sliders icon) in the top-right toolbar inside the builder. The pop-up has two tabs.
- On the General (Branding) tab, configure:
- Firm Name — the firm name shown at the very top of the form.
- Logo — click the logo square to upload an image (JPG or PNG). If you don't add one, the system uses the initials from the Firm Name as a placeholder logo.
- Primary and Background colors — pick from the available color swatches or add a custom color.
- Wallpaper — upload a background image for your form. An uploaded wallpaper overwrites any selected background color.
- On the Publish tab, configure:
- Expire — choose Never, or After a set number of days. The expiration applies based on when the form was sent to each recipient. For example, if a form is set to expire after 7 days, recipients can only access it during that 7-day window. If you don't set an expiration, the form won't expire.
- Notifications — select the NextGen user(s) who should be alerted when someone submits the form.
- Click Update to save changes to settings from both tabs.
Preview and Publish a Form
Before sharing, confirm the form looks and behaves exactly as your recipients will experience it.
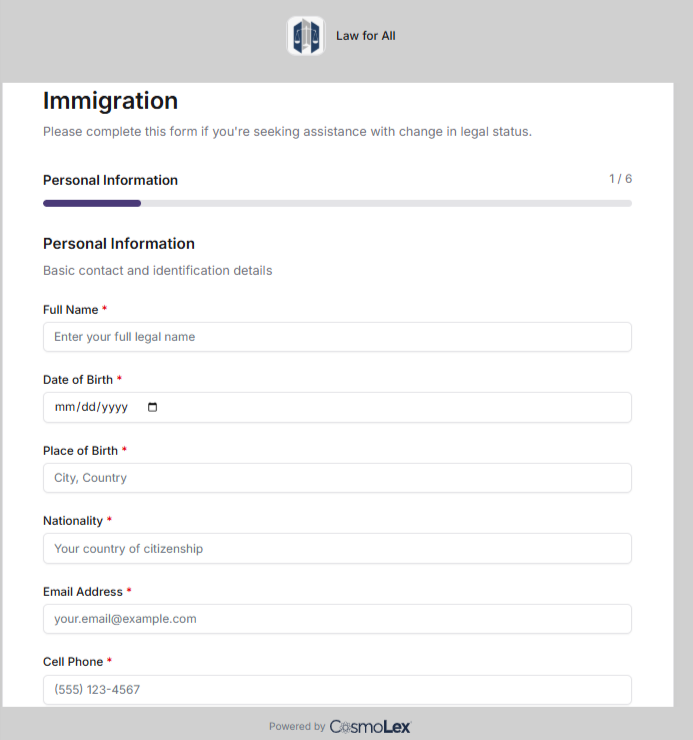
- Click the Preview (play) button in the toolbar to view the form's sections as navigable pages. To return to the builder, click Edit in the top-right corner.
- When the form is ready, click Publish in the builder toolbar.
The form's status changes from Draft to Published, and it can now be sent and shared.