If you have not yet sent out a form, see Send an Intake Form.
The Intake > Forms screen is your central place to manage the forms your firm has built and track the forms you've shared. Use the Forms tab to manage each form, and the Activity Log tab to review outstanding intakes and see what recipients have submitted.
Watch a Video
Manage Your Forms
From the left navigation panel, go to Intake > Forms. You first land on the Forms tab, which lists every form your firm has built. Each row shows the form's Name, Description, Area of Law, Status (Published or Draft), and who created it.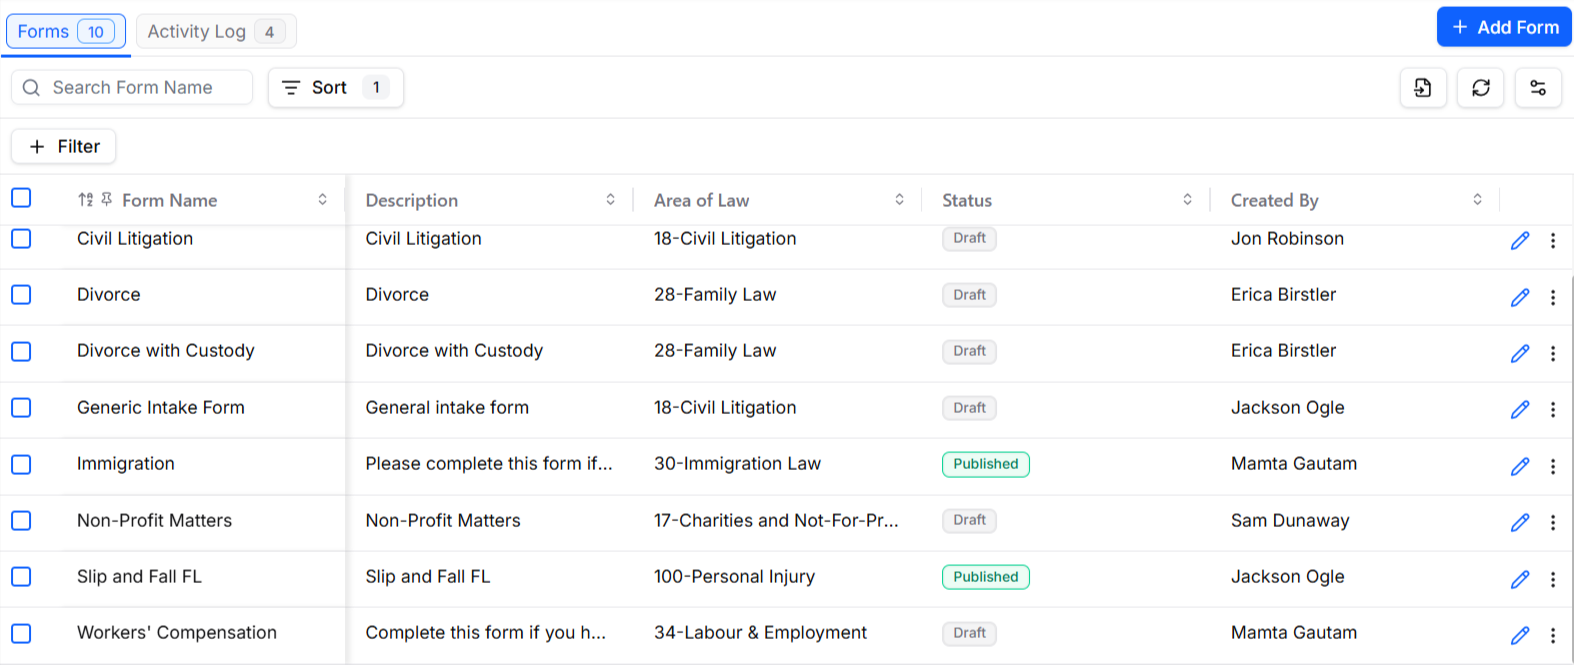
1. To find a form, use the toolbar options above the list:
- Search by form name.
- Sort the list by any column.
- Filter to narrow the list — for example, by Status or Area of Law.
- Additional toolbar icons on the top-right let you export the list, refresh it, and choose which columns to display.
2. To manage an individual form:
- Click the pencil icon on the form's row to open it in the builder, where you can review and make changes.
- Click the three-dot menu at the end of the row for more actions.
3. For a published form, the more actions menu includes:
- View — opens the form link in a browser tab so you can review how recipients see and interact with the form.
- Details — update the form name, area of law, and/or description.
- Copy Link — copy the form's public share link.
- Send — send the intake form using any share method. See Send an Intake Form.
- Configure — open the Form Settings pop-up to update branding and publishing settings.
- Version History — view the form's history without going into the builder.
- Delete — delete the intake form. This action cannot be undone.
4. For a draft form, the available actions are Details, Configure, Version History, and Delete.
Access the Activity Log
The Activity Log keeps track of the forms you've shared and the submissions received. To access the Activity Log:- From the left navigation panel, go to Intake > Forms.
- From the tabs atop the grid, select the Activity Log.
The tab shows a badge with the number of logged activities.
Read the Activity Log
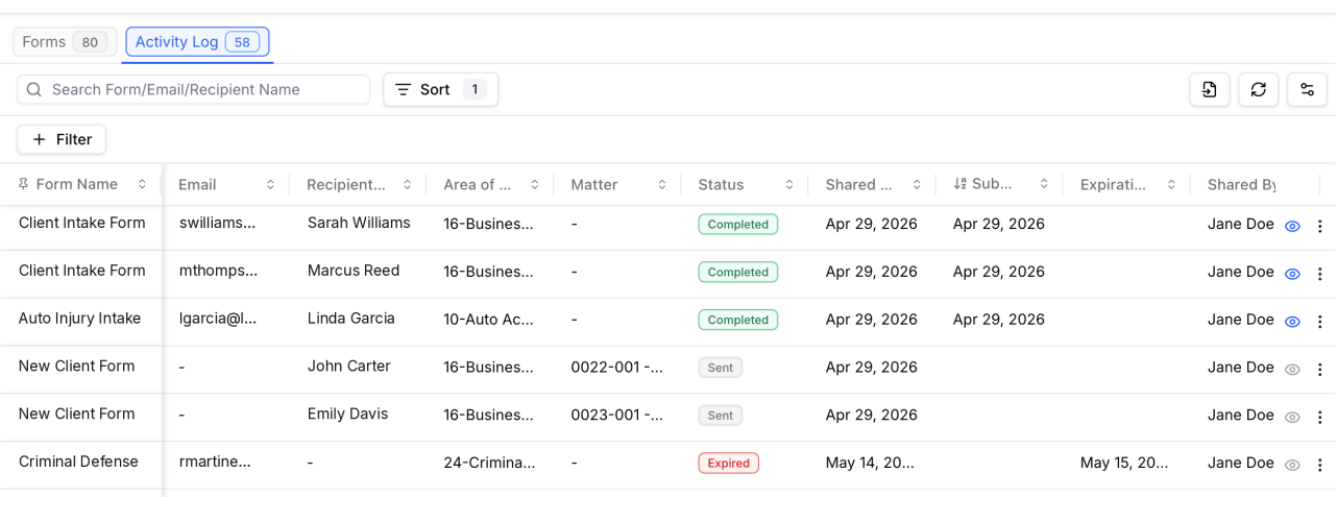
Each row represents a shared form or submission. The columns appear left to right:
| Column | What It Shows |
|---|---|
| Form Name | The specific form that was shared. |
| |
| Recipient Name |
|
| Area of Law | Populated from the shared form's Area of Law. |
| Matter | The linked matter (populated for client-portal shares only). |
| Status | The status of the shared form (Sent, Expired, Completed). |
| Shared Date | When the form was sent. Blank for public link rows. |
| Submission Date | When the form was completed. Date only; blank for rows that haven't been submitted (Sent and Expired). |
| Expiration Date |
|
| Shared By | The user who sent the form. Public link submissions show "Public Link" instead of a user's name. |
Understand Form Statuses
Each shared form shows one of three statuses:
- Sent (gray) — the form has been shared but not yet completed.
- Completed (green) — the form has been completed and submitted by the recipient.
- Expired (red) — the form expired before it was completed.
Track Public Link Submissions
When someone completes a form that was shared via Copy Link (public link), a row is added to the Activity Log at the time they submit — so you have visibility into every submission regardless of how the form was shared.
- The row shows Completed status, with "Public Link" listed in the Shared By column.
- Form Name, Email, Recipient Name, Area of Law, and Submission Date are filled in from the submission.
- Matter, Shared Date, and Expiration Date stay blank, since a public link isn't tied to a specific matter or a send date.
Find and Filter Activity
To find specific activity, use the toolbar options above the logs:
- Search by form name, email, or recipient name.
- Sort any column ascending or descending.
- Filter to narrow the results — for example, by status or submission date.
- Additional toolbar icons on the top-right let you export the page, refresh it, and choose which columns to display.
View Submissions
You can view a recipient's submitted answers directly from the Activity Log.
To view a submission:
- Find the submission's row in the Activity Log. The View (eye icon) appears on every row and becomes enabled once the form has been Completed.
- Click the View icon to open the form and review the recipient's submitted answers.
The row's more actions menu also offers:
- Copy Link — copy the form's public share link.
- Details — open a view-only pop-up showing the shared form's name, area of law, and description.