You can create calendar events, invite participants, and link events to matters. You can add an event from the Quick Action menu or add, edit, delete events from a matter's details or the calendar.
Watch a Video
From Matter Details
Add a Calendar Event
To add a calendar event from Matters:
- From the left navigation panel, click Matters.
- On the Matters screen, either double-click the matter or single-click it, then click on the three dots at the end of the row and from the drop-down, click View.
- From the tabs atop the Matter Summary section, click Matter Management.
- From the tabs on the Matter Management section, click Calendar.
- From the toolbar atop the Calendar screen, click Add Event.
The Add Event panel will display to the right, click on the drawer arrow to the top left to expand it to the full screen.
Add Event Page Fields and Descriptions -
Field Description Event Title Enter the event name. From and To Use the drop-down fields to select the event's date range and time or check the All Day Event box if applicable. Mark this Event as Private Marking as private blocks other users from viewing this event. Even if a user has permission to view your calendar, they will not be able to view this event. Link to Matter Unchecking the box will allow you to link the event to a different matter. You can enter the matter name in the field below. Billing Status From the drop-down, click the applicable status. Note: If you mark this event as Billable, you will see the checkbox, Create timecard for this event. If you check the box the system will automatically create a timecard for this event based on the rate of the Event Owner selected.
Event Owner From the drop-down select from the list of firm users. Invite Attendees Enter the email addresses for event attendees. From the drop-down, click the appropriate match. If no potential matches display, click the + icon to add the email address to the event recipient list.
Note: If you added an attendee in error, you can click the x mark to remove them.
Send invitation emails to attendees Check the box if you wish to send an email inviting the attendee. Custom Labels Type your New Label to add event labels or select one from the list, if desired. Add Location Under the section, enter the location, if desired. Add a Reminder Click on the + icon, to add a reminder, if desired. Use the drop-downs and entry field to add the desired time intervals. Description Enter a description, if desired. - In the upper right corner, click Save.
The system saves the event and emails the invitees. If you linked the event to a matter, it displays under Matter Details.
Learn how to Create a Timecard for the Event added by you.
Edit a Calendar Event
To edit a calendar event:
- From the left navigation panel, click Matters.
- On the Matters screen, either double-click the matter or single-click it, then click on the three dots at the end of the row and from the drop-down, click View.
- From the tabs atop the Matter Summary section, click Matter Management.
- From the tabs on the Matter Management section, click Calendar.
- On the Calendar screen, either double-click the calendar event, or single-click and click on the three dots at the end of the row and from the drop-down, click Edit.
- On the Edit Event screen, make your updates.
- In the upper right corner, click Save.
The system saves your updates.
Delete a Calendar Event
To delete a calendar event:
- From the left navigation panel, click Matters.
- On the Matters screen, either double-click the matter or single-click it, then click on the three dots at the end of the row and from the drop-down, click View.
- From the tabs atop the Matter Summary section, click Matter Management.
- From the tabs on the Matter Management section, click Calendar.
- On the Calendar screen, either double-click the calendar event, or single-click and click on the three dots at the end of the row and from the drop-down, click Delete.The Delete Event message box reads: Are you sure you want to delete selected Event?
- Click Yes.
The system deletes the event.
Export a Calendar Event
To export a calendar event:
- From the left navigation panel, click Matters.
- On the Matters screen, either double-click the matter or single-click it, then click on the three dots at the end of the row and from the drop-down, click View.
- From the tabs atop the Matter Summary section, click Matter Management.
- From the tabs on the Matter Management section, click Calendar.
- On the Calendar screen, from the toolbar, click the export icon.

- In the Export window that opens:
- Toggle off the button if you do not wish to Apply current filters
- Select the page you wish to export from Current or Custom. If you choose custom, you can define the page range.
- The calendar exports in CSV format
- Select the columns from the list
- Once you have made your selections, click Export.
Your calendar will be downloaded to your machine.
From Calendar
Add a Calendar Event
To add a calendar event:
- From the left navigation panel, click Calendar.
- From the tabs atop the Calendar screen, click the gear icon for Settings.
- From the Select View drop-down, click on the radio button to select either Calendar or Details.
- The Calendar tab displays your events in a calendar grid with Day, 5 Days, Week and Month view options. The Details tab lists your calendar events as line items.
- From the toolbar, click Add Event.
- Complete the fields on the Add Event screen and click Save.
The system saves the event and emails the invitees. If you linked the event to a matter, it displays under Matter Details.
Edit a Calendar Event
To edit a calendar event:
- From the left navigation panel, click Calendar.
- From the tabs atop the Calendar screen, click the gear icon for Settings.
- From the Select View drop-down, click on the radio button to select either Calendar or Details.
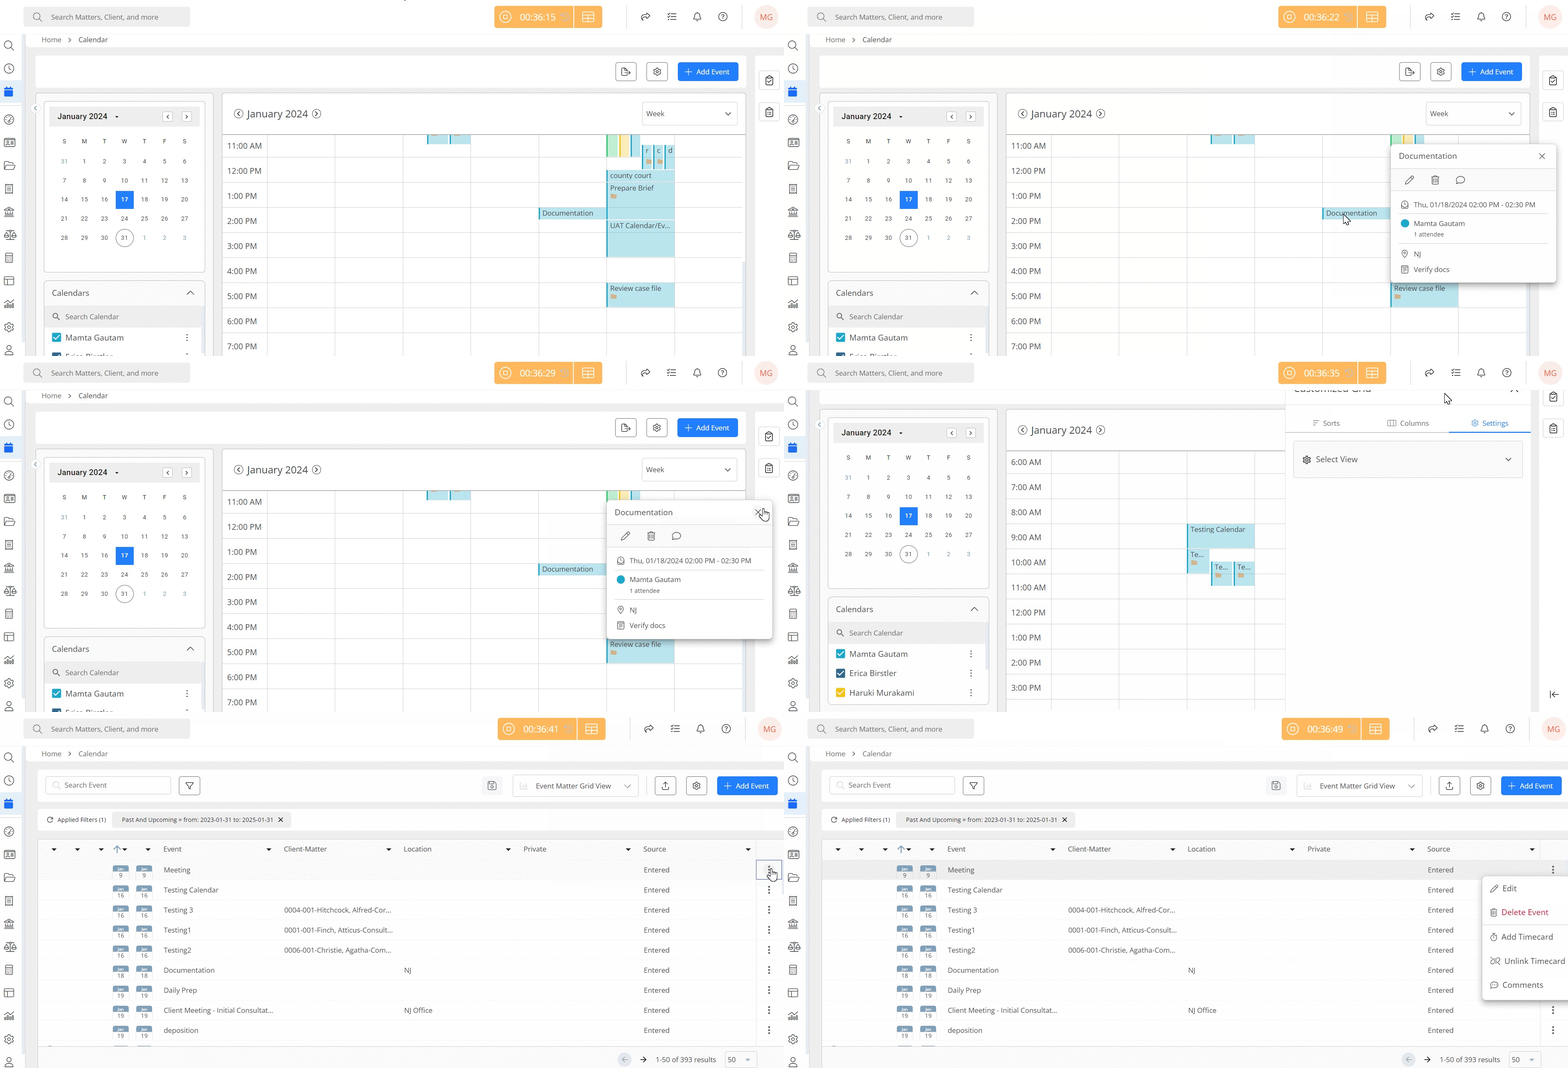
- The Calendar tab displays your events in a calendar grid with Day, 5 Days, Week and Month view options. Click on the event and in the modal that opens, click Edit. On the Edit Event screen, make your updates and click Save.
- The Details tab lists your calendar events as line items. You can either edit events:
- Individually: Scroll to the three dots at the end of the event row and from the drop-down, click Edit.
- In Bulk: Check the boxes beside the events you wish to edit and from the toolbar above the grid, click Edit.
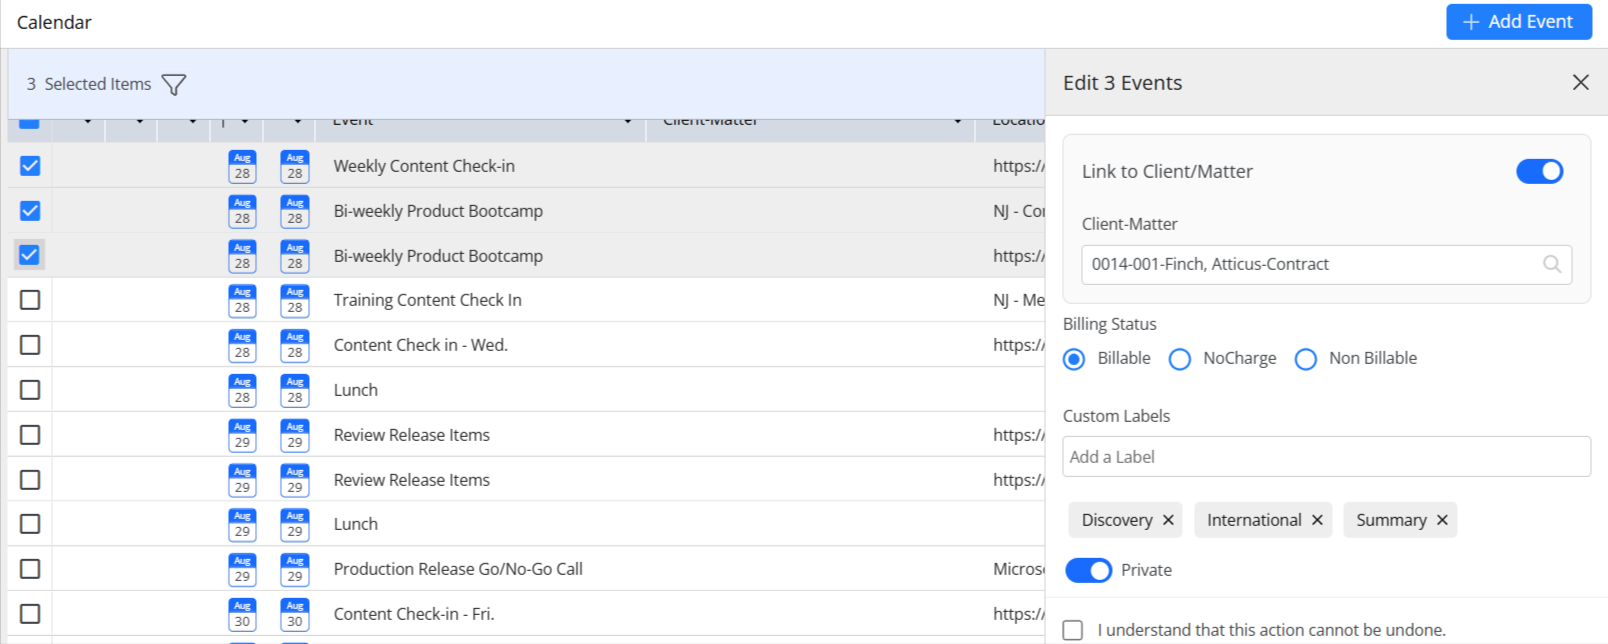
- In the upper right corner, click Save.
The system saves your updates.
Delete a Calendar Event
To delete a calendar event:
- From the left navigation panel, click Calendar.
- From the tabs atop the Calendar screen, click the gear icon for Settings.
- From the Select View drop-down, click on the radio button to select either Calendar or Details.
- The Calendar tab displays your events in a calendar grid with Day, 5 Days, Week and Month view options. The Details tab lists your calendar events as line items.
- Calendar View: Click on the event and in the modal that opens, click Delete.
- Individually: Scroll to the three dots at the end of the event row and from the drop-down, click Delete.
- In Bulk: Check the boxes beside the events you wish to edit and from the toolbar above the grid, click Delete.
- The Delete Event message box reads: Are you sure you want to delete selected Event? Click on the event and in the window that opens, click Delete.
- Click Yes.
The system deletes the event.
Export a Calendar Event
To export a calendar event:
- From the left navigation panel, click Calendar.
- From the tabs atop the Calendar screen, click the gear icon for Settings.
- From the Select View drop-down, click on the radio button to select either Calendar or Details.
- From the toolbar, click the Export icon.
- If you export the Calendar view, your calendar will be downloaded to your machine.
- If you export Details, you can choose to:
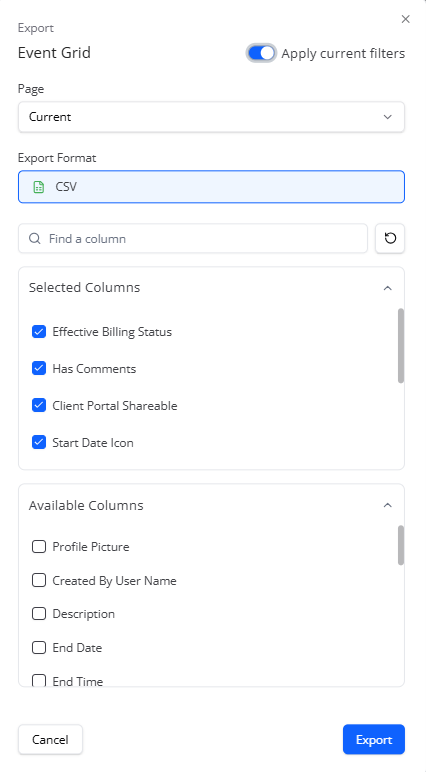
- Toggle off the button if you do not wish to Apply current filters
- Select the page you wish to export from Current or Custom. If you choose custom, you can define the page range.
- The calendar exports in CSV format
- Select the columns from the list
- Once you have made your selections, click Export.
Your calendar will be downloaded to your machine.
Important to Know About Recurring Events
- The application user's time zone must match the integration calendar's time zone.
- When linking to a matter, you can only assign one matter to the whole recurring event.
- The Share via Client Portal option cannot be changed once you assign it to a recurring event. If you need to change that setting, you must delete the event and add a new event.
- Comments are available under Action for recurring events.
- Billing Status is not available for recurring events.
- Recurring events from the same series cannot be updated to fall on the same date.
- Updating an event with all events will impact the entire series except those events which you previously edited.
- Existing recurring events will not automatically sync.
View Another User's Calendar
The administrator (main user) can view all user's calendars.
Important: Only admin users can grant calendar access between other firm users.
To access another user's calendar:
- From the left navigation panel, click Calendar.
- The Calendar tab displays your events in a calendar grid with Day, 5 Days, Week and Month view options.
- In the left column under Calendars, check the boxes beside calendars you want to view.
The system grants calendar access.
Calendar Entries Not Displaying
There are two potential causes for an event not displaying under Calendar.
- The event's start and end times are identical. If that happens, the events will display only in list view from these locations:
-
- Calendar > Details
- Matter Details > Calendar
- If the start and end time is not the issue, then determine whether calendar integrations are in use and troubleshoot them.