Soft costs are also known as indirect costs or cost recovery. They are "in-house" items generally considered part of your firm's overhead, a portion of which may be attributed to your client.
Watch a Video
Examples include:
- Photocopies
- Printing
- Long-distance phone calls
As a firm, you need to decide how to seek reimbursement for these items. You may choose to absorb the cost and not charge your client, add a % fee to every invoice, or itemize these charges. Soft cost entry is meant for those who wish to itemize. If you wish to charge a % fee, you can add an overhead charge.
Add a Soft Cost
You can add a soft cost from:
- Use the Keyboard Shortcuts (S key on the keyboard)
- Mobile App
- Global Add Shortcut
- Matter Landing Page
- Matter Details
- Billing
Global Add Shortcut
-
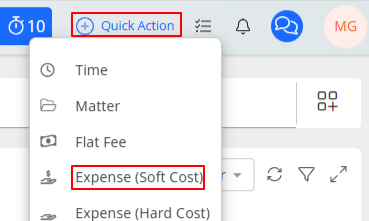
- From atop the right side of the screen, click the Quick Action (plus sign).
- From the drop-down that displays, click Expense (Soft Cost).
The Add Expense screen opens.
Matter Landing Page
-
- From the left navigation panel, click Matters.
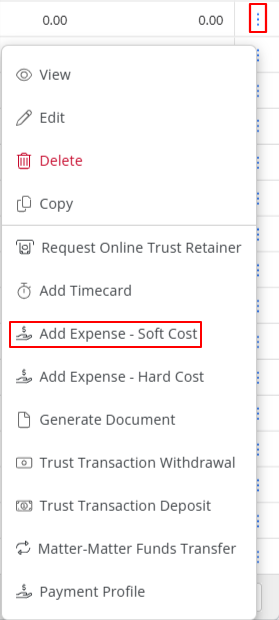
- On the Matters screen, select the matter and click on the three dots at the end of the row and from the drop-down, click Add Expense - Soft Cost.
Matter Details
-
- From the left navigation panel, click Matters.
- In the Matters screen, double-click the matter, or single-click the matter to highlight it, then from the three-dot menu, click View.
- From the tabs atop Matters Details, click Billing.
- From the tabs atop the Billing screen, click Time/Expense.
- From the toolbar atop the Time/Expense screen, click Add Expense > Soft Cost.

- In the soft cost modal that opens, enter the details.
- Enter all applicable billing information for your timecard. If you wish to add additional information and documents, click Next.
- If you wish to quickly enter the relevant information and enter another expense card, click Save and New.
- If you are satisfied with the information you've entered, click Save.
Billing
-
- From the left navigation panel, click Billing.
- From the Billing menu, click Time/Expense.
- From the toolbar atop the Time/Expense screen, click Add Expense > Soft Cost.
The Add Expense screen opens.
Soft Cost Fields
Billing Info Tab
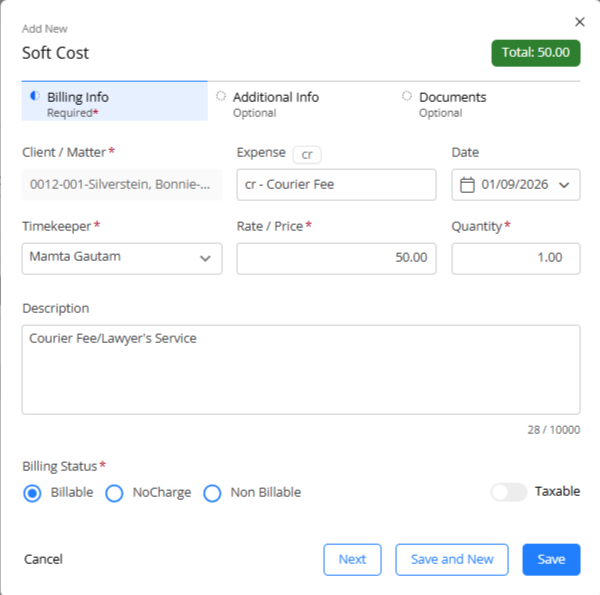
| Client/Matter |
|
|
| Expense |
|
|
| Date |
|
|
| Timekeeper |
|
|
| Rate/Price |
|
|
| Quantity |
|
|
| Description |
|
|
| Billing Status | Billable |
|
| No Charge |
|
|
| Non-Billable |
|
|
| Taxable | Toggled off |
|
| Toggled on |
|
Note: The total in the upper right corner of the form will get updated based on your Rate/Price, Quantity, and Tax.
Additional Info Tab
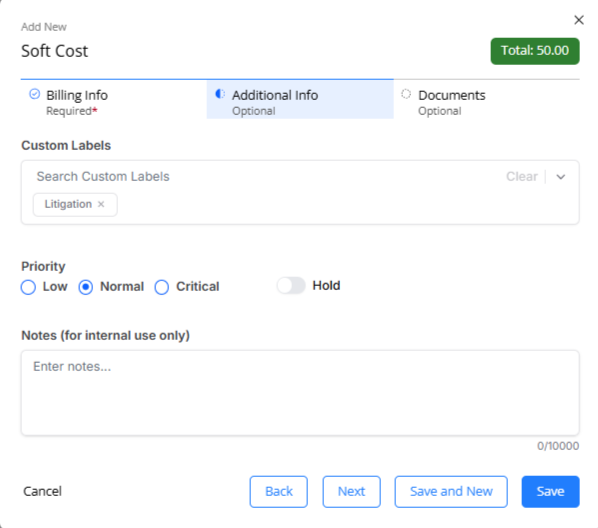
| Custom Labels |
|
|
| Priority |
|
|
| Hold |
|
Documents Tab
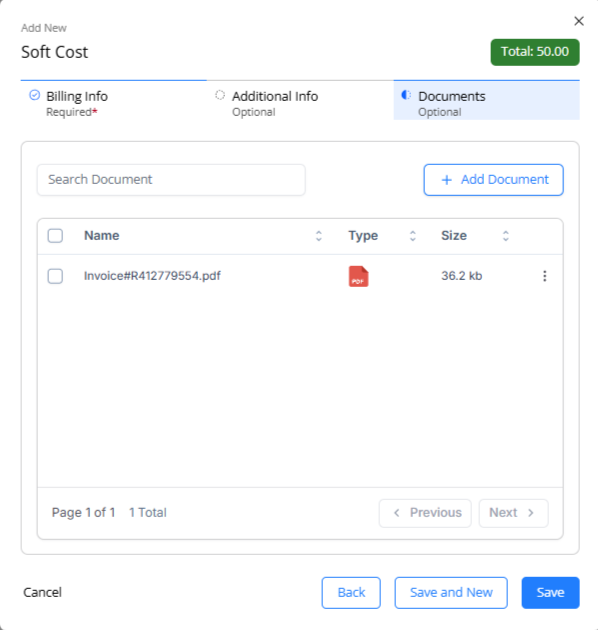
-
In the upper right corner, click Add Document.
-
On the Add File window that opens, search for the document in your native storage by clicking Browse.
-
Either double click the file or select the file and click Open.
-
Once you are sure that you have attached the correct file, click Upload.
-
You can follow the steps above to attach more than one document, if required.
Note: Any document that you attach to the expense does not become part of the invoice when you create an invoice.
Add and manage documents associated with the expense.
Save Options
- If you wish to add additional information and documents, click Back.
- If you wish to quickly enter the relevant information and enter another expense card, click Save and New.
- If you are satisfied with the information you've entered, click Save.