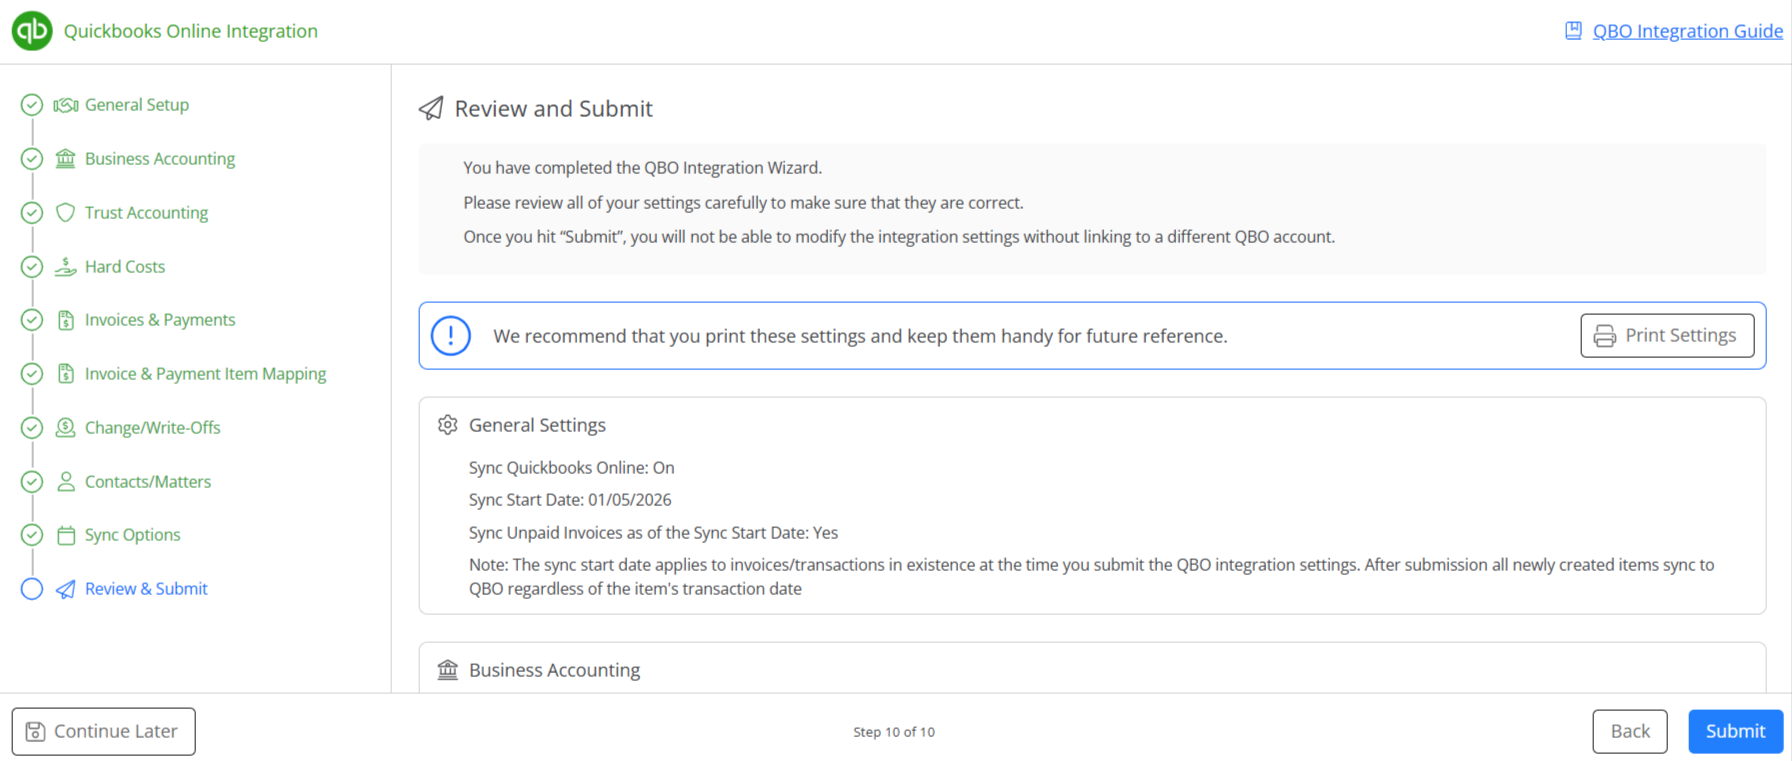
When setting up the integration, follow the step-by-step configuration. To pause, click “Continue Later” to save your settings. You can resume anytime and review or change settings using the Back button. Before submitting, you can cancel the QBO integration to prevent syncing. Consult with your bookkeeper or accountant before finalizing.
Watch a Video
This article will guide you through the steps to configure the Default Settings.
*Important*: Once submitted, you cannot change the settings without moving to a NEW QuickBooks account.
QuickBooks Default Settings Configuration
To integrate QuickBooks Online:
- From the left navigation panel, click Accounting.
- From the Accounting menu, click QuickBooks.
- On the QuickBooks Integration page, slide the toggle button On.
- You’ll be prompted with the QBO Acknowledgement.
Important: BEFORE you begin configuring your QuickBooks Integration, we strongly suggest reviewing our in-depth QBO Integration Guide with your bookkeeper or accountant. This guide will walk you through all integration items, configuration items, required QBO settings, syncing, resyncing, and much more! - Once you’ve read the QBO Integration Guide and you wish to proceed with the integration setup, click Acknowledge and Proceed.
- Select the account you want to use to access QuickBooks and click Sign In.
- Enter your password.
- From the Search for your company drop-down, select your company and click Next.
- You will get the confirmation message QuickBooks is successfully linked to your CosmoLex account! Click Back to CosmoLex.
Step 1: General Setup
You will be directed to the configuration setup. In step one, review the information on the welcome page and then click “Next” in the bottom right.
Step 2: Business Accounting
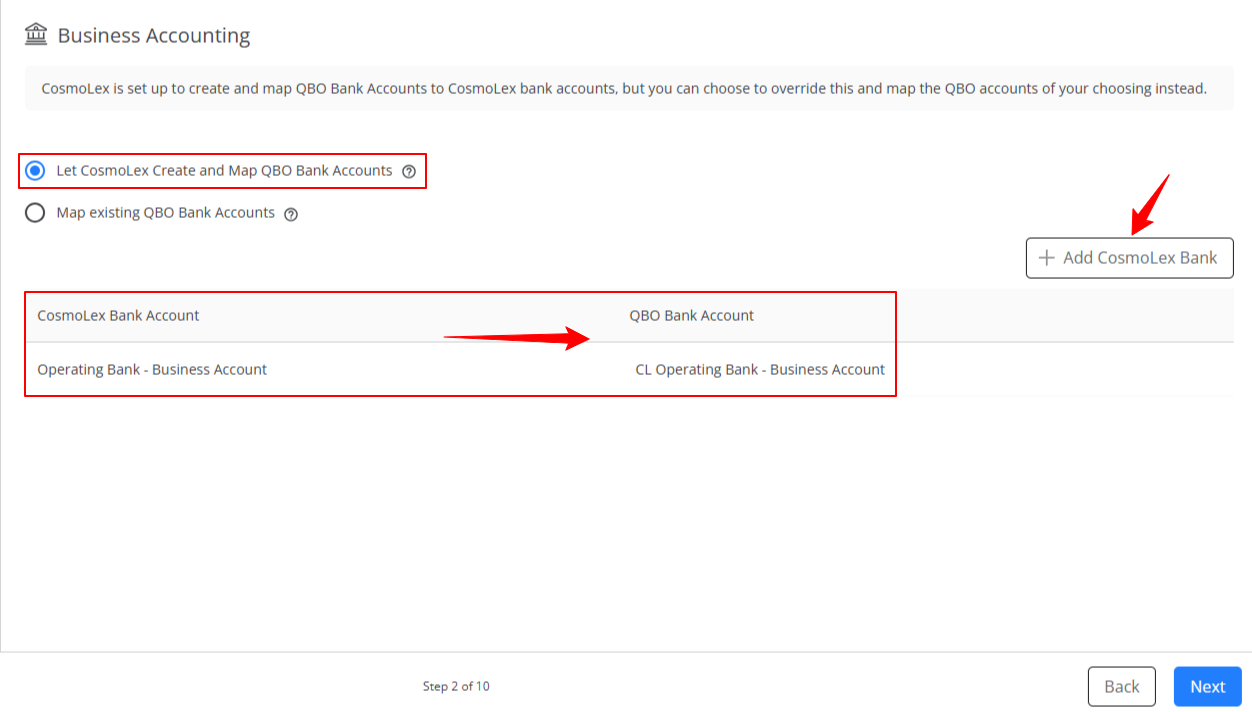
- In Step 2, we will focus on Business Accounting. This article will guide you through the Default Setting’s configuration steps, where you will choose the option “Let CosmoLex Create and Map QBO Bank Accounts.” If you select this option, the system will automatically create a QBO Bank Account and map it to a CosmoLex bank account.
- As shown below, the CosmoLex Bank Account “Operating Bank – Business Account” will map to the QBO Bank Account “
- Add CosmoLex Bank – If you wish to add a CosmoLex bank account, select “Add CosmoLex Bank.” You will then be prompted to enter the details for the Operating Bank or Credit Card Account Name.
- As shown below, the CosmoLex Bank Account “Operating Bank – Business Account” will map to the QBO Bank Account “
- Click ‘Next‘ when complete.
Step 3: Trust Accounting
Step 3 is Trust Accounting. CosmoLex will create and map QBO trust bank and QBO trust liability accounts to CosmoLex trust bank accounts, but you can turn off this feature or customize your settings. Within the Trust Accounting configuration, you’ll have the following options:
-
-
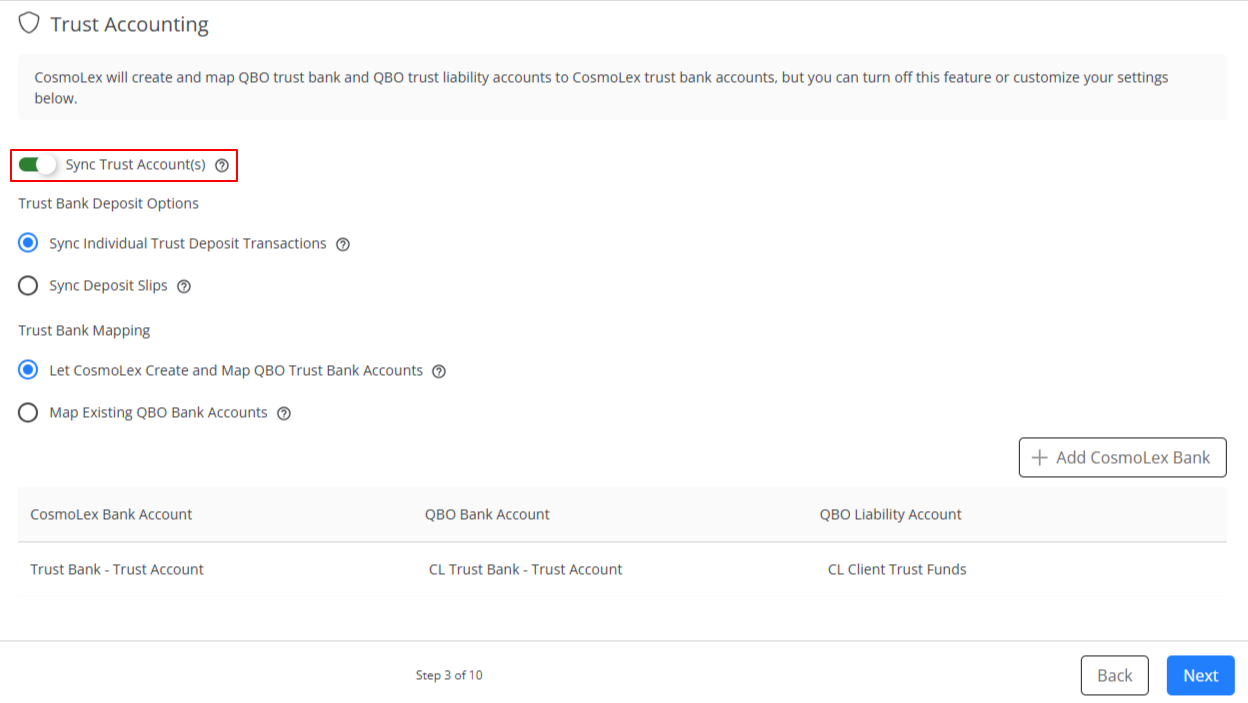
Sync Trust Accounts:
- You are not required to sync your trust account with QBO to use the Trust Accounting functions.
- If you turn off the sync trust account feature, CosmoLex will not sync any of your trust transactions to QBO and you will have to manually add your trust transactions to QBO.
-
Trust Bank Deposit Options:
-
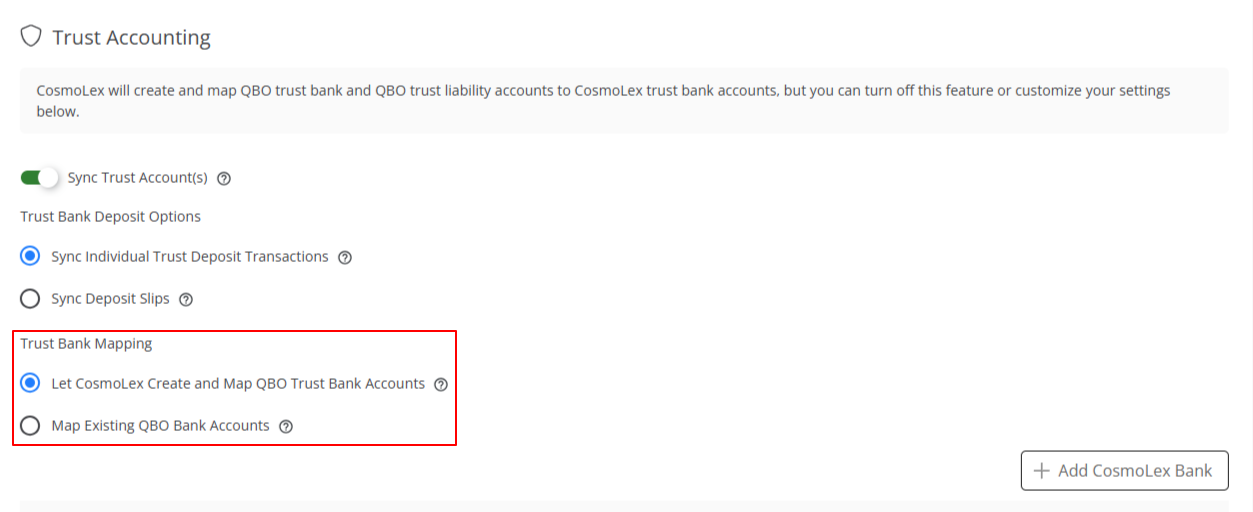
Trust Bank Mapping:
- Option 1: Let CosmoLex Create and Map QBO Trust Bank Accounts: If you choose this option, the system creates one QBO client Trust Liability Account that is mapped to current and future Trust Bank Accounts.
- Option 2: Map Existing QBO Bank Accounts: If you choose this option, you will have to use existing, or create new QBO trust bank and QBO client trust liability accounts and then map those to your CosmoLex Banks in the table below. If desired, you can create a separate QBO Client Trust Liability account for each Trust Bank Account.
- As shown below, the CosmoLex Bank Account “Operating Bank – Business Account” will map to the QBO Bank Account “
- Below you’ll find the Default Mapping for Trust Accounts.
- Add CosmoLex Bank – If you wish to add a CosmoLex bank account, select “Add CosmoLex Bank.” You will then be prompted to enter the details for the Trust Account.
- Once complete, click Next.

-
Step 4: Hard Costs
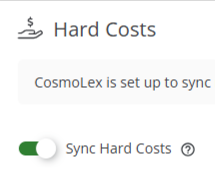
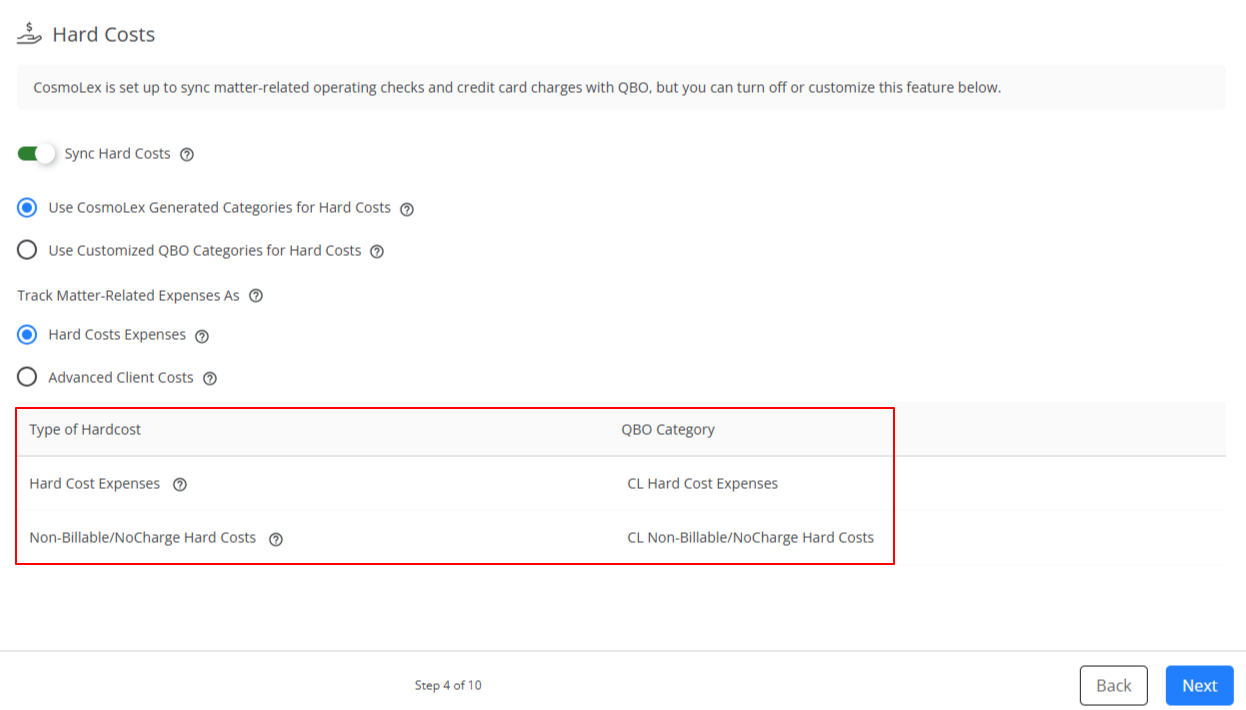
CosmoLex is set up to sync matter-related operating checks and credit card charges with QBO, but you can turn off or customize this feature below.
- Sync Hard Costs: If you turn this feature off, you will have to manually add your hard costs expenses into QBO.
- Hard Cost Catagory Options:
- Option 1:
- Track Matter-Related Expenses: Choose whether to track your matter-related expenses as Advanced Client Costs or as Hard Cost Expenses
- Option 1: Hard Costs Expenses – Choose this to track matter-related as expenses when paid and as income when reimbursed
- Option 2: Advanced Client Costs – Choose this to track matter-related expenses to the same asset account when reimbursed
- Review the Hard Cost selection and mappings below. Once complete, click “Next.”
Step 5: Invoices & Payments
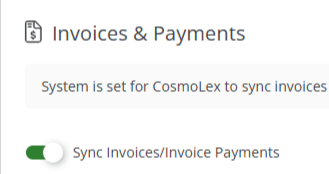
The system is set for CosmoLex to sync invoices and invoice payments into QBO, but you can turn off or customize your settings below.
- Toggle to Sync or not to sync Invoices/Invoice Payments.
- If you turn off the sync invoice/invoice payments feature, none of your invoice payments will sync with QBO. You will need to manually add invoices and invoice payments into QBO.
- If you turn off the sync invoice/invoice payments feature, none of your invoice payments will sync with QBO. You will need to manually add invoices and invoice payments into QBO.
- Sync Invoice Options:
-
- If selected, the option to Allow Unlink Payments in CosmoLex will appear. If you check this option, the system will unlink the payment in CosmoLex only. The unlinked payment is not synced to QBO and you will have to manually record the unlinked payment in QBO
-
- If selected, the option to Allow Unlink Payments in CosmoLex will appear. If you check this option, the system will unlink the payment in CosmoLex only. The unlinked payment is not synced to QBO and you will have to manually record the unlinked payment in QBO.
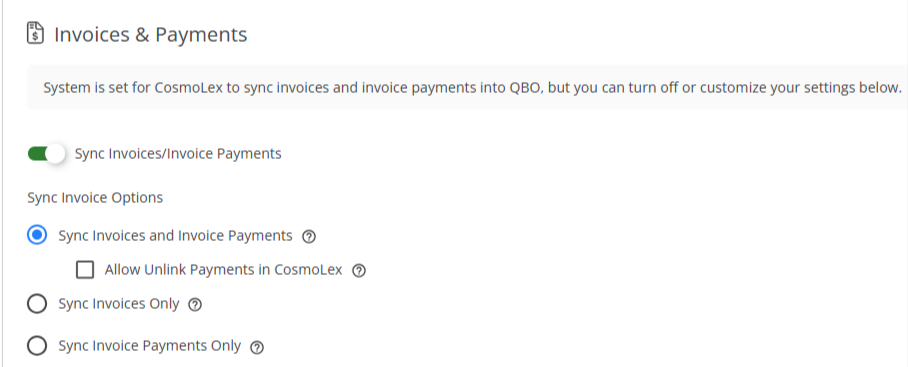
- If selected, the option to Allow Unlink Payments in CosmoLex will appear. If you check this option, the system will unlink the payment in CosmoLex only. The unlinked payment is not synced to QBO and you will have to manually record the unlinked payment in QBO.
-
- If
- If you turn off the aggregate time/expense items, the system will sync every single time and expense item when it syncs the invoice.
- Once complete, click Next.
Step 6: Invoice & Payment Item Mapping
The default is for CosmoLex to create QBO products and services and map them to the invoice items for you, but you can override that setting below.
- Invoice Item Mapping
- Option 1: Let CosmoLex Crea
- Once complete, click Next.
Step 7: Change/Write-Offs
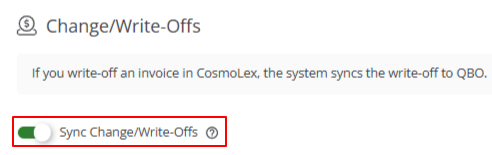
- Sync Change/Write-Offs: If you turn off the Sync Change/Write-Offs feature, none of your changes or write-offs will sync with QBO. You will need to manually add any changes or write-offs to the QBO invoices.
- Invoice Item Mapping:
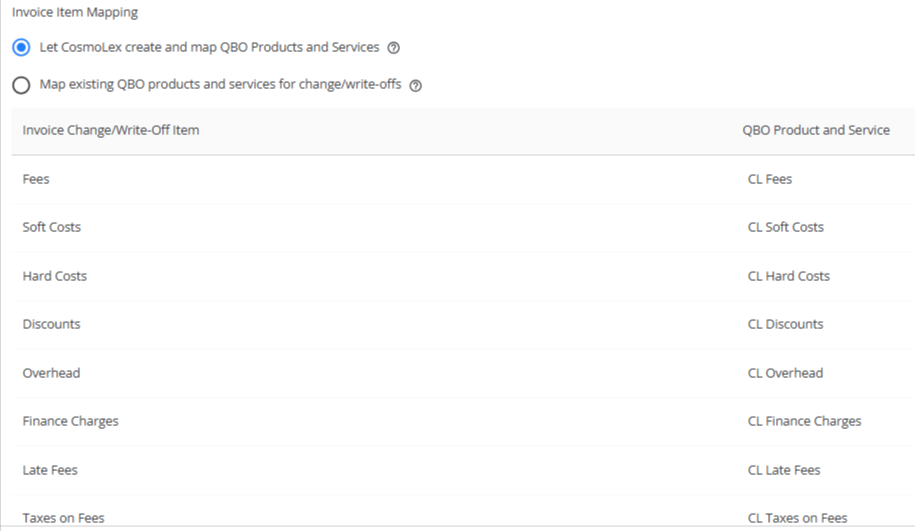
- Option 1: Let CosmoLex create and map QBO Products and Services – The system automatically creates QBO Products and Services and maps them to the appropriate CosmoLex write-off items.
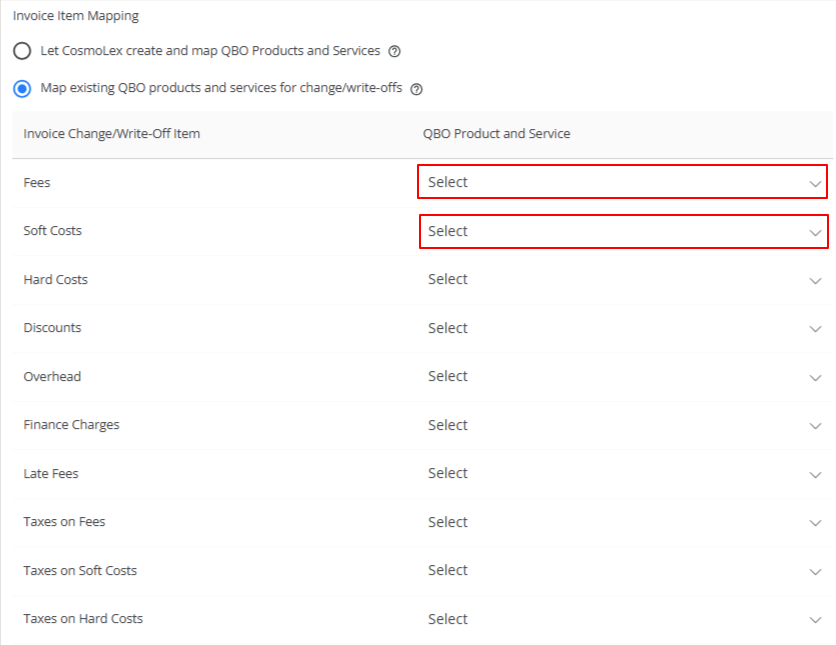
- Option 2: Map existing QBO products and services for change/write-offs – This option allows you to use custom-created QBO products and services when recording change/write-offs in QBO.
- Option 1: Let CosmoLex create and map QBO Products and Services – The system automatically creates QBO Products and Services and maps them to the appropriate CosmoLex write-off items.
- Once complete, click Next.
Step 8: Contacts and Matters
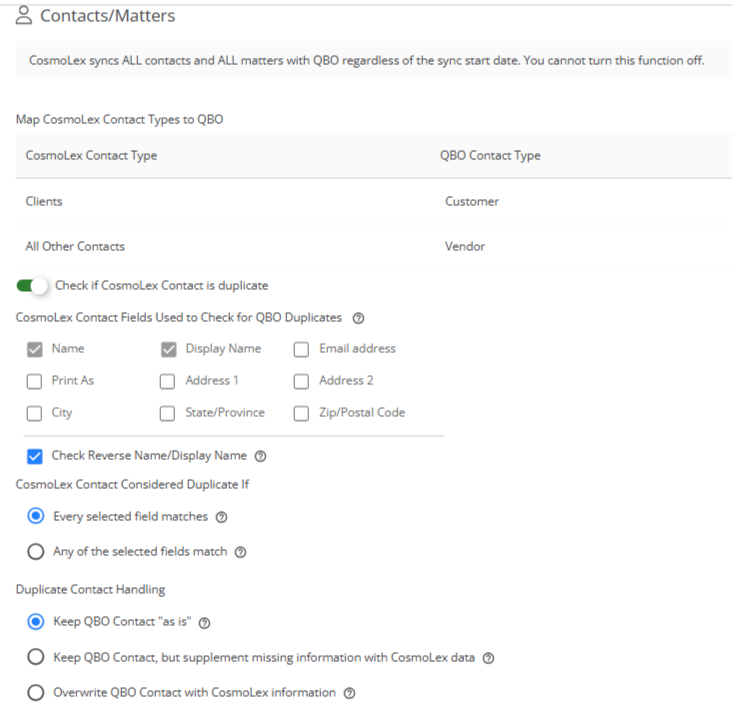
- CosmoLex syncs ALL contacts and ALL matters with QBO regardless of the sync start date. You cannot turn this function off.
- CosmoLex Clients will sync into QuickBooks as contact type “Customer.”
- All other CosmoLex contacts will sync into QuickBooks as contact type “Vendor.”
- Duplicate Contacts
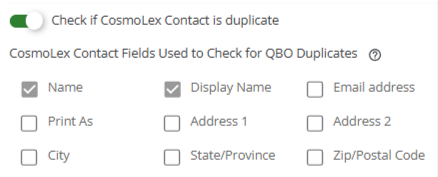
- Toggle here to check if CosmoLex Contact is a duplicate.
- If you choose not to check for duplicate contacts, integrating with an existing QBO account could result in a significant number of duplicate contacts being imported into QBO.

- CosmoLex Contact Fields Used to Check for QBO Duplicates – By default, CosmoLex automatically checks for duplicates based on Name and Display Name. The system can check for duplicates based on additional contact fields, and select all those that apply.
- Check Reverse Name/Display Name: QBO may display the contact name in the opposite order than how it displays in CosmoLex. Check this if you want CosmoLex to check for duplicates by both Last Name, First Name, AND First Name Last Name.
- CosmoLex Contact Considered Duplicate If...
- Every selected field matches – When selected, CosmoLex creates a new contact in QBO if any one of the checked fields above does NOT match the corresponding field in QBO.
- Any of the selected fields match – When selected, CosmoLex doesn’t create a new contact in QBO if any one of the checked fields above matches the corresponding field in QBO.
- Duplicate Contact Handling
- Keep QBO Contact “as is” – If the CosmoLex contact is a duplicate of a QBO contact, the system doesn’t make any changes to the QBO contact information.
- Keep QBO Contact, but supplement missing information with CosmoLex data – If the CosmoLex contact is a duplicate of a QBO contact, the system doesn’t make any changes to the QBO contact information, but it does replace any blank fields in the QBO contact with the information from CosmoLex.
- Overwrite QBO Contact with CosmoLex information – If the CosmoLex contact is a duplicate of a QBO contact, the system replaces all fields in the QBO contact with the information from CosmoLex’s contact.
- When finished, click Next.
Step 9: Sync Options
- Sync Start Date: Before you can submit your sync, you must choose a sync start date. This is very important because only items dated after your sync start date will be synced with QBO.
- Items dated after the sync start date automatically sync with QBO in real-time.
- Contacts and Matters sync with QBO regardless of when they were created.
- Sync All Unpaid Invoices:
- If you disable the Sync Fully Outstanding Invoices feature, only invoices with fully outstanding balances as of the sync start date will be synced.
- Partially paid invoices will not be synced at all. Consequently, none of your existing invoices will be synced with QBO if this feature is turned off.
- Additionally, any payments made on these invoices will not be synced either.
Step 10: Review and Submit
- You have completed the QBO Integration Wizard. Please review all of your settings carefully to make sure that they are correct. Click “Continue Later” if you’d like to save your changes and come back to them later.
- *Important*: Once submitted, you cannot change the settings without moving to a NEW QuickBooks account.
- We recommend that you print these settings and keep them handy for future reference. Click the Print Settings to print all selections.
- Once finished, click Submit.