Watch a Video
Your dashboards are the first thing you see when you log in to your account.
Your ability to view dashboards depends on your user access. To learn more, see Dashboards Overview. You firm dashboard displays firm-wide information. Admin-level users can restrict individual users' access.
Clicking on different icons in the toolbar atop each section allows you to:
- Expand the section by clicking on the two arrows.
- Filter the section by clicking on the filter icon.
- Refresh the section by clicking on the refresh icon.

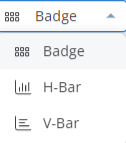
- If a feature of the section, clicking on the drop-down arrow allows you to view the section as:
Snapshot
This section provides unpaid, unbilled, and overdue item counts.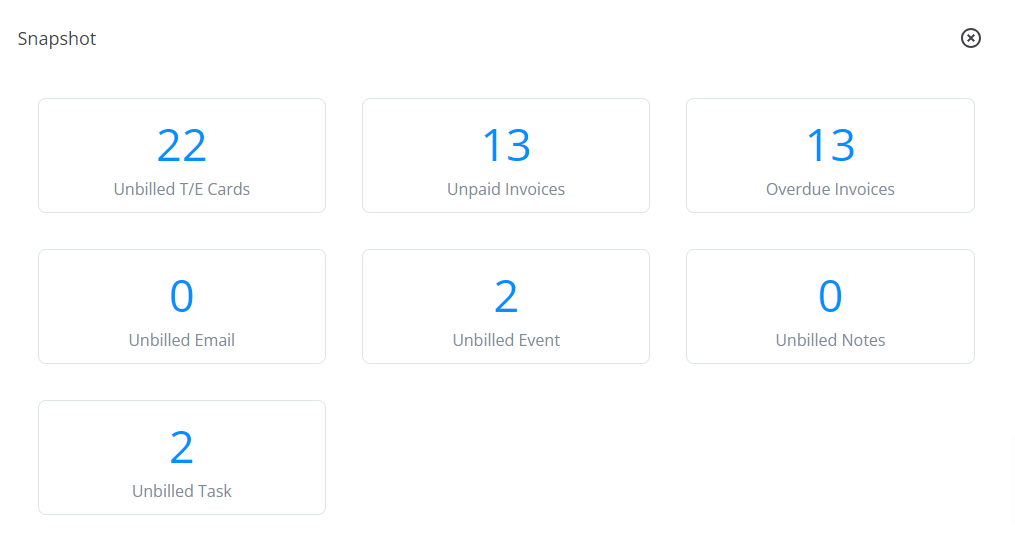
Unbilled Time & Expense Cards
Within the Snapshot section, clicking Unbilled T/E Cards accesses a list of billable items you have captured but not invoiced.
To the right of the window, clicking on the three dots allows you to edit unbilled items and save your changes.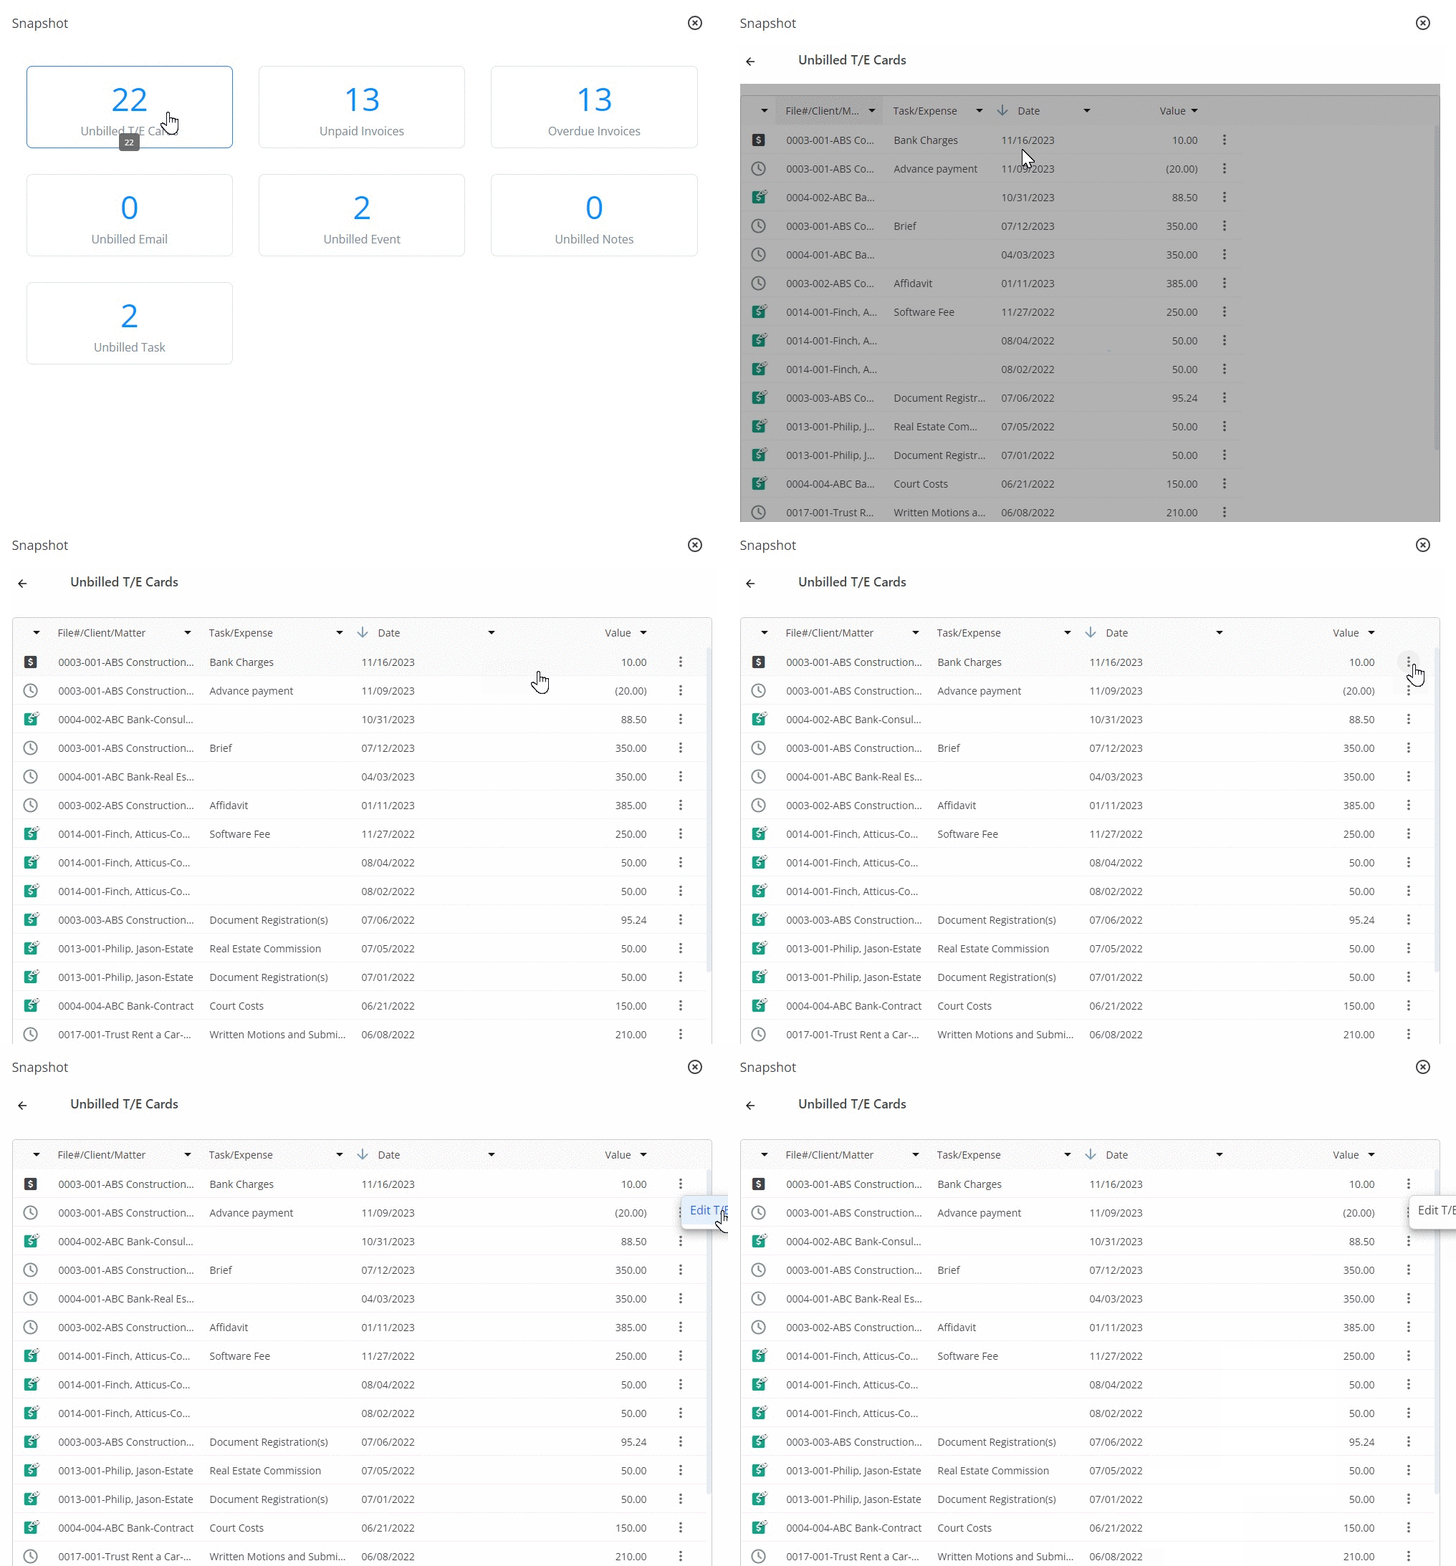
Unpaid Invoices
By clicking Unpaid Invoices, you can access a list of all unpaid invoices. Clicking on the three dots allows you to view the the details of the invoice.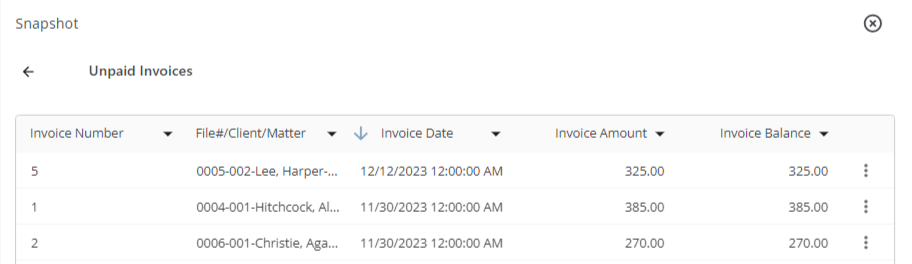
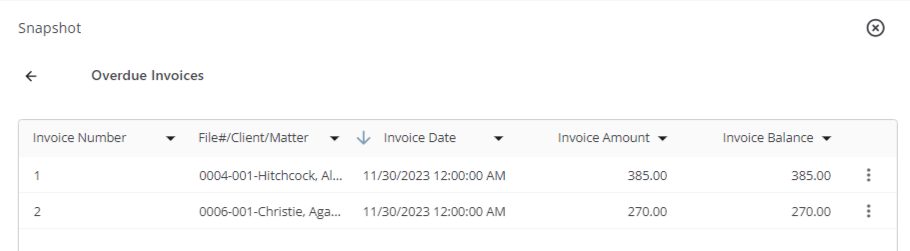
Overdue Invoices
This works like Unpaid Invoices, only these invoices are past-due.
Unbilled Emails
When you receive emails, you can mark them as billable items. Those emails will then display in this list of emails that can be invoiced, but for which no time entry has been made.
When you click here, a list of your firm's unbilled emails displays. You can click on the three dots at the end of the row to add a timecard to the email; this removes it from unbilled status and readies it for inclusion on your next invoice.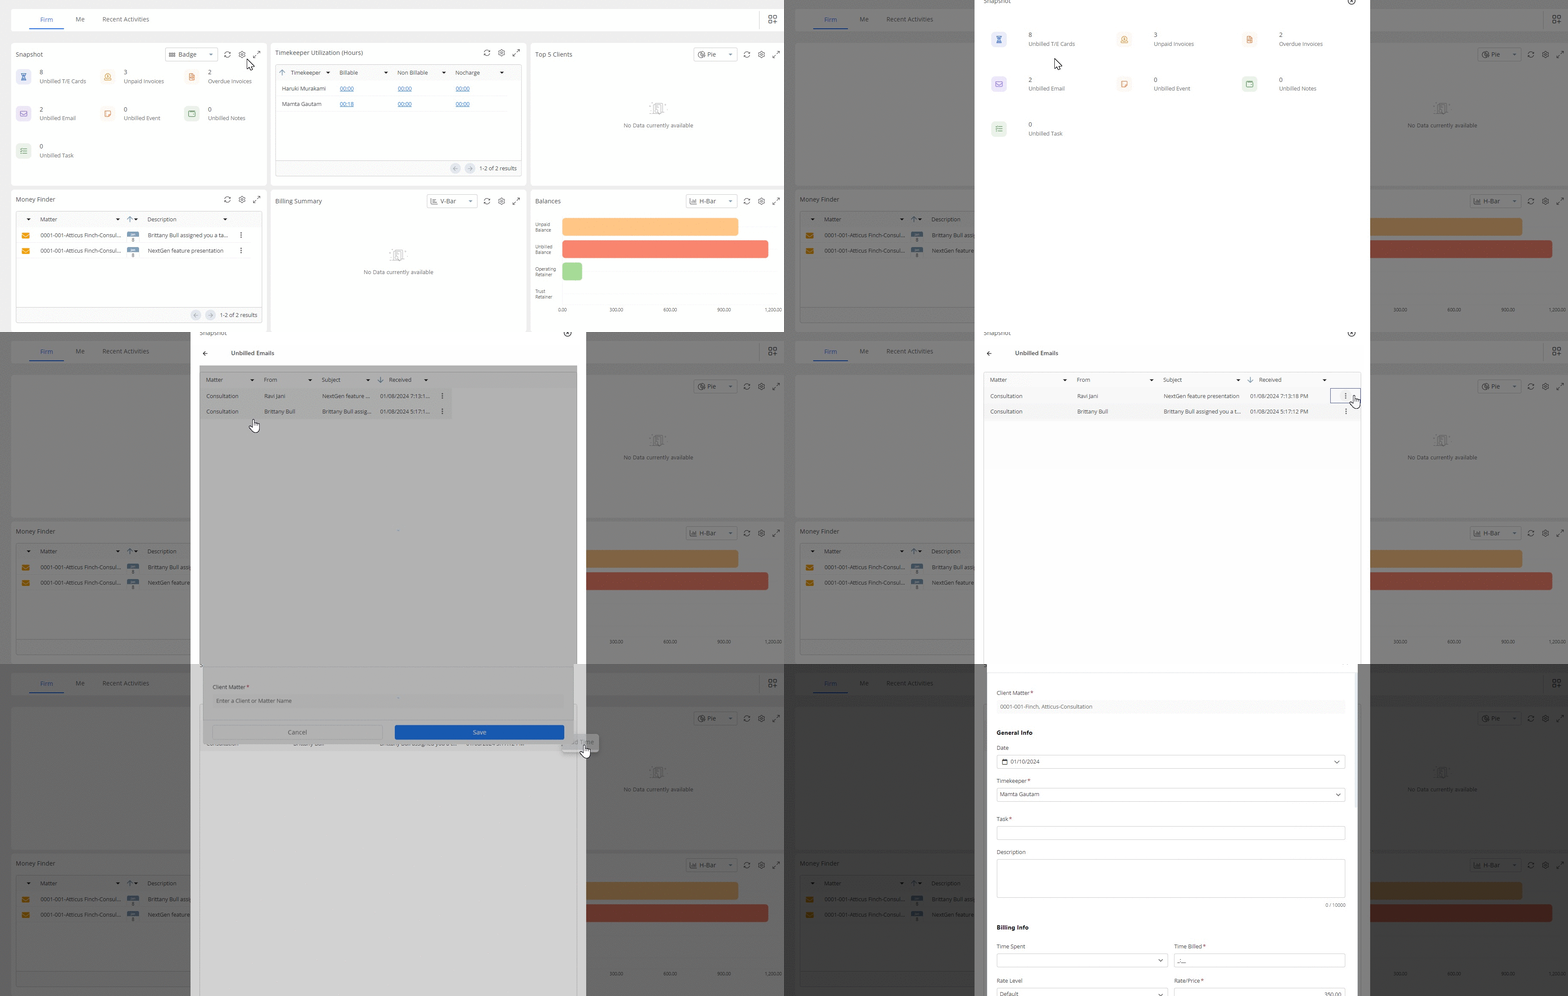
Unbilled Events, Notes, and Tasks
Events, Notes, and Tasks work like unbilled emails with one exception, besides creating a timecard for the event, you can also click on the the three dots at the end of the row to edit it.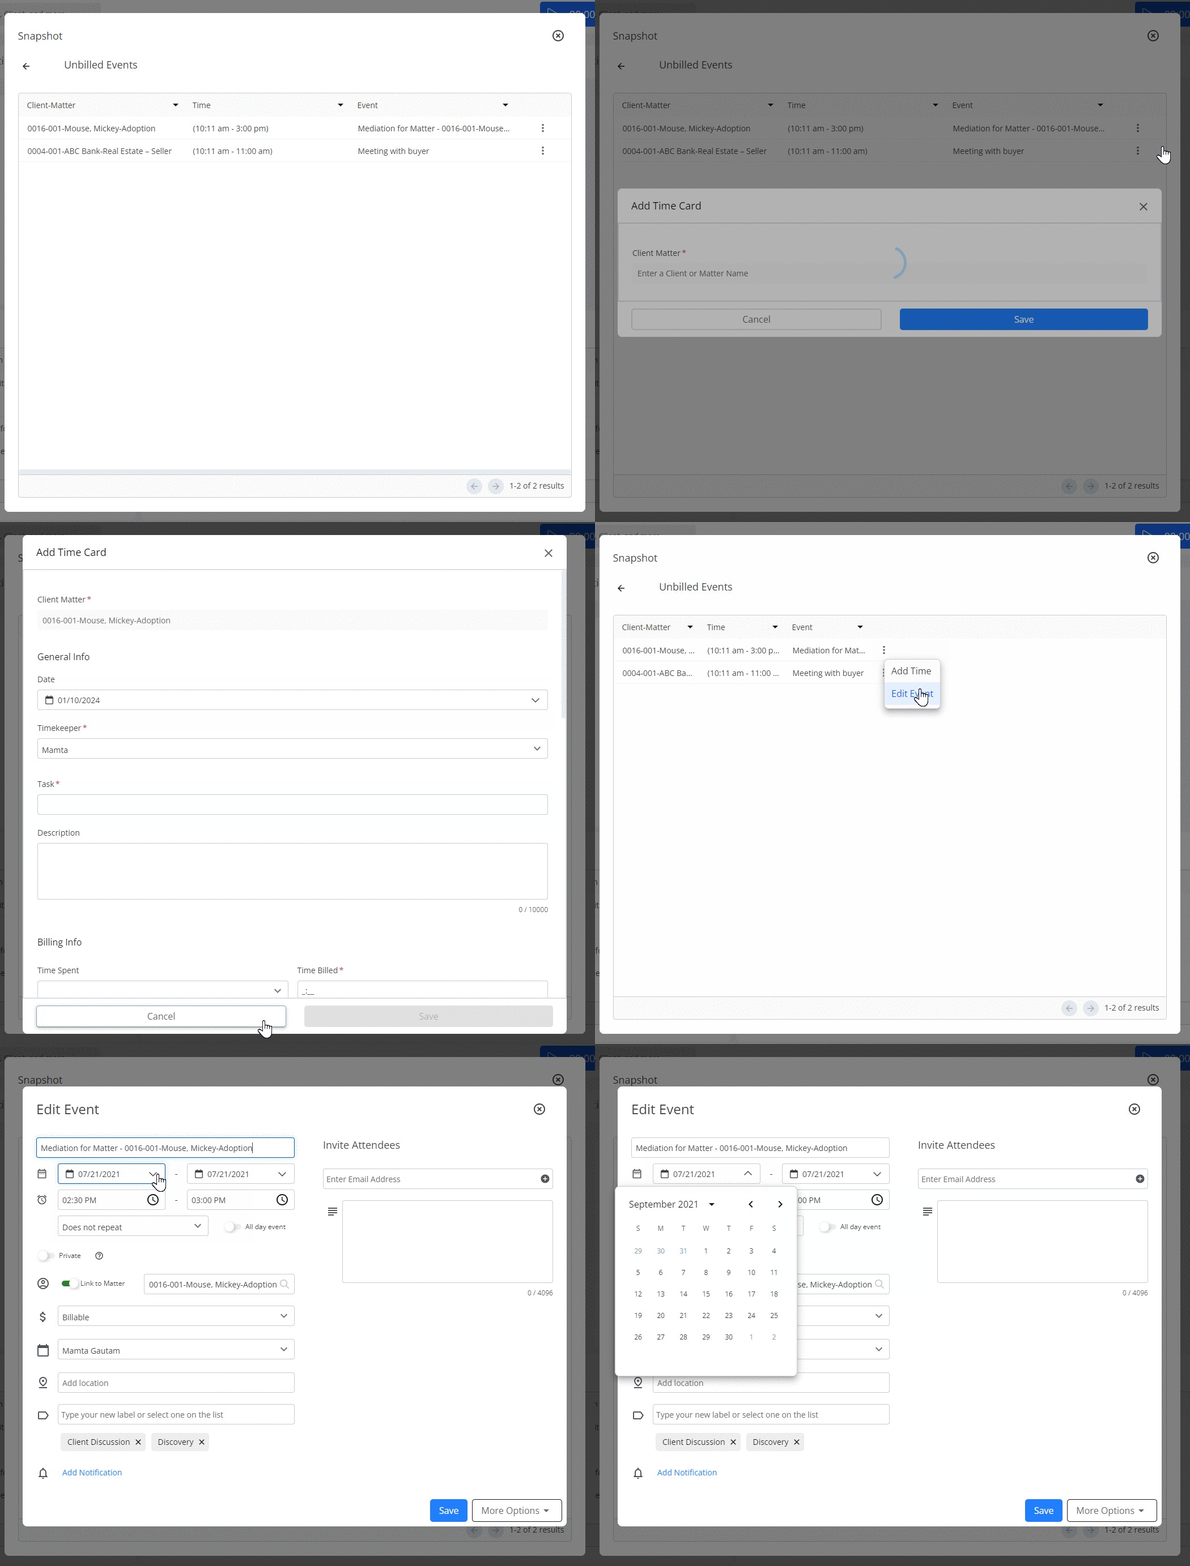
Timekeeper Utilization
The Timekeeper Utilization section displays all billable, non-billable, and no charge hours your timekeepers enter.
In the upper right corner of the section, if you click on the Manage icon, you can find a filter, select the time/expense date, and choose to view active, inactive, or all timekeepers. Once you have made your selection, click Save.
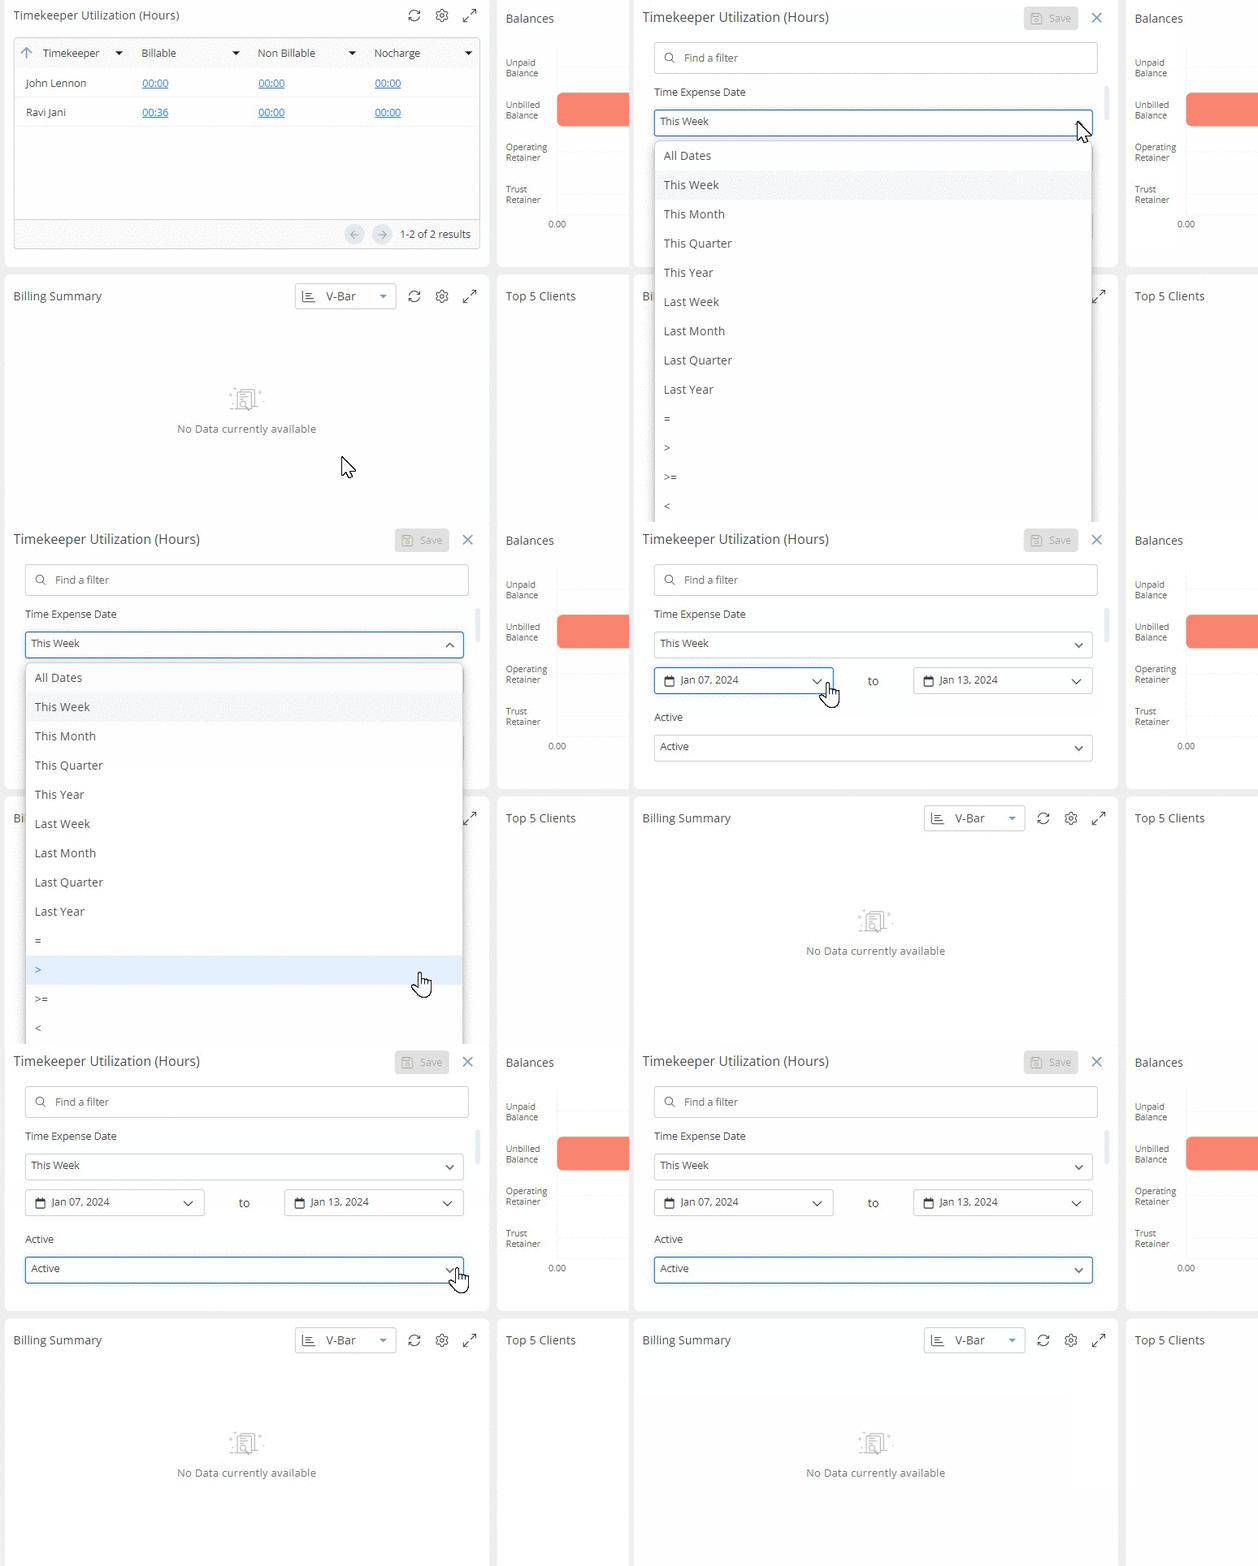
View Time Entries from Timekeeper Utilization
To view the individual time entries included under Timekeeper Utilization, click the value listed beside the Timekeeper's name.
A screen opens, displaying all time entries listed under that category. From here, you can click the three dots at the end of the row to edit those time entries.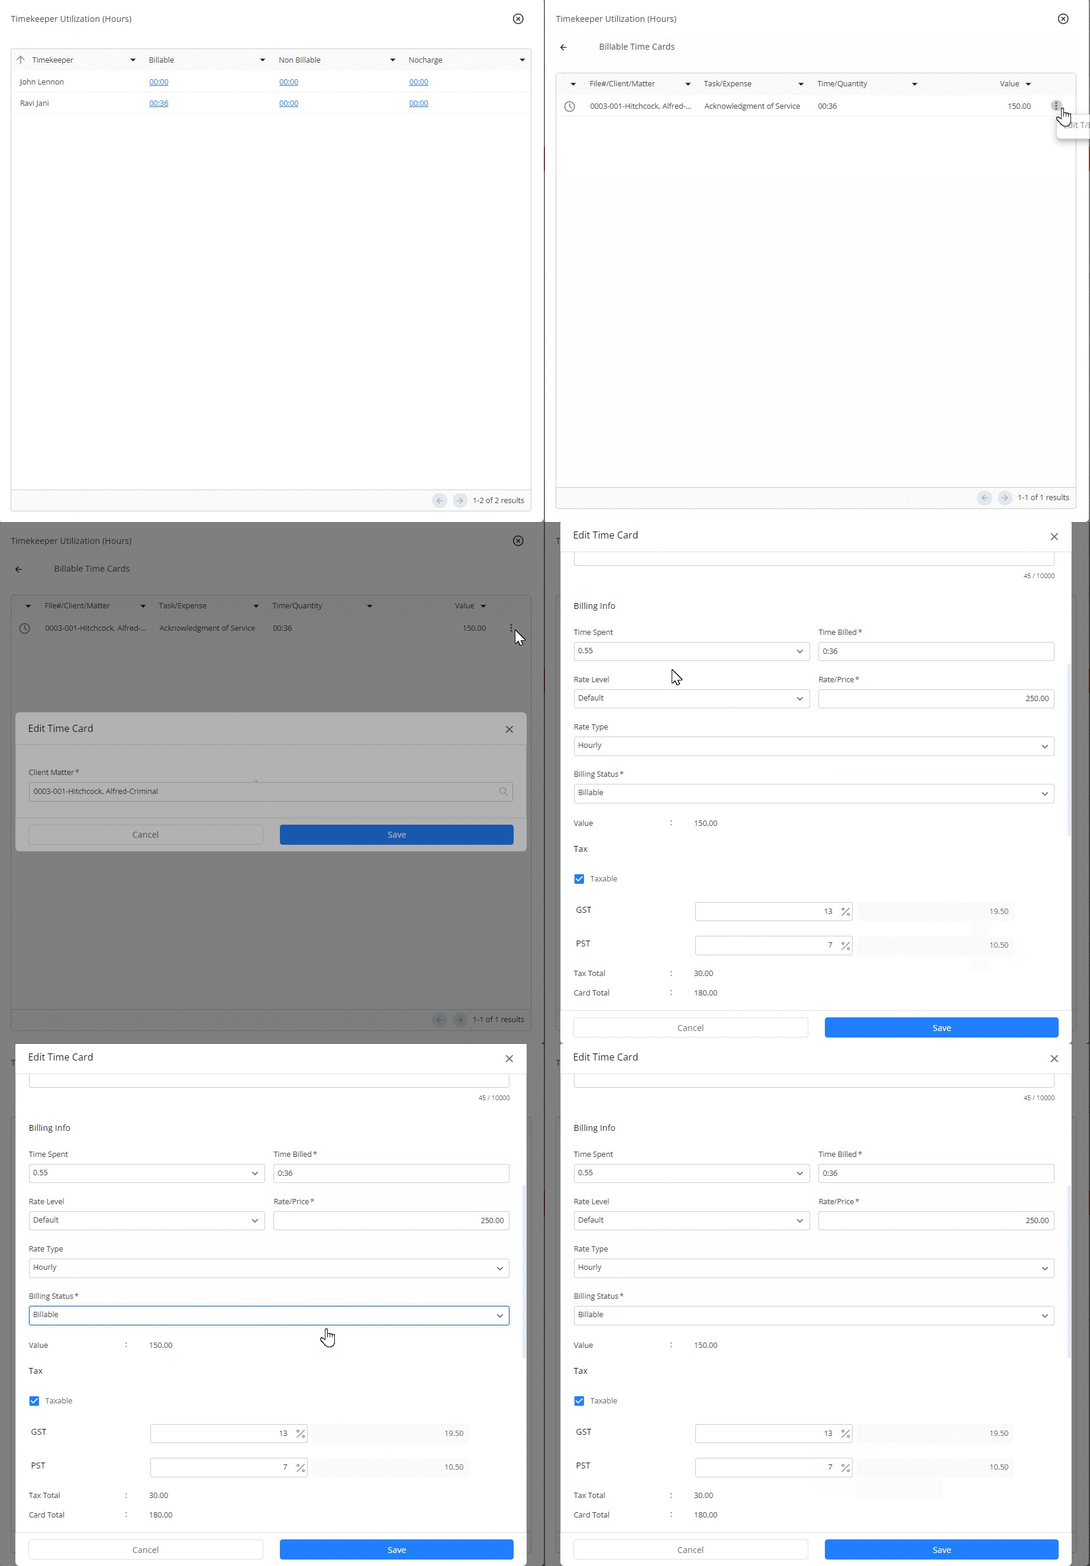
Balances
The Balances section displays cumulative:
- Unpaid Balances
- Unbilled Balances
- Operating Retainers
- Trust Retainers
You can choose the view the section as a Badge, H-Bar or V-Bar. The interactive graph allows you to hover over each graph bar to view the cumulative amount. You can also click a bar for additional information or even update items within a category.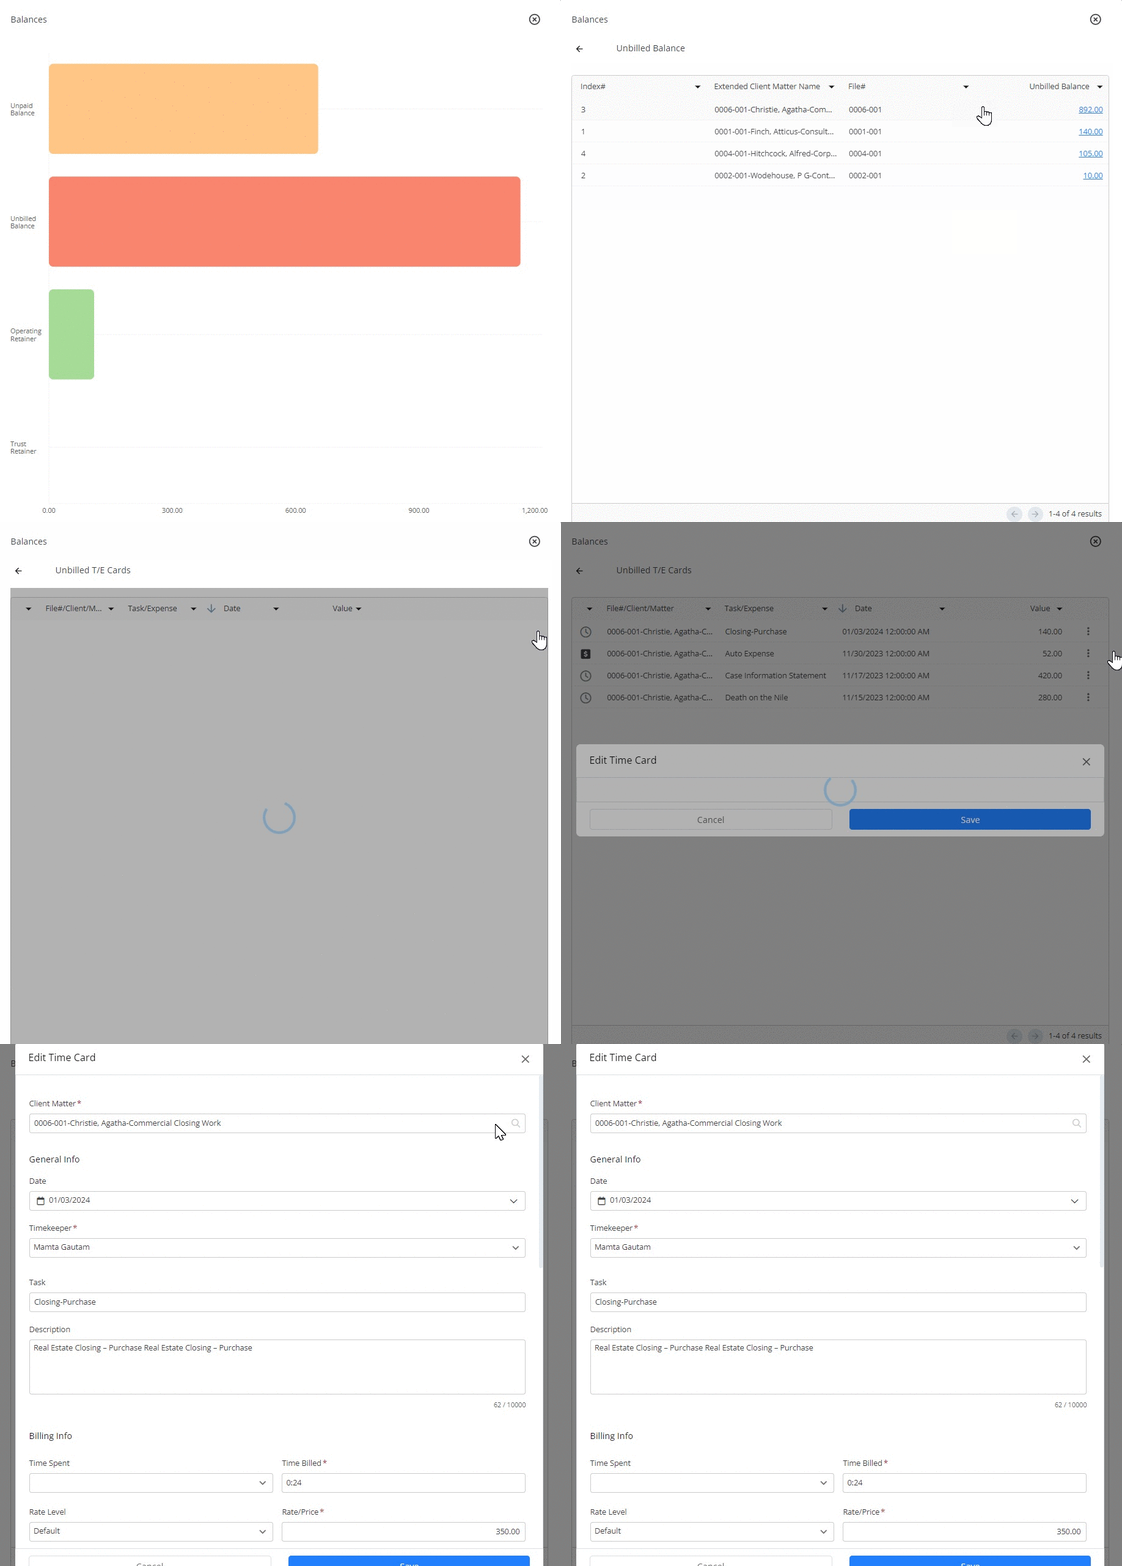
Money Finder
To make an item appear on the Money Finder list, either mark it as billable upon creation, or edit the item to change the billing status to Billable.
Note: The Money Finder will display billable:
- Emails and Notes - As soon as they are created
- Calendar Event - Once the event is over
- Task - When you change the status of the task to Done.
Add Time from the Money Finder
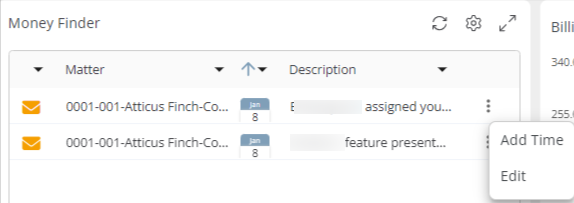
- Locate your billable item on the Money Finder list.
- To the right of the item, click the three dots.
- From the drop-down, click Add Time.
- Complete the timecard.
- Click Save.
The system saves your timecard.
For additional information, see Options to Track Time.
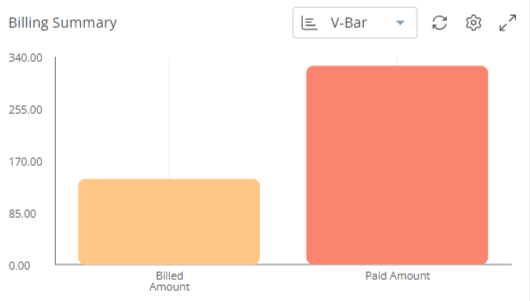
Billed Amount
When you click the Billed Amount balance, the screen displays all invoices billed during that time period. Click the three dots at the end of the row to view an invoice or its details.
Paid Amount
Clicking the Paid Amount bar displays all invoices paid during a given time period. Click the the three dots at the end of the row to view a paid invoice or its details.
Top 5 Clients
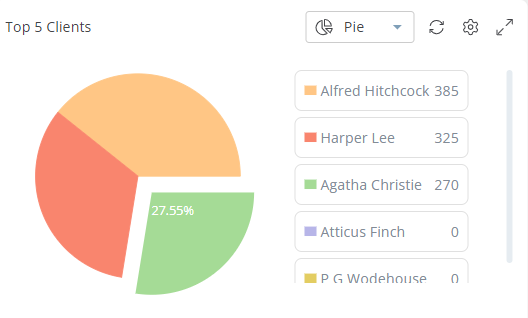
This section displays your top five clients based on their total amount paid. Click the gear icon to change the date range.
While the pieces of the pie chart display percentages, you can hover over a specific client to display their monetary value.