Your dashboard is the first thing you see when you log in to your account. Your ability to view dashboards depends on your user access. NextGen gives you greater flexibility in managing and customizing your dashboard.
To learn more about dashboards, see Dashboards Overview.
Manage Your Dashboard
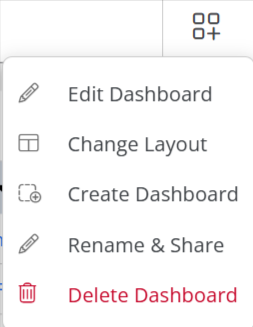
- Once logged into your account, on the Dashboard screen, click on the widget icon in the top right of the screen.

- When you click on Change Layout, you will unlock the Edit Layout function. You now have permission to move the widgets for Snapshot, Balances, Money Finder, Timekeeper Utilization (Hours), Billing Summary, and Top 5 Clients around based on your preference.
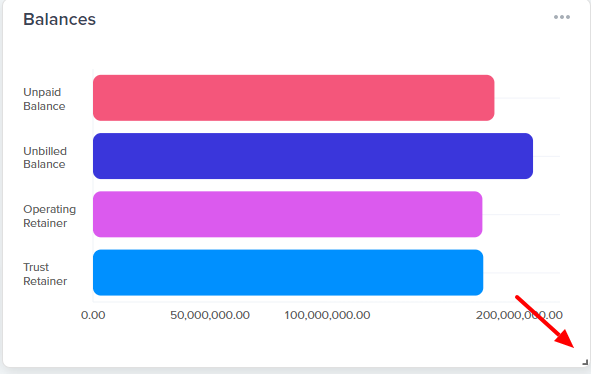
- You can also choose to expand or reduce the size of each widget by using the arrow at the bottom right.
- Once you have made your changes, click Save Layout. If you wish to return without making changes, click Restore.

Modify the View of Each Widget
You can choose to change the view of each widget within your dashboard. To modify the view:
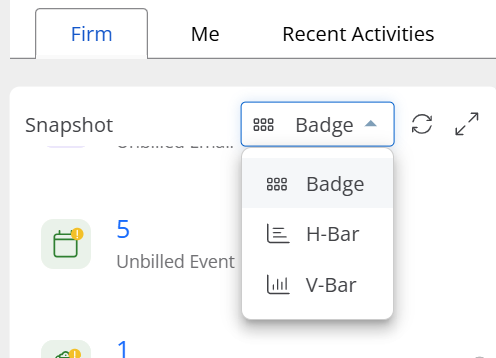
- On the dashboard screen, click on the filter drop-down of the widget you wish to modify.
- From the choices in the drop-down, select the view from Badge, H-Bar, or V-Bar.
- While logged in, if you have made entries elsewhere in the application, you can choose to click Refresh. This will update the data in the widget.
- You can also filter the data you wish to see by clicking on the filter icon.
- On the pop-up panel, you can find a filter by typing in the Find a filter field. You can also filter by specific areas depending on the widget you are filtering.
Create New Dashboard
- Once logged into your account, on the Dashboard screen, click on the icon in the top right of the screen.
- When you click on Create Dashboard, you will have the ability to create and customize your own dashboard.
- Enter the name of your dashboard in the Enter Dashboard Title field.
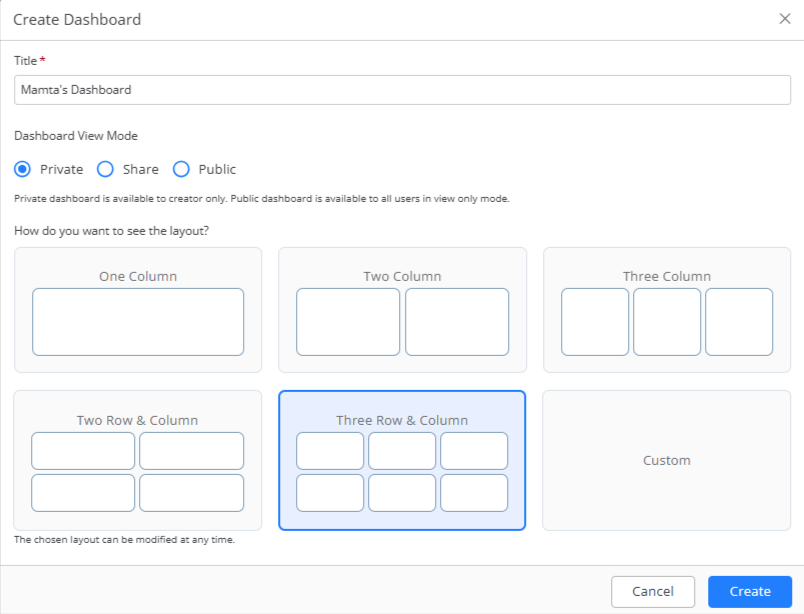
- Select a dashboard view mode from the options:
- Private: Will only be available to the creator of the dashboard
- Share: Can be shared in read only or editable format for selected users
- Public: Is available to all users in the firm in view only mode
- Select the layout of your dashboard widgets from the given options, or customize it based on your preference.
Note: The chosen layout can be modified at any time. - In the bottom right of the window, click Save.
Your dashboard will be added to the tabs atop the screen. - You can now add the views to each widget of your dashboard by clicking Add a view.
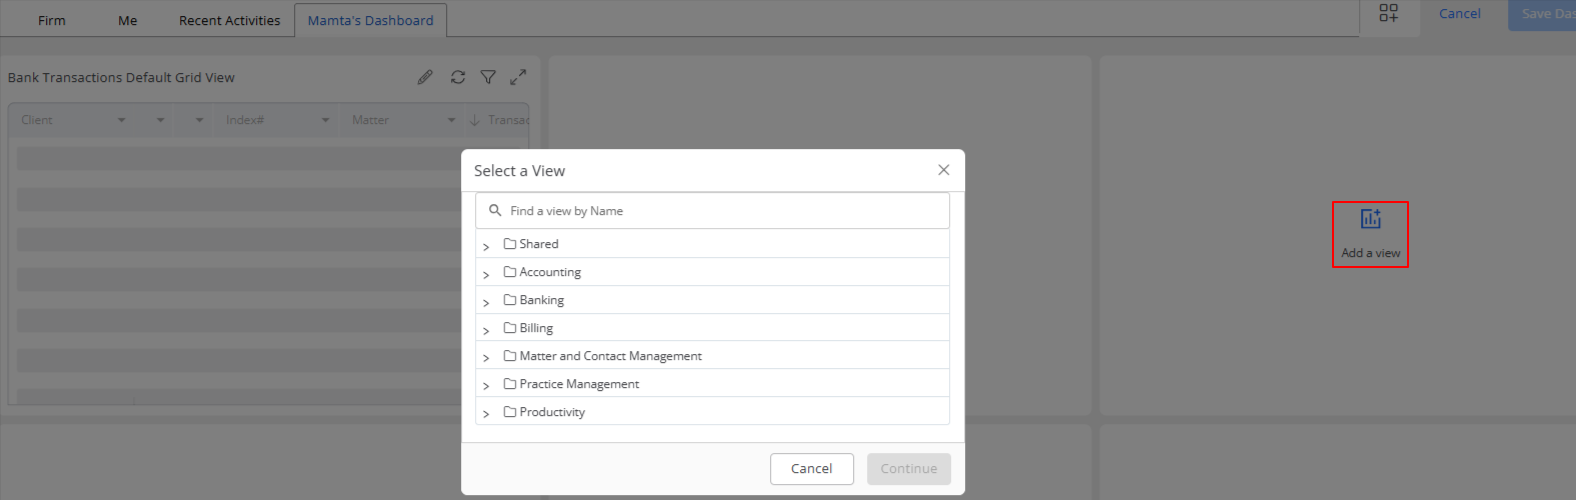
- Select from the listed areas or find a view by clicking on a name, then click Continue.
Your view will be added to the widget. - Once you have configured the widgets, click Save Dashboard.
your dashboard will be saved.
- Click on the widget icon in the top right of the screen and from the drop-down, you can edit the dashboard, change the layout, create a new dashboard, rename and share the newly created dashboard, or delete the dashboard.
Note: System defined dashboards cannot be edited or deleted.