You can now configure your grid in any section of the application and save it to get back to when you log in to your application.
Watch a Video
Customize the View
- From the left navigation panel, click on any tab - Dashboard, Matter, Contact, etc.
- While in your selected screen, you can either:
- Select your filters OR
- On the extreme right of the task bar, click the Settings icon.
A pop-up panel displays allowing you to select Row Height, Column Size, Wrap Text, and select Columns.
Select Your Columns
- To change the row height or to resize the columns, select from the radio buttons below each.
- To ensure that all the text in each column is visible, slide the toggle on beside Wrap Text.
- To hide, remove, or add columns, check or uncheck the boxes beside column names to make the columns visible or hidden. NextGen supports vertical and horizontal scrolling. If you have added a large number of columns, you can use the scroll horizontally to view each of them. If you choose to hide a column, it will remain part of the list and to make it visible, check the box beside it.
- If you are customizing the grids for Matters, Clients, or Address Book, you can choose from additional available columns which include Matter/Contact columns and Custom Fields.
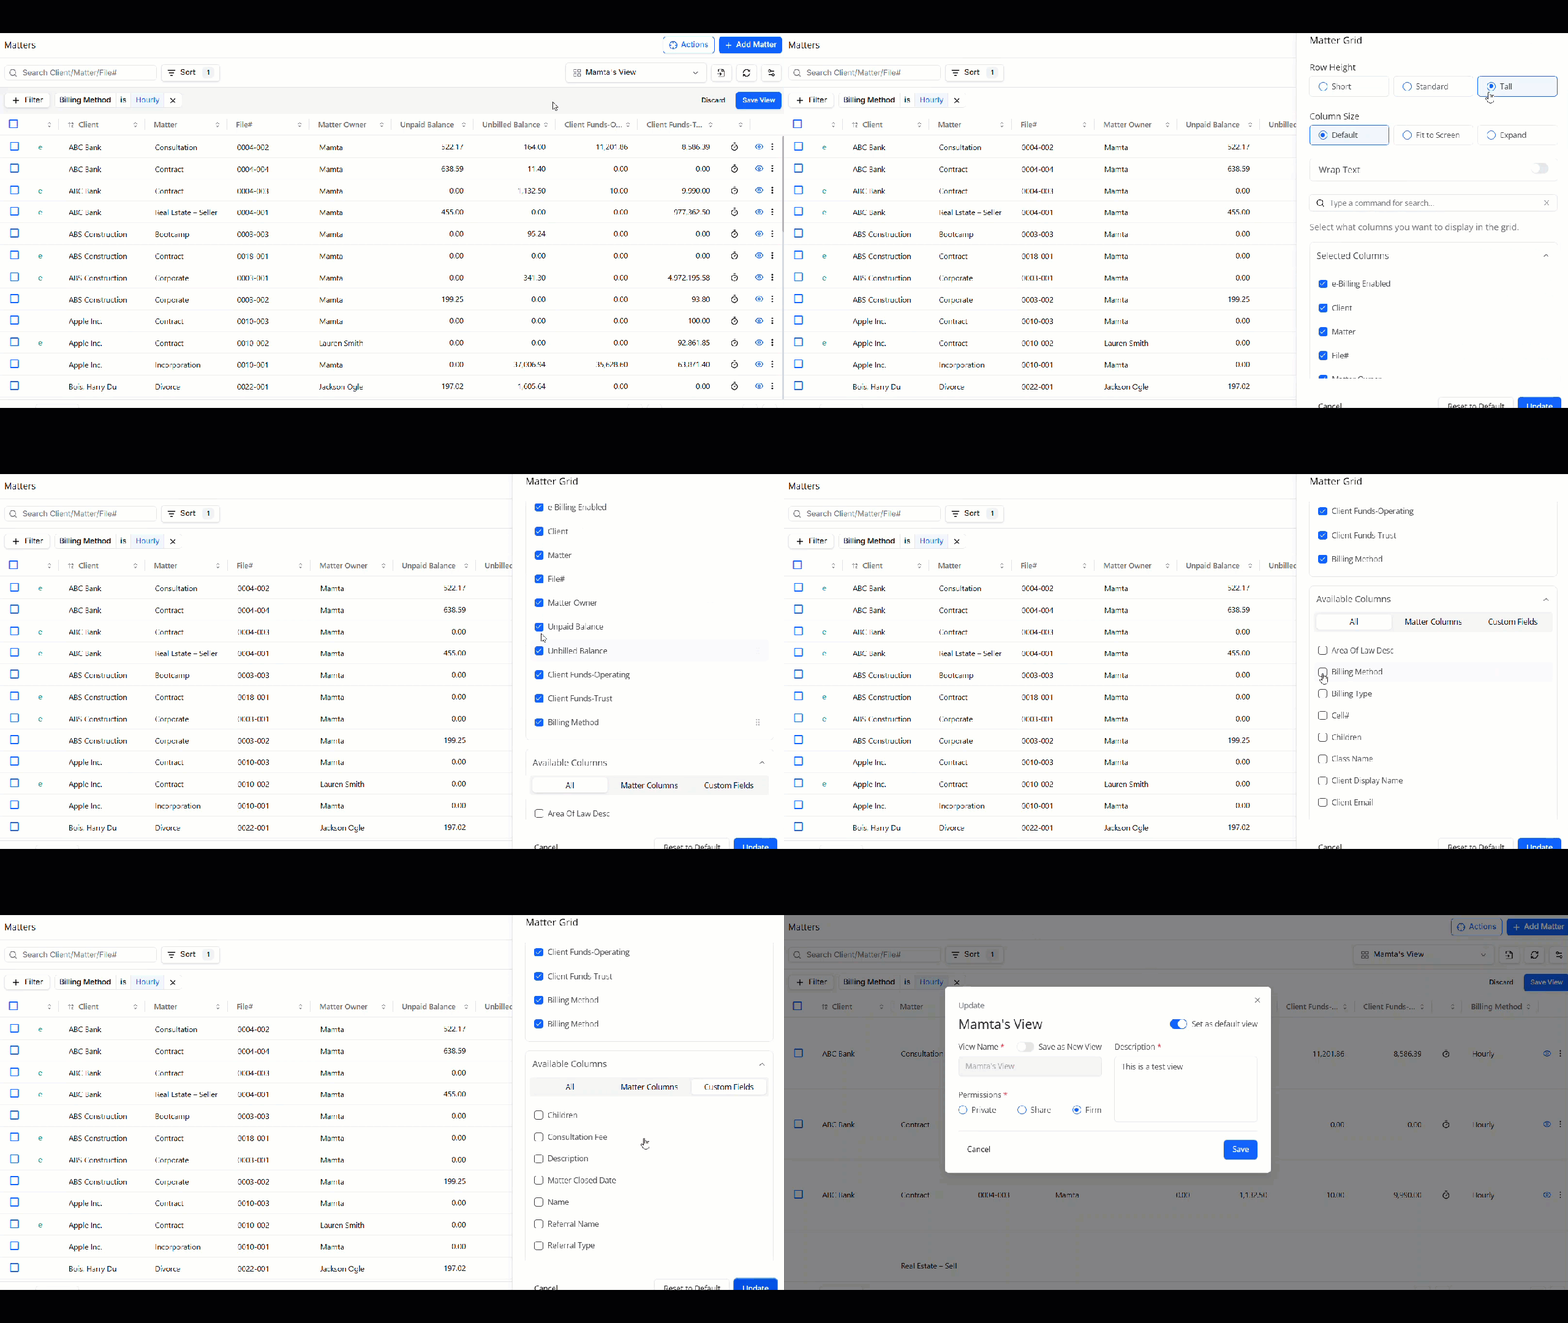
- Once you have made your selection, click Apply.
The columns selected by you will display in the grid.
Save Your View
- After selecting your filters or configuring the grid, from the toolbar, click Save View.
- On the Save View window that opens, give your view a name.
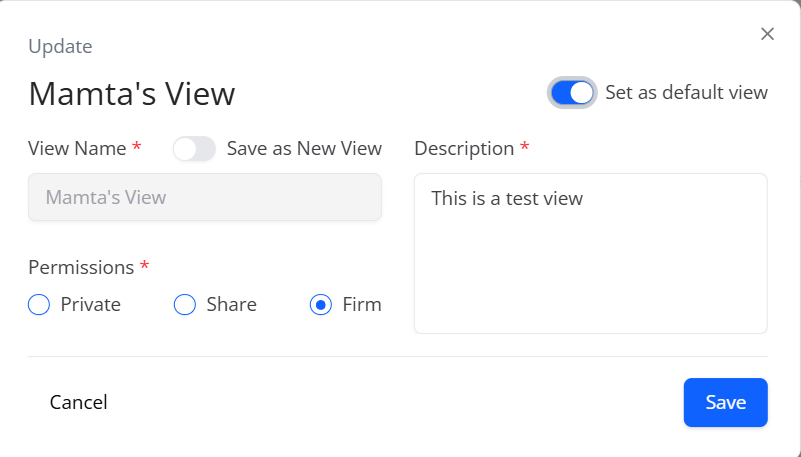
- If you wish to have this view set as your default for the particular section of the application, toggle on the button.
- To save as a new view, toggle on the button.
- In the description field, give a description to your view.
- You can choose to keep this view Private, Share it or make it Public.
- Private: This view will only be visible to you when you set it as your default and log in. Nobody else in your law firm will have access to your view.
- Share: Selecting Share will expand the panel to allow you to choose users or roles with whom to share your customized view. You can give them access to a Read Only version of your view or permit them to make changes by selecting Read/Write.
- Public: This will give everyone in your firm access to your customized view.
- Once you have completed all the fields, click Save. To make changes, click on the Cancel button.