Setting Up/Customizing Marketing Sources and Call Tracking Numbers
Manage your lead sources and their associated call-tracking numbers from one centralized screen.
Tracking where your leads are coming from is a crucial part of any intake strategy—whether your firm has a few marketing sources or hundreds. CosmoLex CRM makes it easy to manage your lead sources and associated call tracking numbers in a centralized, intuitive way.
⚠ Note: Only users with Admin Rights can make the changes described in this article.
How to Access Marketing Sources
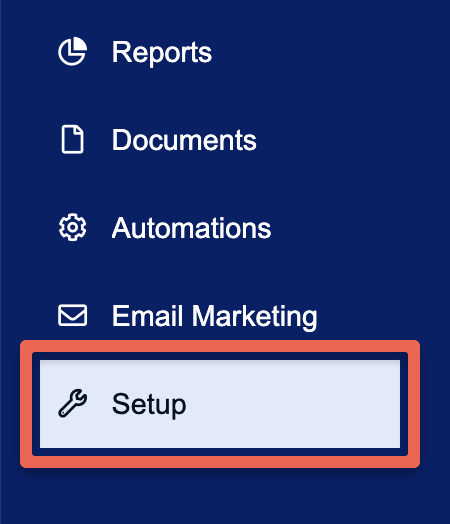
From the main navigation menu on the left-hand side, go to Setup.
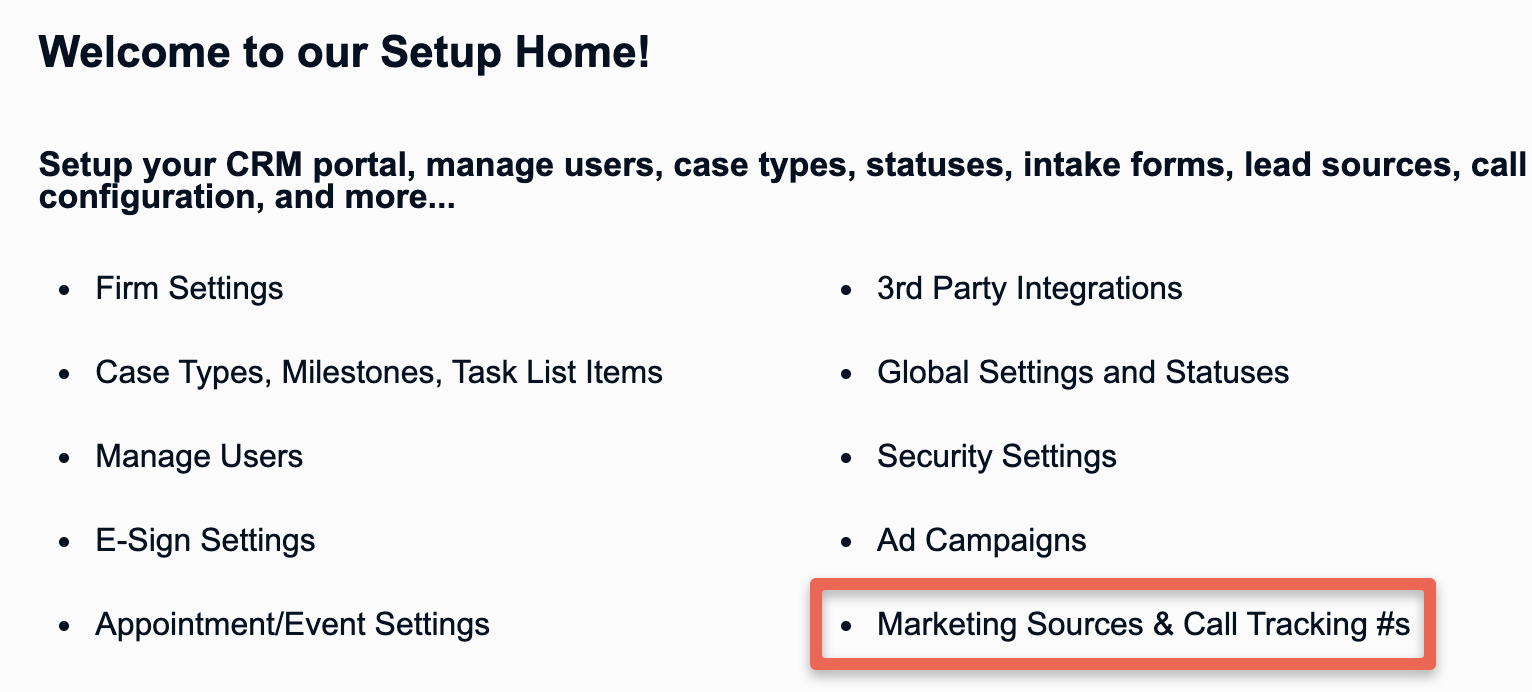
Next, select Marketing Sources & Call Tracking #s.
Adding a New Source
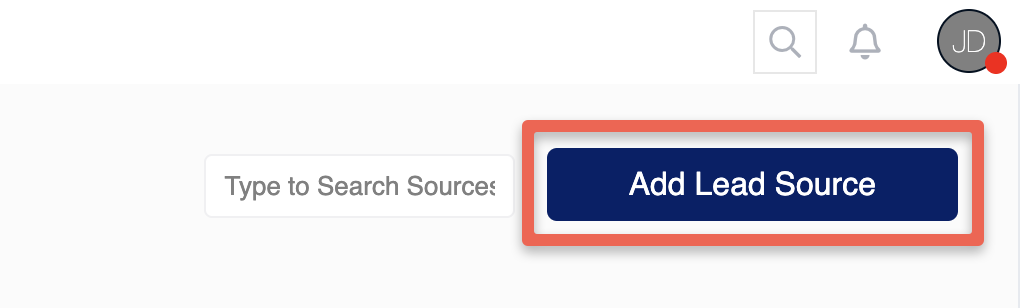
Click the Add Lead Source button in the top-right corner of the page
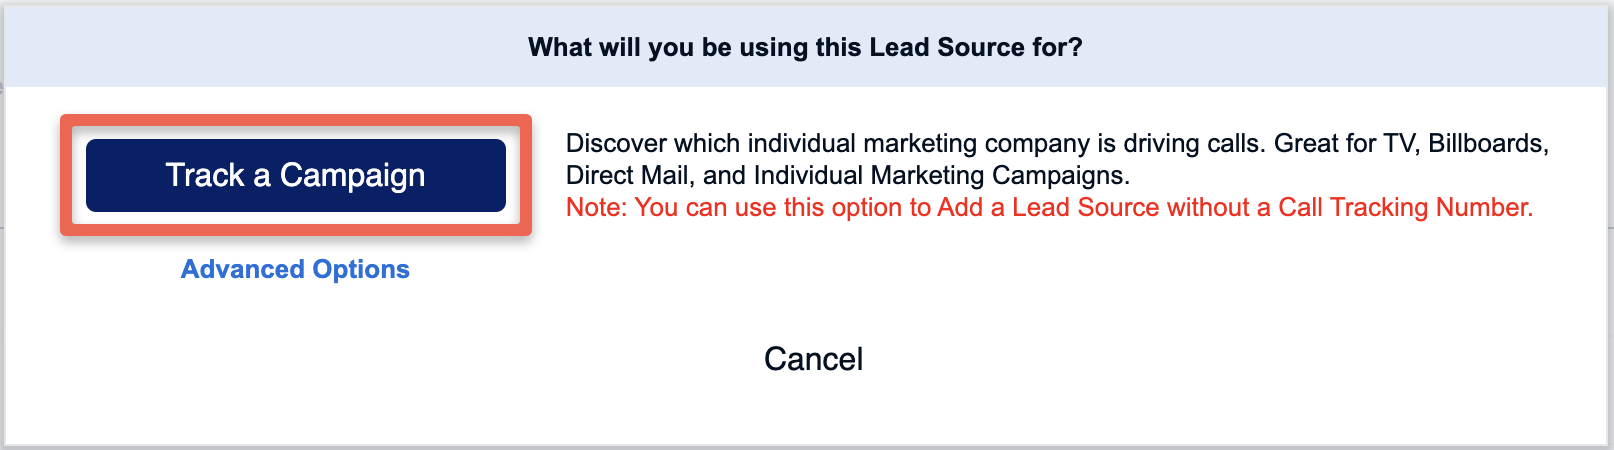
In the pop-up, click Track a Campaign.
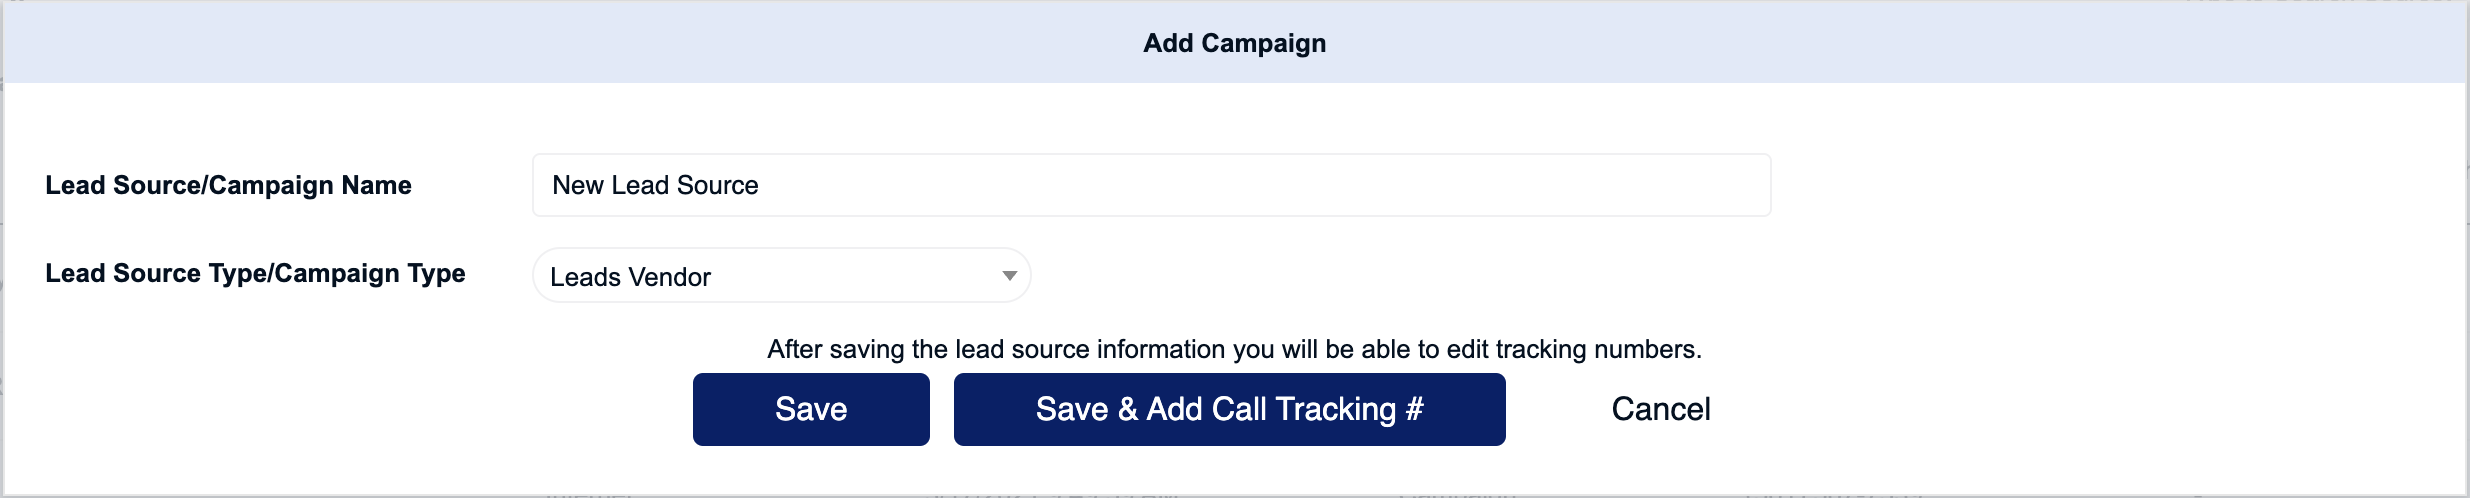
In the next window:
- Enter a name for the Marketing Source.
- Select a Source Type.
- Click either:
- Save – to create the source without adding a phone number, or
- Save & Add Call Tracking # – to purchase a call tracking number for the new source.
Purchasing and Setting Up Tracking Numbers
For a New Source:
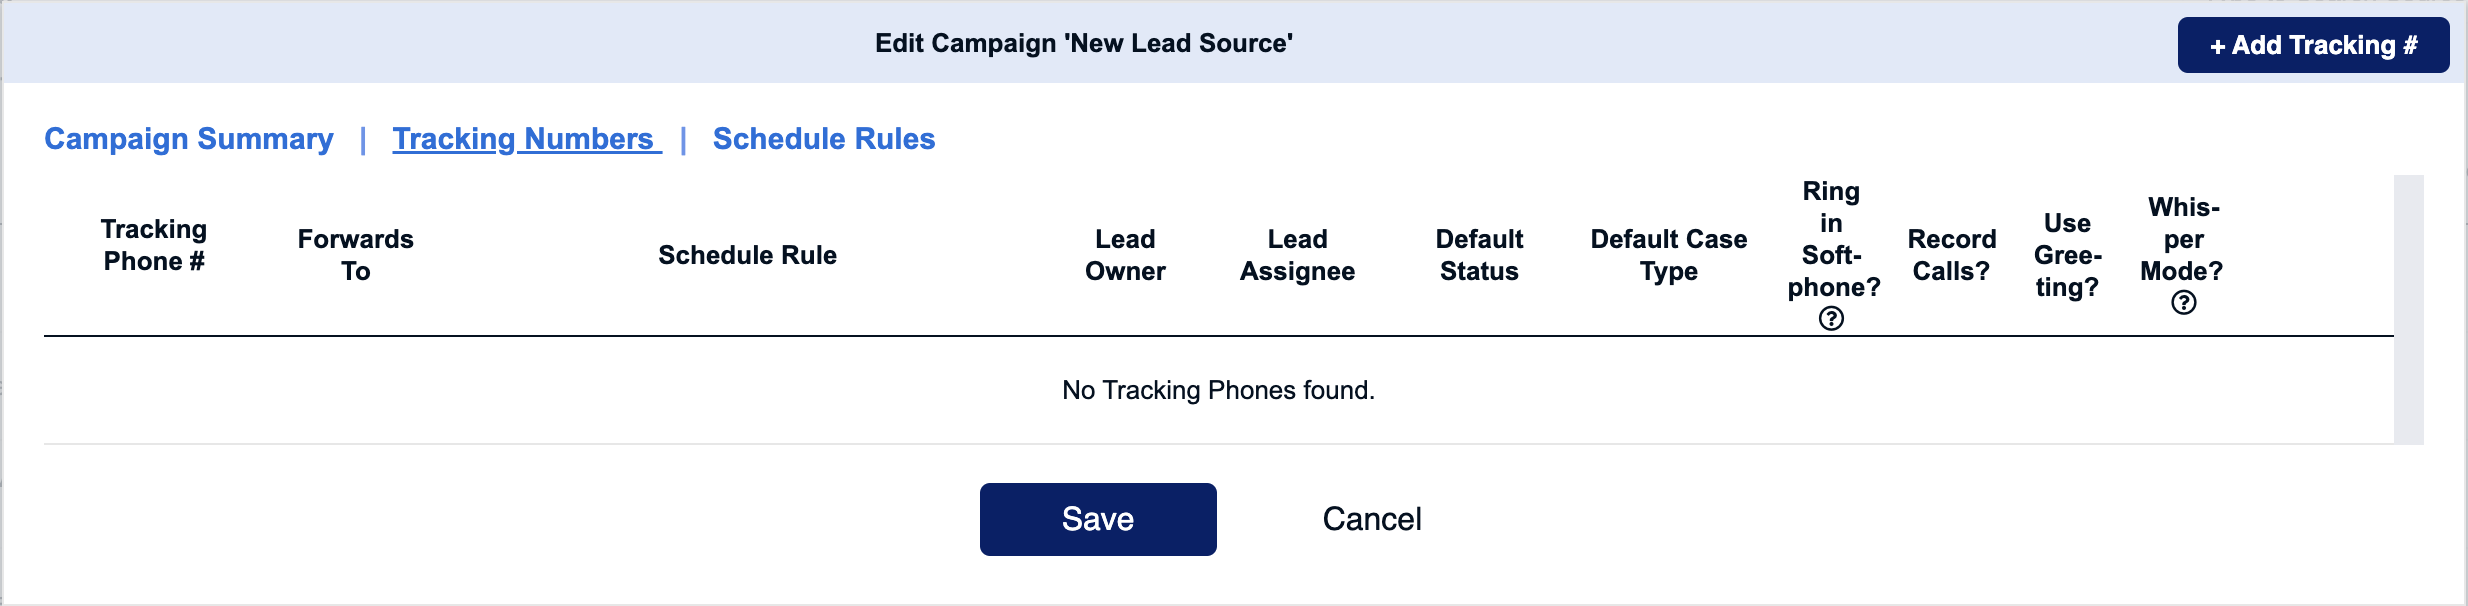
If you selected Save & Add Call Tracking #, you’ll be taken directly to the Tracking Numbers tab for the new source.
For an Existing Source:
Find the Marketing Source in the list, and click the pencil icon to the very right. Then, go to the Tracking Numbers tab in the Edit Campaign pop-up.
To Purchase a Tracking Number:
Click the + Add Tracking # button in the upper-right corner.
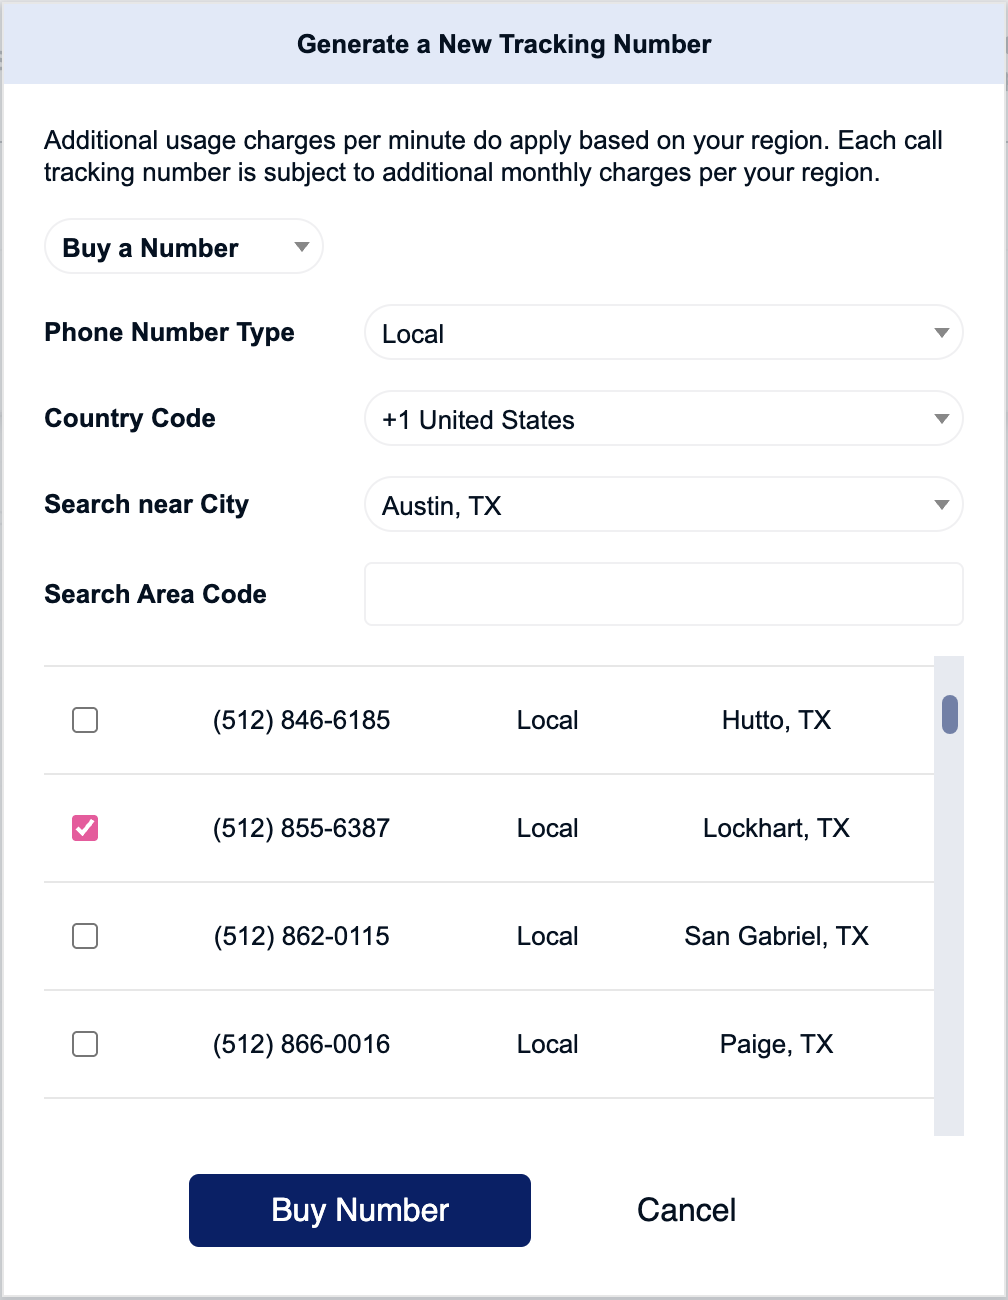
Next, in the Generate a New Tracking Number pop-up, select whether you want a local or toll-free number.
- For local numbers, search by area code.
- For toll-free numbers, search using toll-free prefixes (note: availability may vary).
Whether you choose local or toll-free, once you find a number you like, click the checkbox next to the phone number to select it. Then, click the Buy Number(s) button to purchase.
Configuring a New Tracking Number
After purchasing a number, a configuration pop-up window will appear:
- Forwards To: Use this field to enter a number where incoming calls should be forwarded.
- You can also set default values for:
- Owner
- Assignee
- Status
- Case Type
Enabling Call Tracking Numbers to Ring in the Dialer
If your firm is utilizing the CRM's built-in softphone dialer, you will need to enable the Allow calls to ring in softphone setting so that calls placed to this tracking number will ring in the dialer to available agents. This setting can be found when editing a tracking number. Please refer to the previous screenshot above.
Keeping Inbound Calls in the Dialer Queue
By default, if no forwarding number is set on a dialer-enabled call tracking number, the system will keep the caller in the queue indefinitely until an agent becomes available or the caller hangs up.
⚠ The CRM softphone dialer does not offer a voicemail feature at this time.
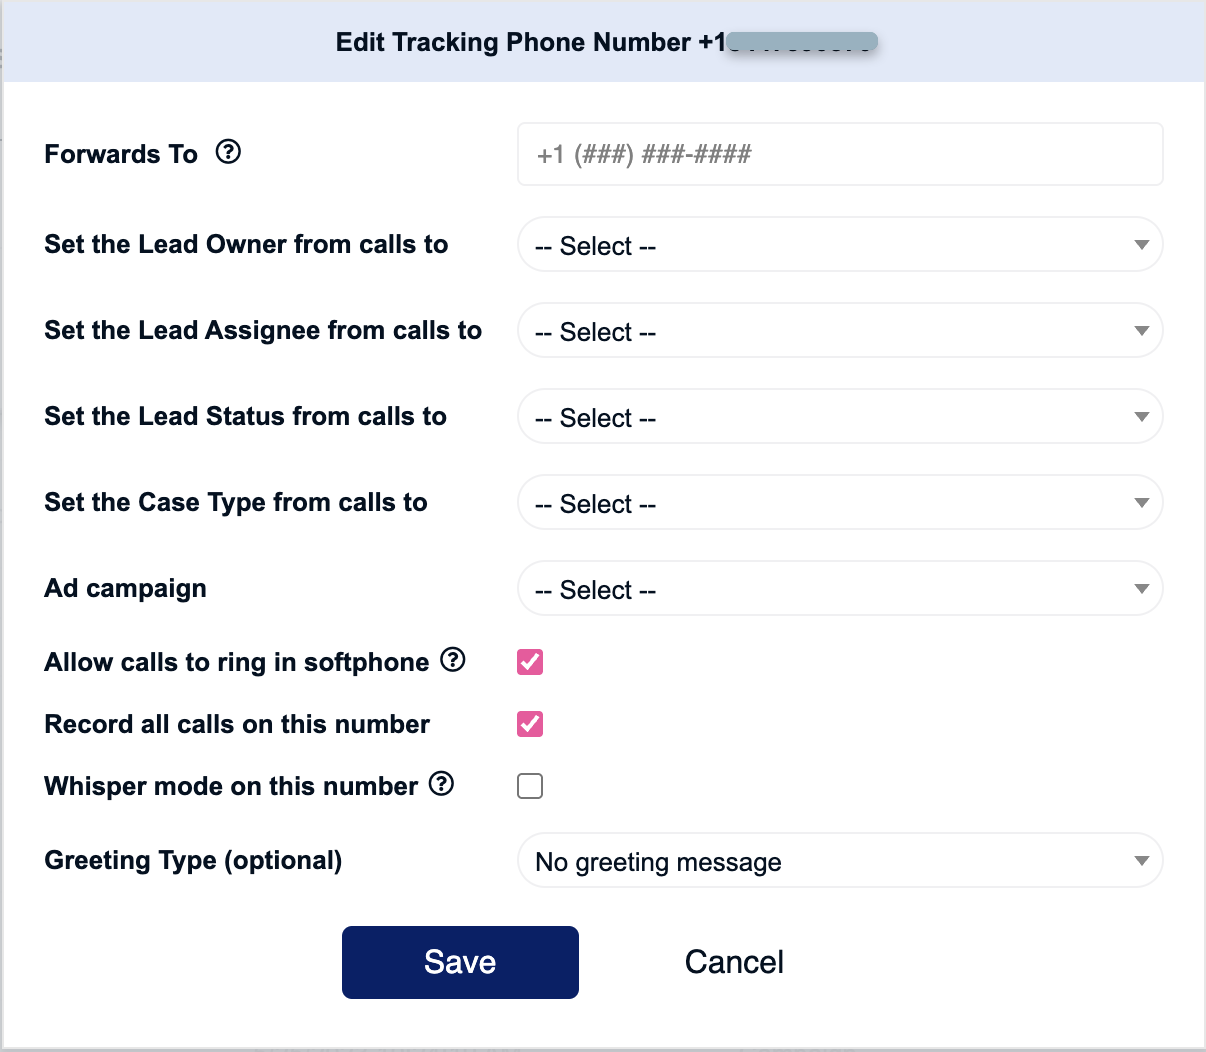
Be sure to click Save when you’re done setting up the number!
Editing/Deactivating Marketing Sources
Editing a Source
Click the pencil icon next to the Marketing Source to make changes.

Deactivating a Source
Click the trash bin icon.

You’ll be given two options:
- Yes, Only Deactivate – Disables the source but keeps its tracking numbers active.
- Yes, Deactivate & Delete – Disables the source and permanently deletes any associated tracking numbers.
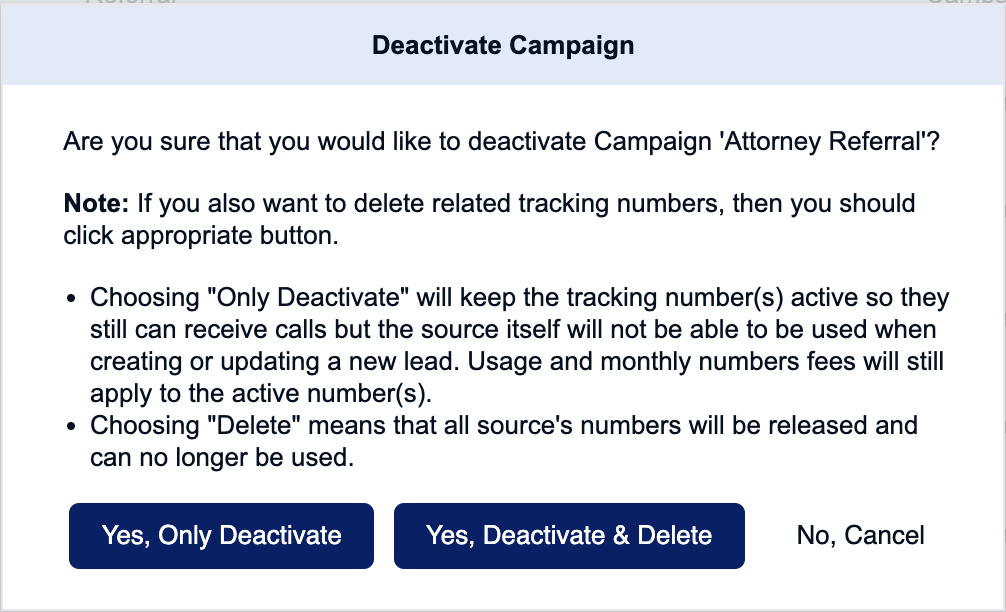
Need to reactivate a source?
To reactivate an inactive Marketing Source, first, turn on the Show Deactivated Sources toggle at the top of the page to show the deactivated sources. Next, click the circular refresh icon to reactivate any desired source.

Moving/Deleting Tracking Numbers
While editing a Marketing Source, you can choose to move specific tracking numbers to another source or delete a tracking number entirely.
Moving Tracking Numbers
You can move a specific tracking number to another Source by clicking the double arrow icon.
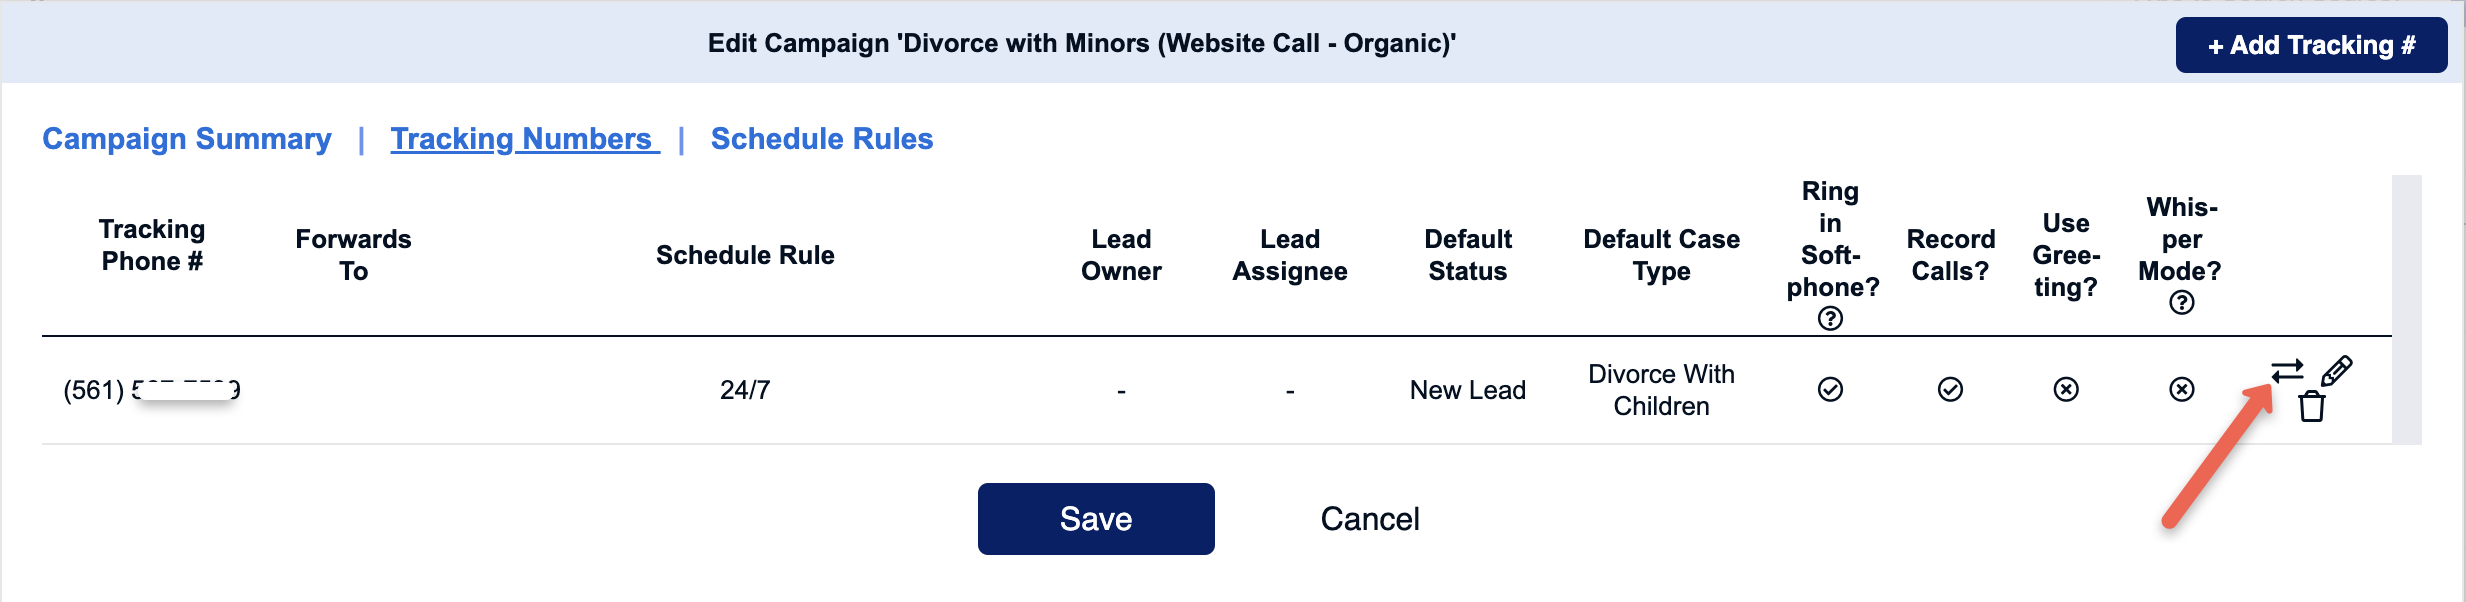
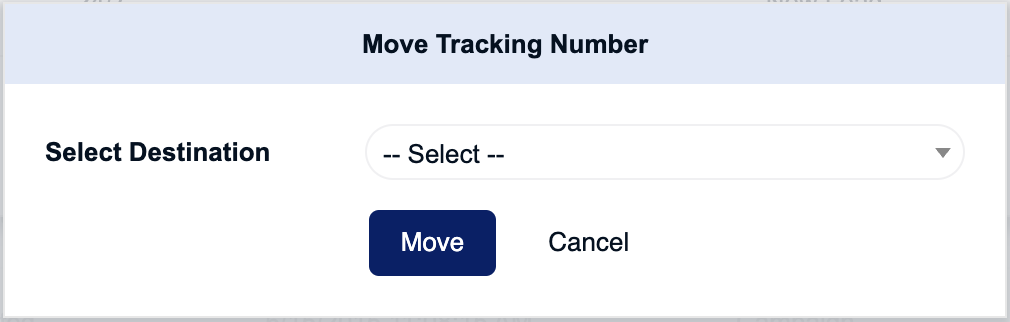
A pop-up will appear for you to select a destination Source to move the tracking number to. Be sure to click the Move button to complete the change.
Deleting Tracking Numbers
To delete a specific tracking number from a Marketing Source, click the trash bin icon.
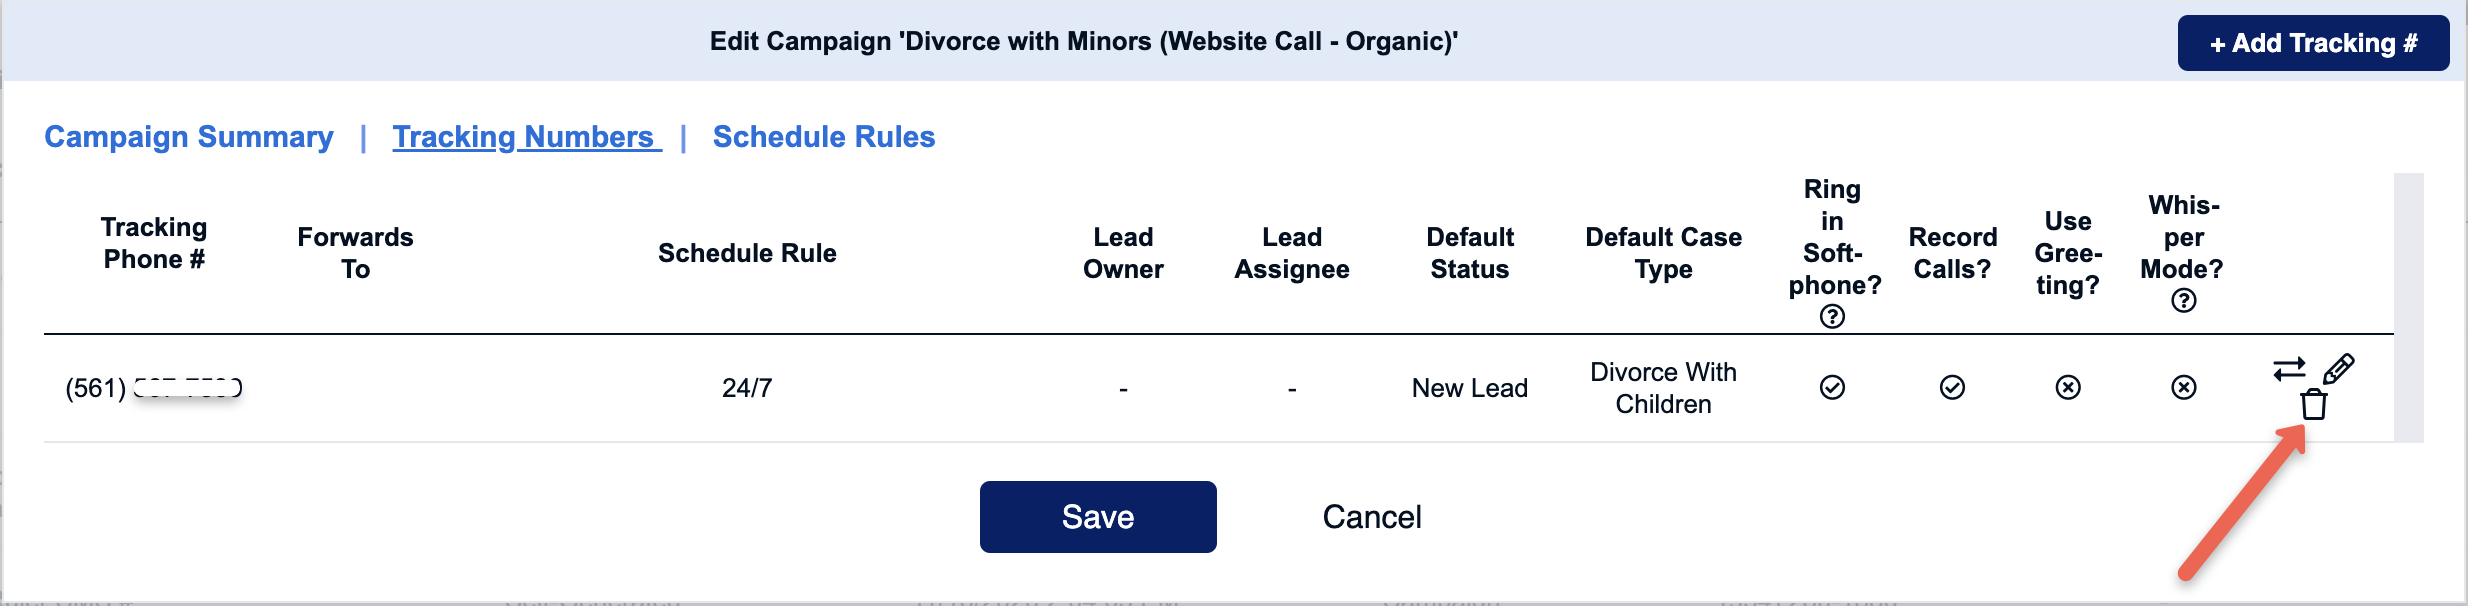
⚠ Be careful, once you delete a tracking number, it'll be immediately released from your account and will be available for purchase by another party.
Configuring Schedule Rules for Tracking Numbers
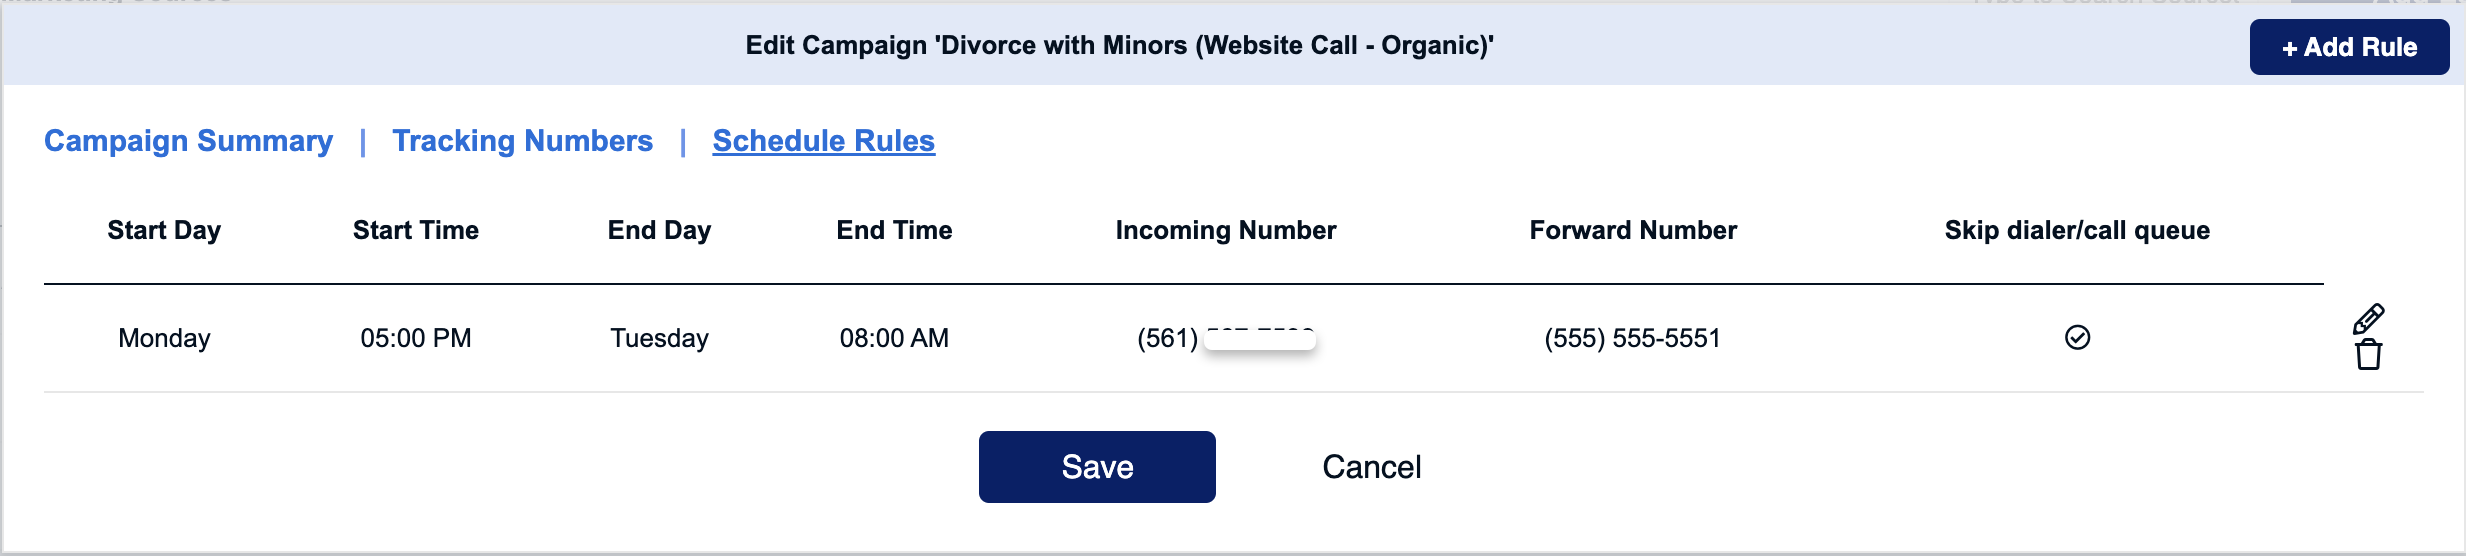
Need to have calls routed to different numbers depending on the day or time? The CRM offers custom schedule rules that can be configured for any of your tracking numbers.
To get started, navigate to the Schedule Rules tab of the specific Marketing Source you are editing. Next, click the + Add Rule button:
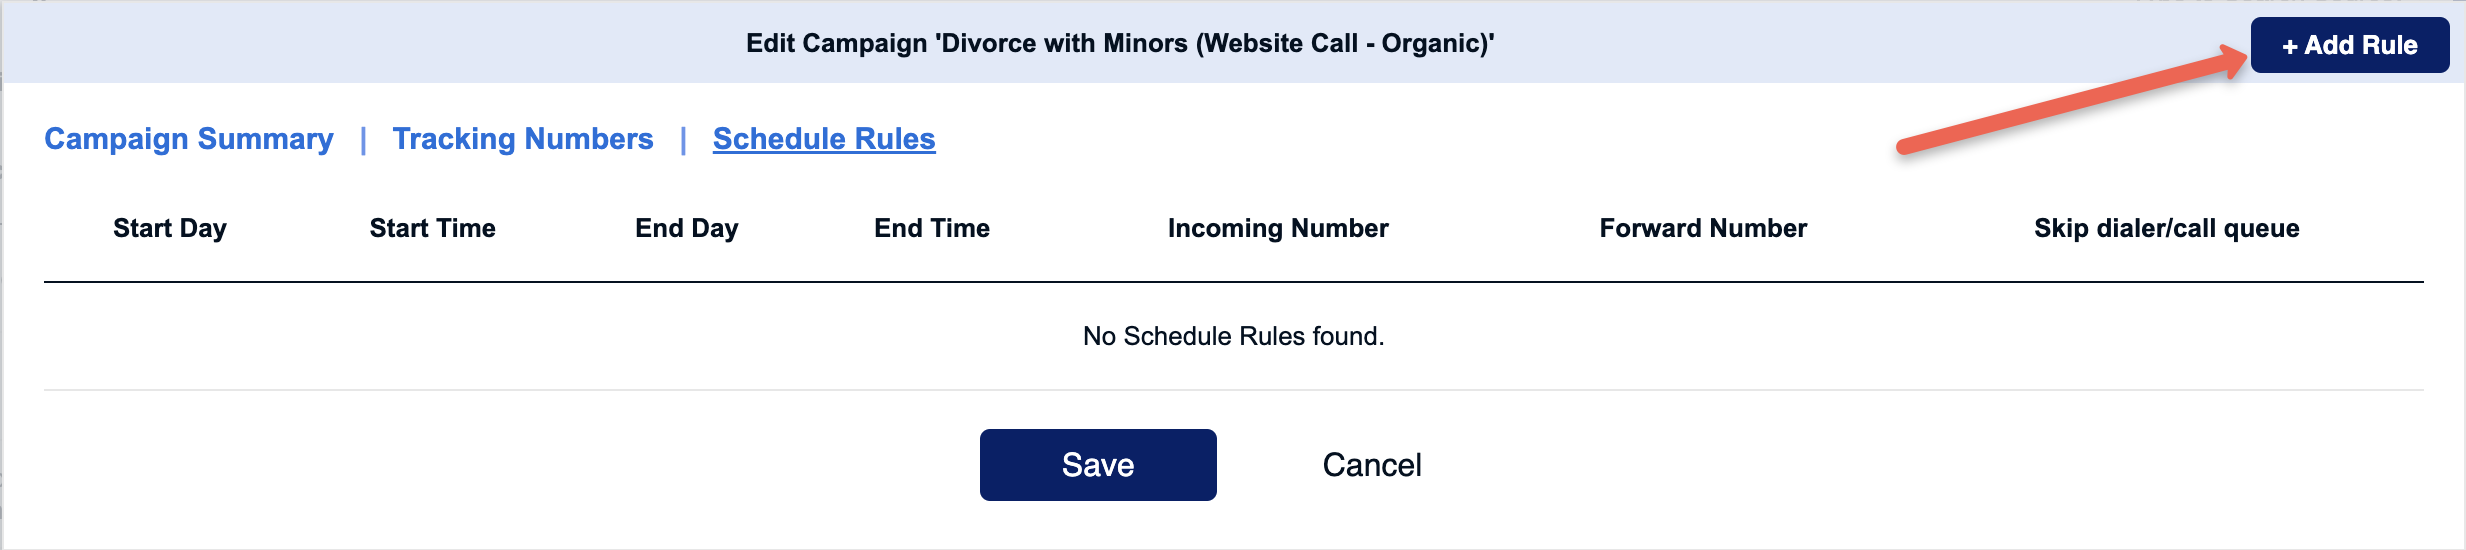
In the pop-up that appears, you'll configure your rule by setting items such as the start day, start time, which tracking number the rule applies to, and more.
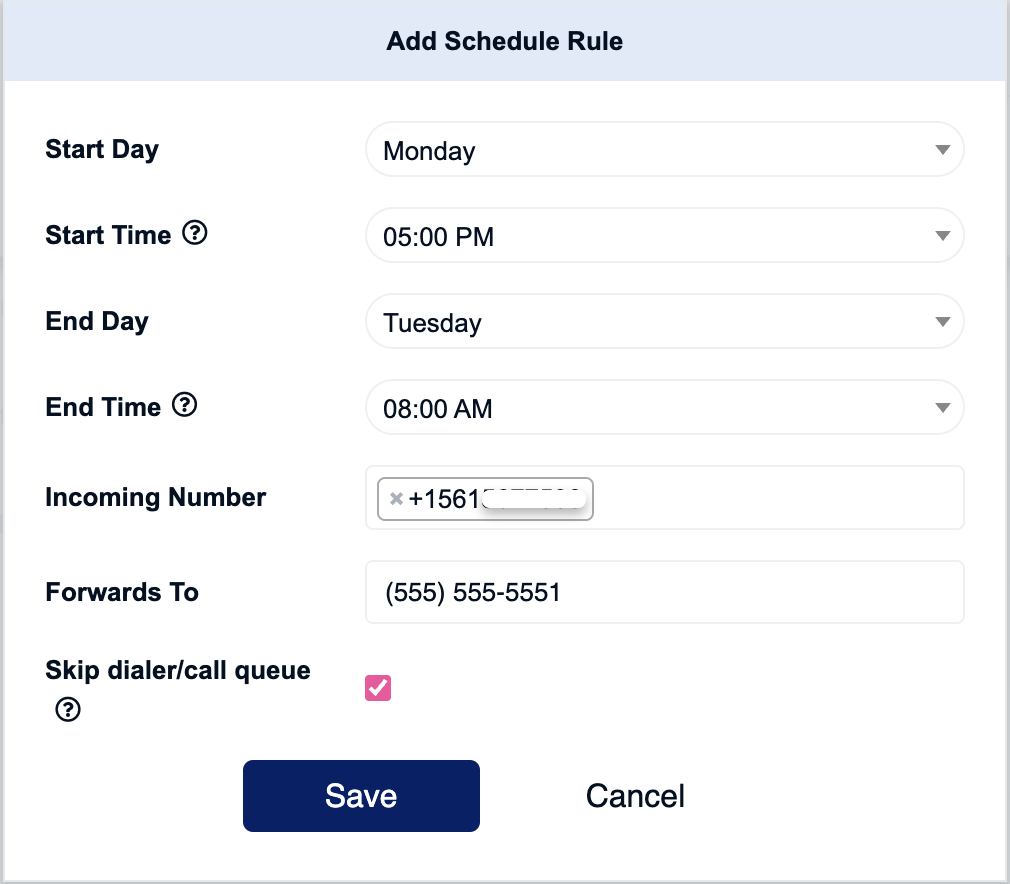
Remember to click the Save button to save your changes.
Once you have added your rules, you can always go to the Schedule Rules tab to add, edit, or delete rules.