How to Use the Inbox
Browse, filter, and bulk-update all your leads and cases from the CosmoLex CRM Inbox.
CosmoLex CRM’s Inbox offers powerful features to always keep your firm on top of everything that is happening in the portal. The Inbox is where you will find all leads and cases in CosmoLex CRM. Whether it is keeping track of your customers during the workday, or updating records in bulk using the Action Menu, we have you covered!
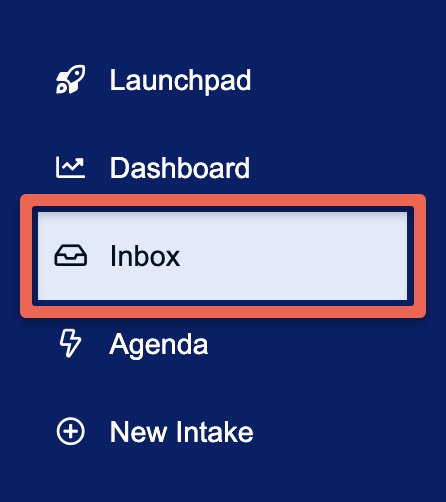
To access the Inbox, use the main navigation menu on the left-hand side of the screen and go to Inbox.
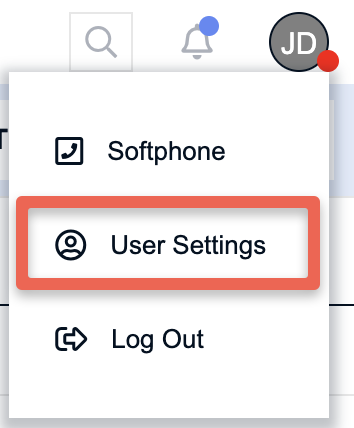
Important: To have the Inbox always be the first screen you see upon logging in, you might need to edit your account settings. To do this, click on your user initials bubble located in the upper-right corner of CosmoLex CRM, and then click on User Settings.
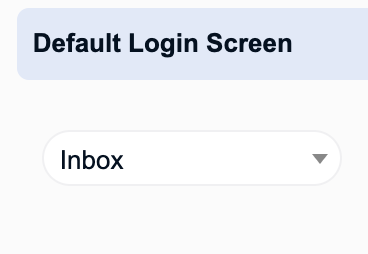
Next, make sure that the Default Login Screen setting is set to Inbox.
Accessing Customer Records
Let's start by going over the list of customer records in your portal. You can access all records through the Inbox. To open a customer record, just hover your mouse over it to highlight it, and then click on the name or anywhere on the row. This will open the record on a new screen.

Using the Inbox Action Menu
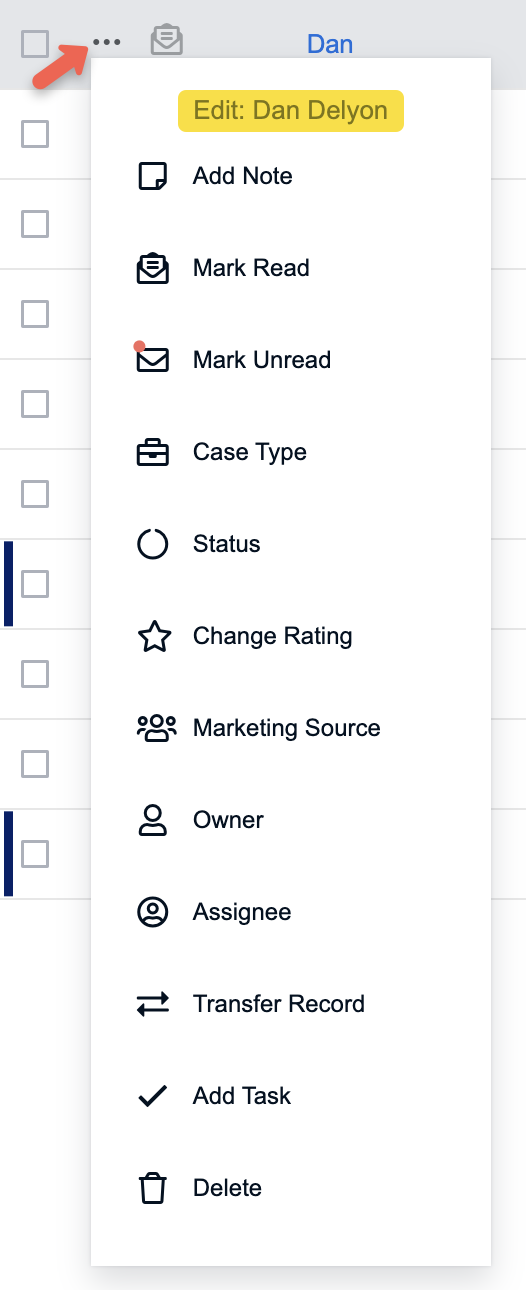
The Inbox Action Menu is a newer feature of the Inbox that provides a lot of convenience! You will notice a column of checkboxes along the left margin of the Inbox screen, as well as 3 dots to the right of each checkbox. If you only need to edit one record, you can click on the 3 dots to access the Action Menu. The Action Menu will display the name of the customer you have selected to edit.
If you need to edit multiple records at the same time, such as adding the same note to multiple records, select each record you wish to update using the checkboxes. Then, click the 3 dots next to any selected record to open the Action Menu and perform an action on all selected records. The Action Menu will show you a preview of how many records you are editing.
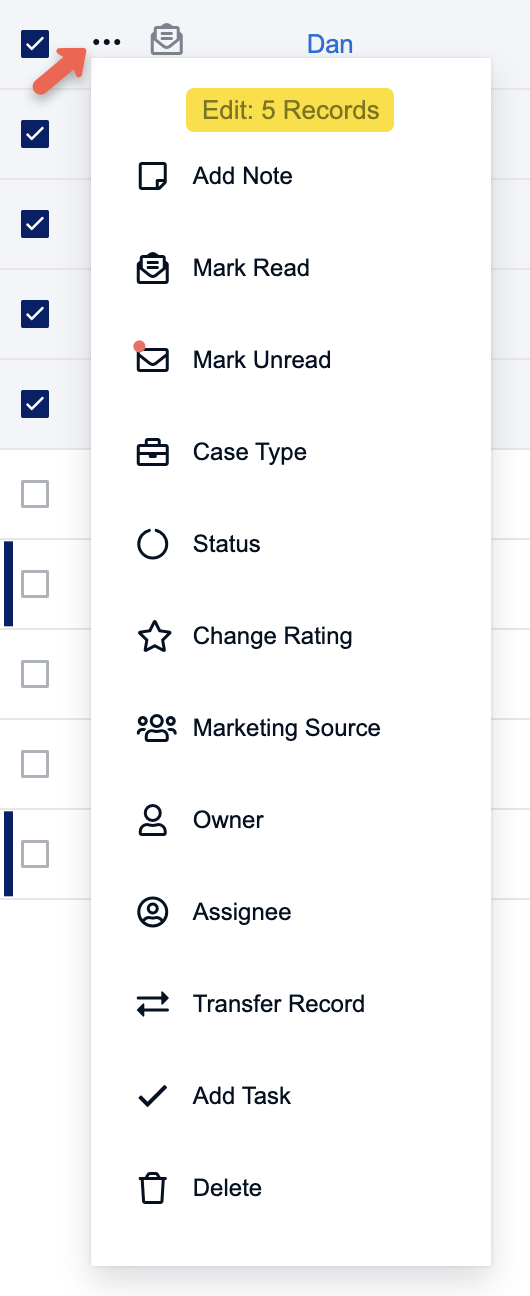
The Action Menu allows you to perform various actions on 1 or more records at a time:
- Add Note – add a note to all selected records - this also allows upload of docs to a note
- Mark Read – mark all selected records as Read in the Inbox
- Mark Unread – mark all selected records as Unread in the Inbox
- Case Type – modify the current case type for all selected records
- Status – modify the status for all selected records
- Change Rating – modify the rating for all selected records
- Marketing Source – modify the current marketing source for all selected records
- Owner – modify the owner for all selected records
- Assignee – modify the assignee for all selected records
- Transfer Record – transfer the selected records to another user
- Add Task – create a new task for all selected records
- Delete – delete all selected records
If you need to clear your selection of records, use the Clear selection button located to the left of the search bar, as shown below.

Exporting Your Inbox, Changing Layout and Sort Order, and Applying Filters
Using the options located in the upper-right corner of the Inbox, you can choose to:
- Export your Inbox
- Change your layout
- Choose a default sort order
- Apply filters

Exporting
To export all records in your Inbox view, click the export icon.
Layouts
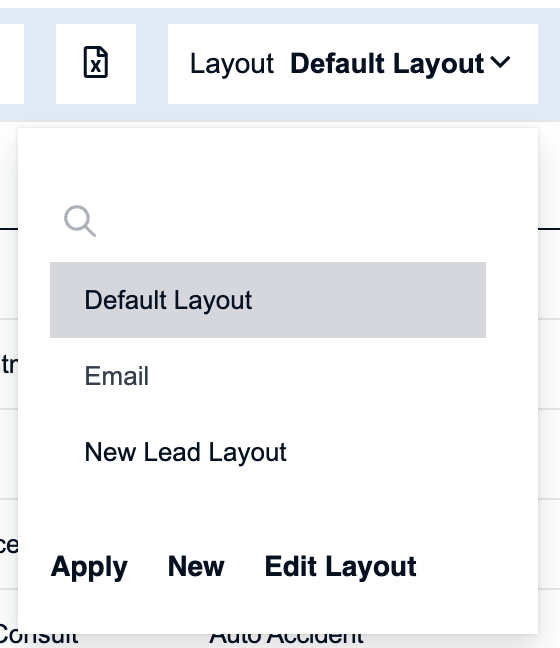
To change or edit the Layout of your Inbox, first, click the Layout dropdown.
Next, you can choose to apply an existing Layout by selecting an option from the Layout dropdown list. After making your selection, click Apply.You also have the option to edit the current Layout by selecting Edit Layout or create a new layout by selecting New.
To learn more about the CRM’s custom layouts, please see the Custom Report Builder article.
Sort Order
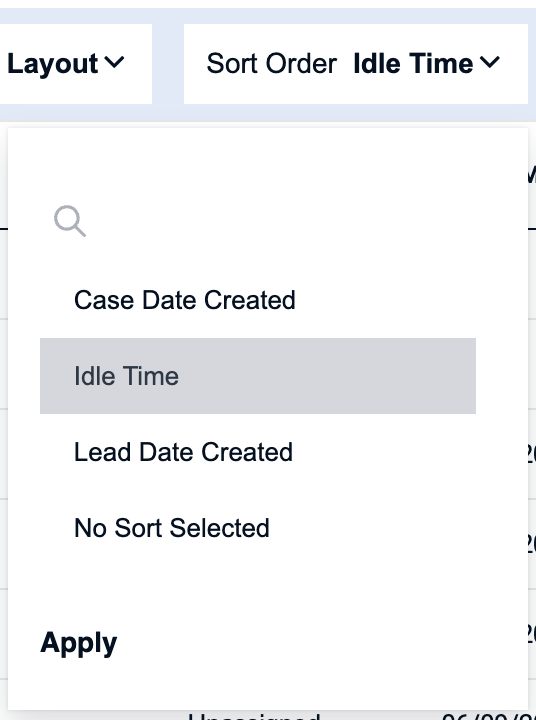
To change the default sort order of your Inbox, click the Sort Order dropdown. You can choose one of the following options as your sort order:
- Case Created Date - sorts the inbox based on the date the case record was created; it is recommended to only use this sort option if you are filtering your inbox by case records only.
- Idle Time - sorts the inbox based on the last time a record was updated
- Lead Created Date - sorts the inbox based on the date the lead record was created
- No Sort Selected - defaults inbox to Idle Time sort
Filters
Lastly, you can apply filters to your Inbox by using the Filters button located in the upper-right corner of this section:
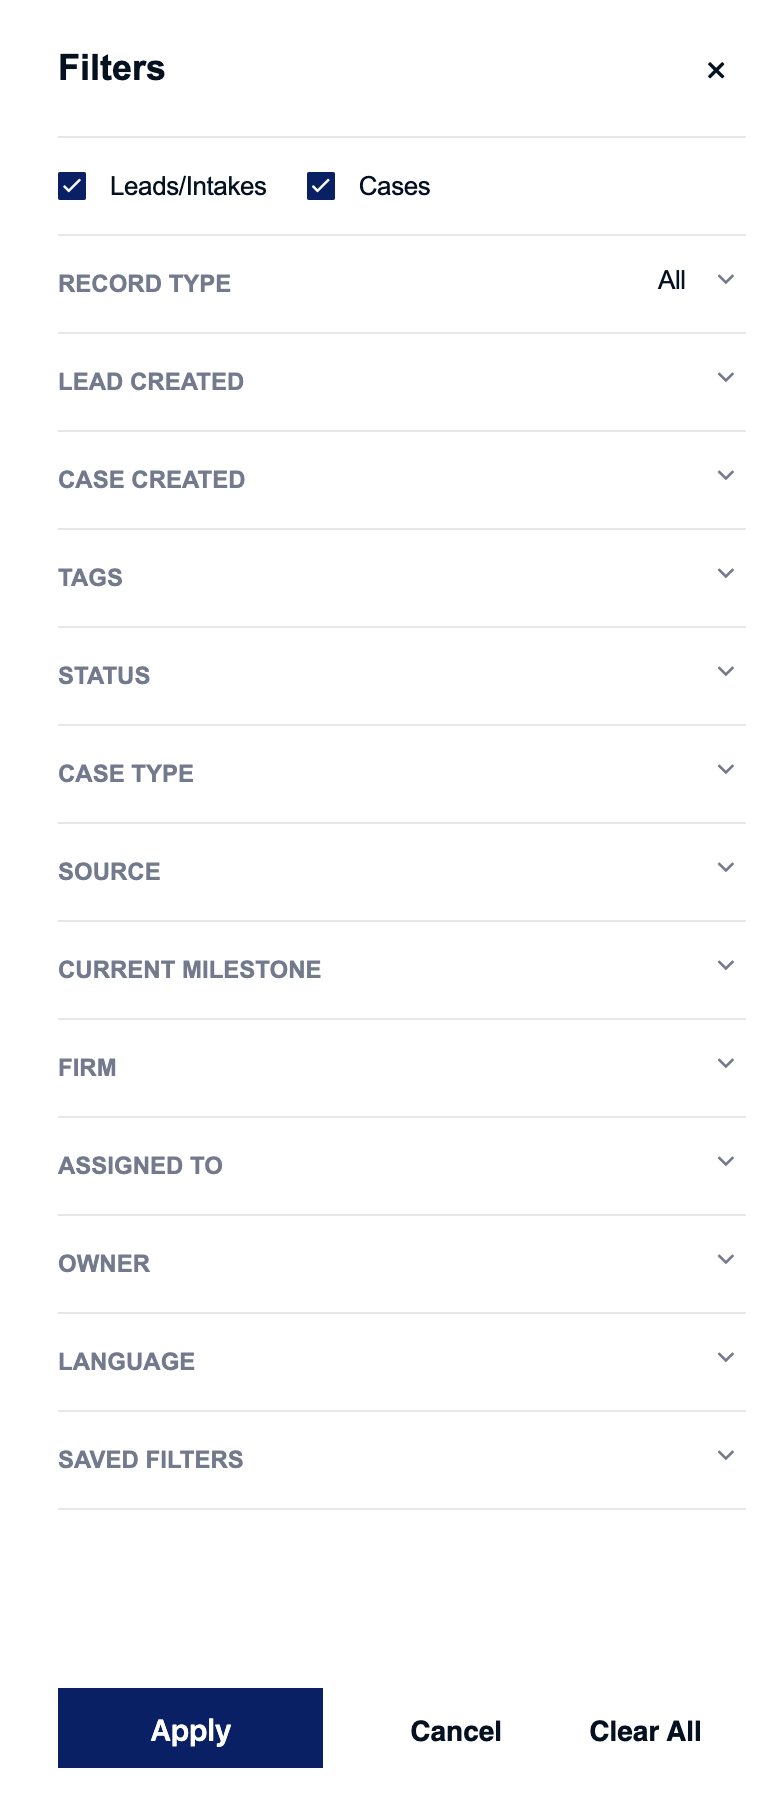
The following filter types are available to you:
- Leads/Intakes - displays all active lead/intake records
- Record Type - displays records based on dashboard categories (i.e. Open, Clients, etc.); to learn more about CosmoLex CRMs dashboard categories, click here
- Lead Created - displays records that have a lead created date in a specific date range
- Case Created - displays records that have a case created date in a specific date range
- Tags - displays records that have specific tags
- Status - displays records that are currently in a specific status
- Case Type - displays records that have specific case types
- Source - displays records that have a specific source
- Current Milestone - displays records that are currently in a specific milestone
- Firm - displays records that have a specific referral firm added to their record
- Assigned To - display records that have a specific assignee
- Owner - display records that have a specific owner
- Language - display records that have a specific language set
If you find yourself repeatedly applying the same filters, we recommend creating Saved Filters. To do this, first, make your filter selections. Next, at the very bottom of the Filters pop-up menu, find the Saved Filters option where you will be able to give your selected filters a name and save it.
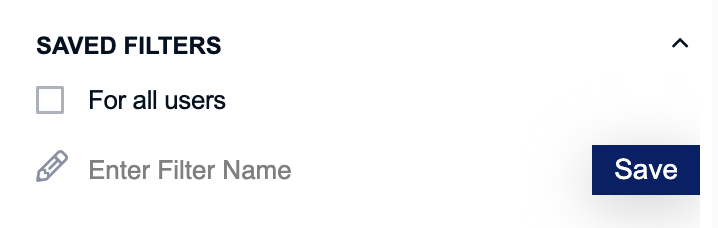
If you ever need to change your selected Saved Filter, click on the Filters button, select the Saved Filters option, and then select a new filter using the Selected Filter dropdown.
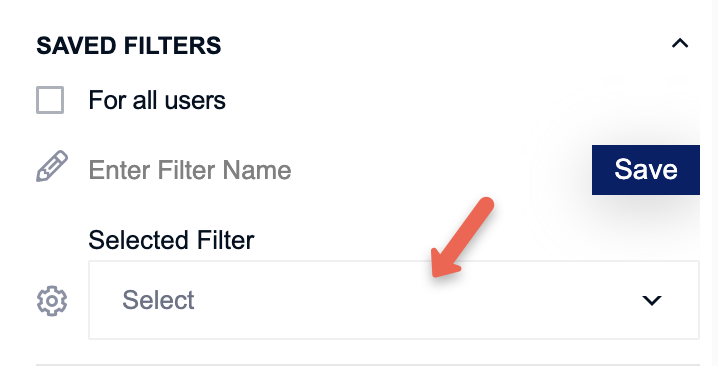
If you need to delete any previously saved filters, you can always click on the gear icon located to the left of the Selected Filter dropdown. This will redirect you to your User Settings page. There, you can scroll down to the Saved Filters section to view a current list of your filters as well as edit or delete them.

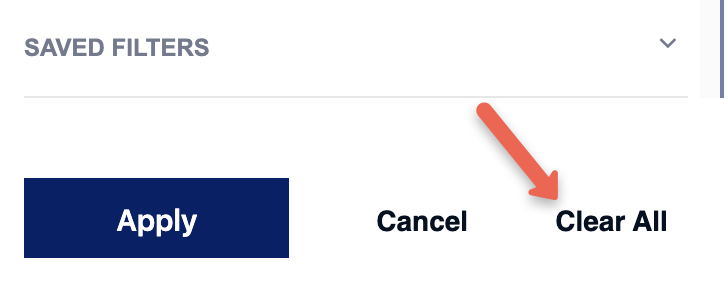
To clear your Saved Filter or individually selected filters, you can do this in one of 2 ways:
The first way is to click the Clear all option that appears below the Filters button.

The second way is by clicking the Filters button, and then clicking Clear All at the bottom of the pop-up.
Navigating Through Records in the Inbox
If you have a long list of records, use the page navigator at the bottom of your screen to navigate through the different pages of records.

Please note that you can also adjust how many records are displayed per page by using the Rows per page option at the bottom of the screen. You can view as little as 10 records per page or up to 100 records per page.
If you want to know how many records are displaying based on your filters, a preview of the total number of records returned can be seen in the bottom left corner of your screen.

Creating New Leads
If you are on the Inbox screen and need to quickly create a new lead manually, you can use the + button located in the top left to create a new intake.